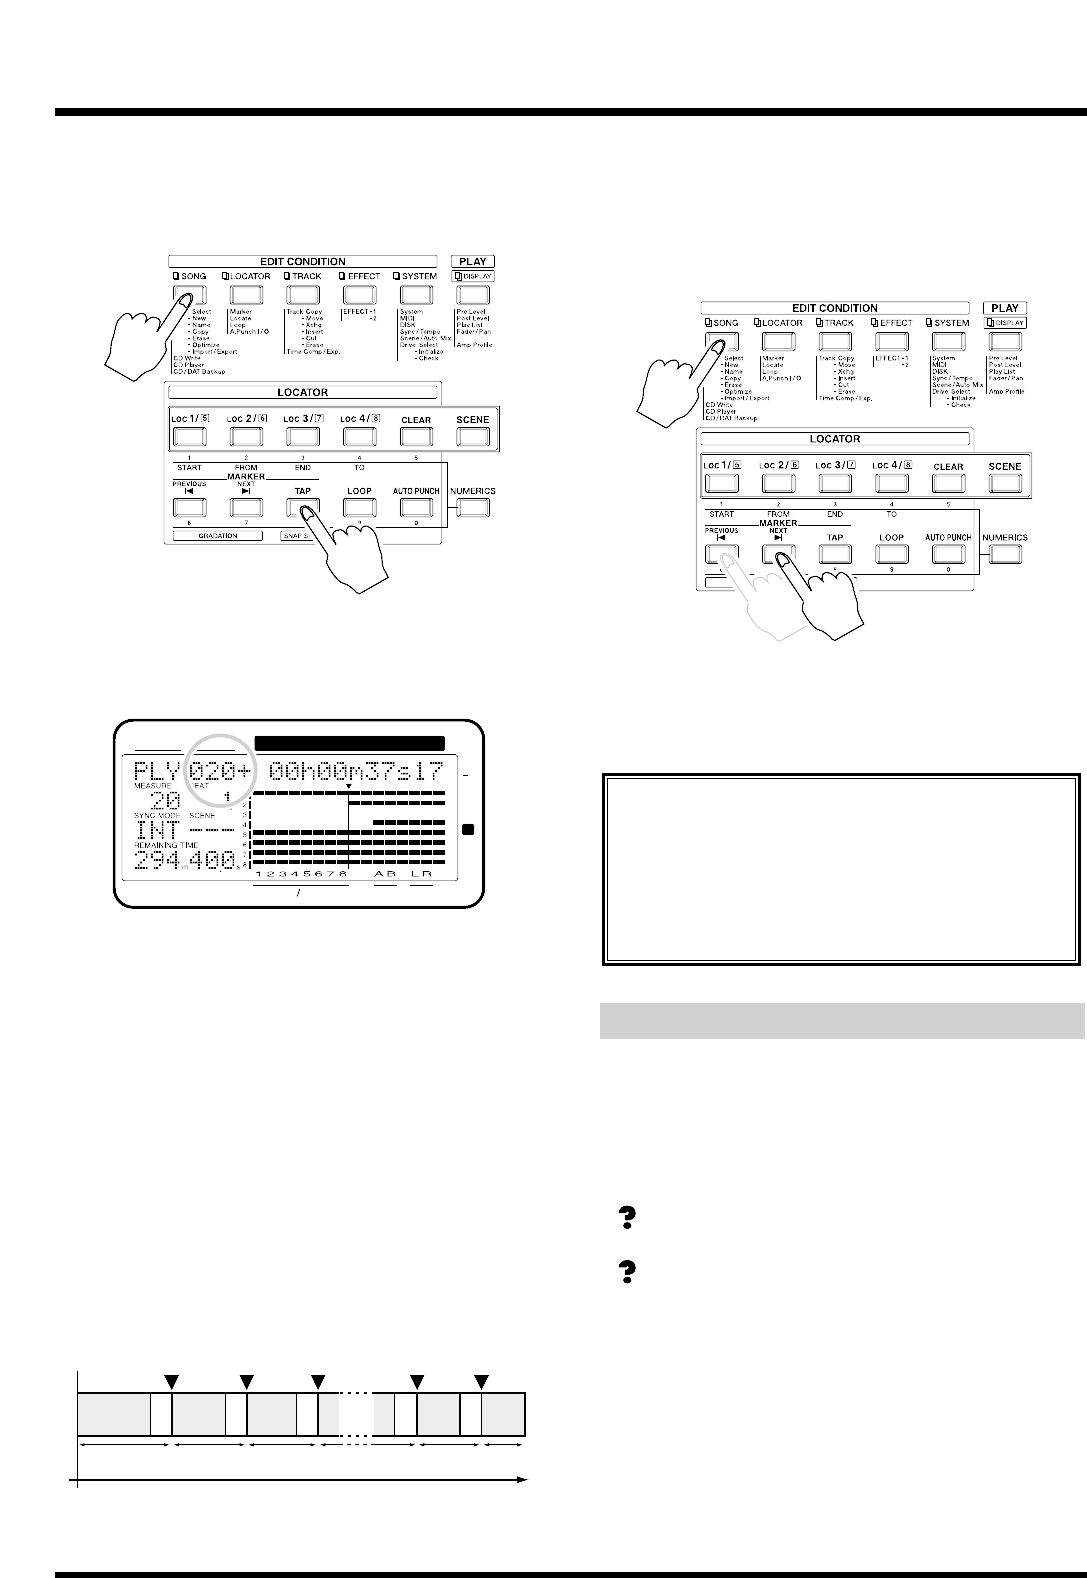
2. Hold down [SONG] and press [TAP].
Set a track number mark point at the present location
on the track.
A “+” (plus sign) appears at the end of the track num-
ber mark point.
* You cannot set markers for four seconds from the top of
songs (“00h00m00s00”).
* Due to audio CD standards, songs must be at least four
seconds long. Thus, if you try to set two markers as track
numbers within four seconds of each other, “Can’t Set
Marker” appears on the display, and the process cannot be
carried out. Reset the track number markers so there is an
interval greater than four seconds between them.
* Audio CD standards allow up to 99 songs to be stored on
one disc. Furthermore, even if no track number marker is
set at the beginning of the song, it is still used for the
beginning of the first song. Thus, you can set up to 98
markers as track numbers.
3. Pressing [PREVIOUS] while also pressing [SONG]
moves you to the previous track number marker.
Pressing [NEXT] while also pressing [SONG]
moves you to the next track number marker.
Please check the time at the track number.
4. Store the song to the CD-R disc by following pro-
cedure as described in “Writing Songs to CD-R
Discs” (p. 109).
Writing the Song Data (Finalize)
To make CD-R discs prepared with the VS-880EX
playable on ordinary CD players, write a TOC (Table
of Contents). This is referred to as Finalize. CD-R discs
that have undergone the finalize procedure can no
longer have additional material written to them.
Finalize (Appendices p. 123)
TOC (Appendices p. 125)
1. Press [SONG] until “SNG CD-R Write?” appears
in the display.
2. Press [YES].
“-Scanning CD-R -” appears in the display. The VS-
880EX is checking the SCSI ID of the connected CD-
RW drive, and displays the next ID number for a set
time. “SNG Write+Finalize?” appears in the display.
CONDITION MARKER#
MASTER
INPUT TRACK
AUX
TIME
48
24
4
0
dB
12
M1 M2 M3 M97 M98
Song 1 Song 2 Song 3
Song 98 Song 99
00h00m00s00
Time
To Delete Track Number Markers
Delete markers used as track numbers the same
way you would regular markers (p. 39).
1. Move to the marker you want to delete.
2. Hold down [CLEAR] and press [TAP].
Chapter 8 Use with a CD-RW Drive
112


