


Recording the Mixer Settings, Method 2
(Gradation)
This creates an auto mix that smoothly connects
Snapshots recorded in two adjacent markers. This
method is called Gradation.
For example, this is convenient when you wish to
specify the length of a fade-in or fade-out.
1. Follow the operation as described in “Recording
the Mixer Settings, Method 1,” record a Snapshot
with the time locations at which you want
Gradation to begin and end.
2. Confirm that Auto Mix mode is on.
3. Select the channels which you want to record
using Auto Mix. While pressing [AUTOMIX], so
that the button indicators to blink, press the each
channel SELECT button or [EZ ROUTING]
(Master Block).
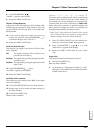
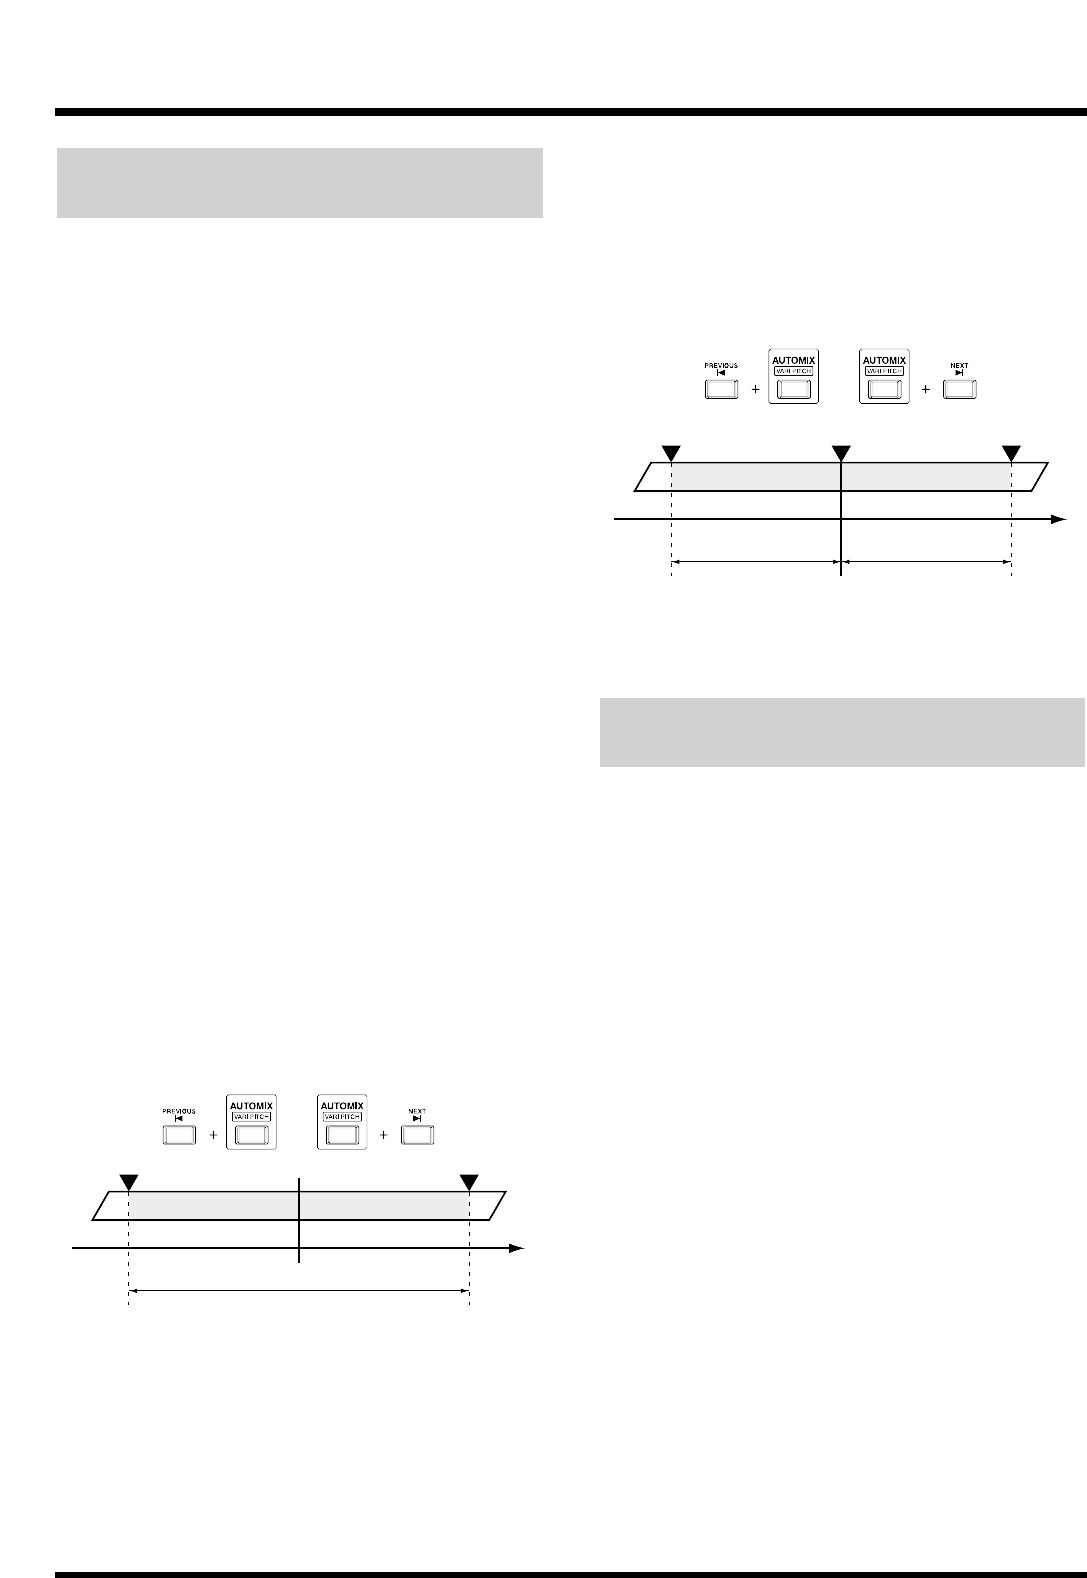
4. Hold down [AUTOMIX] and press [PREVIOUS]
or [NEXT].
5. A confirmation message appears on the screen.
Press [YES].
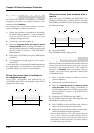
A new mark point is automatically added between the
two mark points, and Gradation is executed. Press
[CANCEL (NO)] if you wish to cancel Gradation.
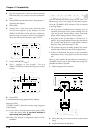
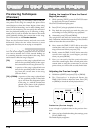
When the current time is included in
an adjacent marker
Press either [AUTOMIX] and [PREVIOUS] or
[AUTOMIX] and [NEXT], the gradation range will be
specified in a same range.
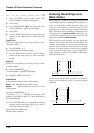
When the current time matches with a
marker
When you press [AUTOMIX] and [PREVIOUS], the
gradation includes the preceding marker; pressing
[AUTOMIX] and [NEXT] creates a gradation including
the following marker.
6. Press [AUTOMIX].
The AUTOMIX indicator light goes off.
Recording Fader Operations
(Realtime)
With this method, time-based both channel fader and
master fader movement during play back song are
recorded to the marker directly. This method is
referred to as Realtime. This is convenient when, for
example, you want to freely adjust the volume levels
of individual tracks.
1. Move to the time location at which you wish to
record in Realtime.
2. Confirm that Auto Mix mode is on.
3. Select the channels which you want to record
using Auto Mix. While pressing [AUTOMIX], so
that the button indicators to blink, press the each
channel SELECT button or [EZ ROUTING]
(Master Block).
4. Hold down [AUTOMIX] and press [REC].
The AUTOMIX indicator blinks, indicating that Auto
Mix Realtime recording is ready.
5. Press [FADER] to select the faders that will be in
effect with the input mixer or track mixer.
6. Adjust the top panel channel faders, master fader,
and PAN knobs to the desired positions.
* When the Fader Match (p. 164) in the System parameters
is set to “Null,” and the current fader positions of do not
match the actual volume levels, if you don’t first move the
channel faders to their actual values, you will be unable to
record the data using Auto Mix.
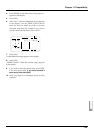
Current TimeMarker 1 Marker 2
Gradation Range
Time
Current Time
Marker 2Marker 1 Marker 3
Gradation Range Gradation Range
Time
Chapter 12 Other Convenient Functions
144