


113
Saving/Loading a Song (Save/Load)
Songs you record are initially held in Temporary Area. A song in
Temporary Area will be lost when you turn off the power or when
you load a different song. If you want to keep the song, you must
save it to user memory or a memory card.
Conversely in order to edit a song (p. 94, p. 108), you must first load
it into Temporary Area.
1.
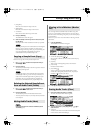
Hold down [SHIFT] and press EDIT [WRITE].
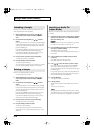
The SAVE/LOAD MENU screen appears.
* When the MIDI TRACK screen, AUDIO TRACK screen, or AUDIO
MIXER screen is displayed, you can access the SAVE/LOAD MENU
screen simply by pressing EDIT [WRITE].
2.
Press [F1 (1)]–[F3 (3)] to select the format in which you want
to save the song.
•
1. Save Song+Smpls:
The temporary song will be saved as a song file (SVQ file, SVA
file). All samples in sample memory will also be saved. The
saved song includes the data of the temporary area.
•
2. Save Song:
The temporary song will be saved as a song file (SVQ file, SVA
file). The saved song includes the data of the temporary area.
•
3. Save all Samples:
All samples in sample memory will be saved.
✔
: Saving is possible
The performances, patches, and system setup you are using at that
time are saved together with the song recorder data.
The performances and patches saved along with the song are special
data used to reproduce the song; they are separate from the user
performances and user patches.
* If you want to use these performances or patches in a different song, or
without reference to a song, you’ll need to save them in the user area.
* Mastering Effect settings are not included in the data saved with a
song. In order to completely reproduce the way in which the song
played back at the time it was saved, you will also need to check the
mastering settings.
Parameters included in System Setup
• Sound generator mode (Patch/Performance) and Patch/
Performance numbers
• MFX 1–3/Chorus/Reverb switch
• Transpose and Octave Shift values
• The selection of the function controlled by D Beam
• All settings in the Arpeggio screen and the Arpeggio on/off
setting
• All settings in the Rhythm Group screen and the Rhythm
Pattern on/off setting
• All settings in the Chord Memory screen and the Chord
Memory on/off setting
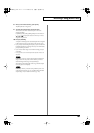
Here’s how to save the Temporary Song along with all samples in
sample memory and the current sound generator settings.
1.
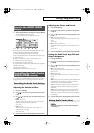
From the SAVE/LOAD MENU screen, press [F1 (1)].
The SONG FILE NAME screen appears.
2.
Assign a file name to the song (up to 8 characters). A file
name extension of “.SVQ” will automatically be added to
the song.
For details on assigning names, refer to p. 24.
Song file names may not contain lowercase characters or certain
symbols (space, “ * + , . / : ; < = > ? [ \ ] |).
3.
After you have assigned a name, press [F6 (WRITE)].
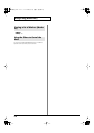
The SAVE SONG screen appears.
4.
Press [F1 (USER)] (User memory) or [F2 (CARD)] (Memory
card) to select the location where you want to save the
song.
5.
Press [F6 (SAVE)].
A message will ask you for confirmation.
6.
Press [F6 (EXEC)] to execute.
* To cancel, press [F5 (CANCEL)].
A song file having the same name, but with an extension of
“.SVA” will also be saved at the same time.
When samples are saved, they will automatically be overwritten onto
the same numbers of the same bank in the sample list. The samples will
be saved with a file name of “smpl****.wav (aif)” in the “ROLAND/
SMPL” folder of user memory or memory card. The number of the file
name will correspond to the number in the sample list.
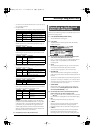
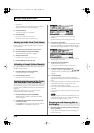
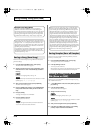
Saving a Song (Save)
Basic Procedure
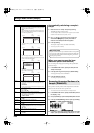
Function
Button Song ALL Samples
Save Song+Smpls
[F1]
✔
✔
Save Song
[F2]
✔
–
Save all Samples [F3] –
✔
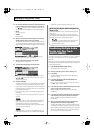
Data Saved Together with a Song
Saving a Song with Samples
(Save Song+Smpls)
JUNO-G_e.book 113 ページ 2006年2月13日 月曜日 午後2時44分