


106
Using Insert E ects
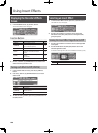
Displaying the Recorder’s E ects
Screen
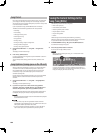
1. In the RECORDER screen, [6] (EFFECT) button.
The recorder’s e ects screen will appear.
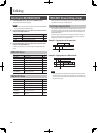
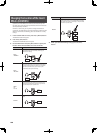
Function Buttons
Button Explanation Page
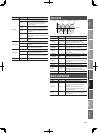
[1] (INS FX) Opens the INSERT FX screen. p. 106
[1] (MASTER)
(only in Mastering mode)
Opens the Mastering Tool Kit.
p. 118
[2] (REVERB) Opens the Reverb screen. p. 117
[4] (LOC)
(only when an insert e ect is selected)
Changes the insert e ect connection
location.
p. 108
[5] (EDIT)
(only when an insert/mastering e ect is
selected)
Edits the e ect.
p. 107
[6] (SWITCH) Turns each e ect on/o . p. 106
2. Use the [1] (INS FX)–[2] (REVERB) buttons to switch to the
e ect screen that you want to see.
Turning each E ect On/O (SWITCH)
1. In the recorder’s e ects screen, press the [6] (SWITCH)
button.
2. Press the [1] (INS FX)–[2] (REVERB) buttons to turn each
e ect on/o .
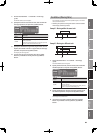
Button E ects
[1] (INS FX) Insert E ects
[1] (MASTER)
(Mastering mode only)
Mastering Tool Kit
[2] (REVERB) Reverb
3. To close the setting window, press the [6] (CLOSE) button or
the [EXIT] button.
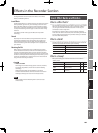
Selecting an Insert E ect
1. In the recorder’s e ects screen, press the [1] (INS FX) button.
The INSERT FX screen will appear.
2. Use the cursor buttons to move the cursor, and use the
VALUE dial or the [DEC] [INC] buttons to change the bank,
group and patch.
Turning the Insert E ect Algorithms On/O
1. Use the cursor buttons to move the cursor to each algorithm
of the patch.
2. Use the VALUE dial or the [DEC] [INC] buttons to turn the
selected algorithm on/o .
For details on each algorithm, refer to “Insert E ects Parameters” (p. 109).
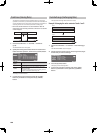
On Uppercase indication in solid frame
O Lowercase indication in dashed frame