93
Overview
Appendix
USB Memory
Song Player
Digital Recorder
Synthesizer
Selecting Sounds Perform. Functions Editing/Eects Other Settings
Rec/Play/Edit Eects Rhythm Pattern
Selecting an Instrument to Record
( REC SOURCE SELECT)
Here’s how to select the instrument you’ll be recording.
Selecting the Sound of the Synthesizer
(KEYBOARD)
1. If you want to record your Synthesizer performance, press
the [KEYBOARD] button so it’s lit.
The KEYBOARD INPUT window will appear.
Input Level Mater
2. Press [2] (KEYBOARD) to record just the synthesizer
performance, or press [4] (KEYBOARD+INS FX) to record the
synthesizer performance with the insert e ect applied to it.
Button Explanation
[2] (KEYBOARD) Synthesizer performance recorded
[4]
(KEYBOARD+INS FX)
Synthesizer performance and insert e ect recorded
• When you press a button, the input corresponding to the button you
pressed will be switched on.
• When you press the same button again, its input will be switched o .
• Multiple buttons cannot be on at the same time.
3. Set the input level and reverb. Use the cursor buttons to
select a parameter, and use the VALUE dial or the [DEC] [INC]
buttons to set the value.
Parameter Value Explanation
Input Level 0–127
Adjusts the internal digital input level.
For example, if you apply an insert e ect to
the sound of the synthesizer, this may increase
the internal digital level. In such cases, play
the keyboard and adjust the Input Level value
so that the level meter in the screen does not
reach the maximum position (“CLIP” is shown
when the level meter reaches the maximum
position).
Reverb 0–127
Level of signal sent from the sound of the
synthesizer to reverb
* Valid only when the [4] (KEYBOARD+INS FX)
button is on.
4. Press the [6] (CLOSE) button to close the KEYBOARD INPUT
window.
If you decide not to record your synthesizer performance, press the
[KEYBOARD] button to turn o its illumination.
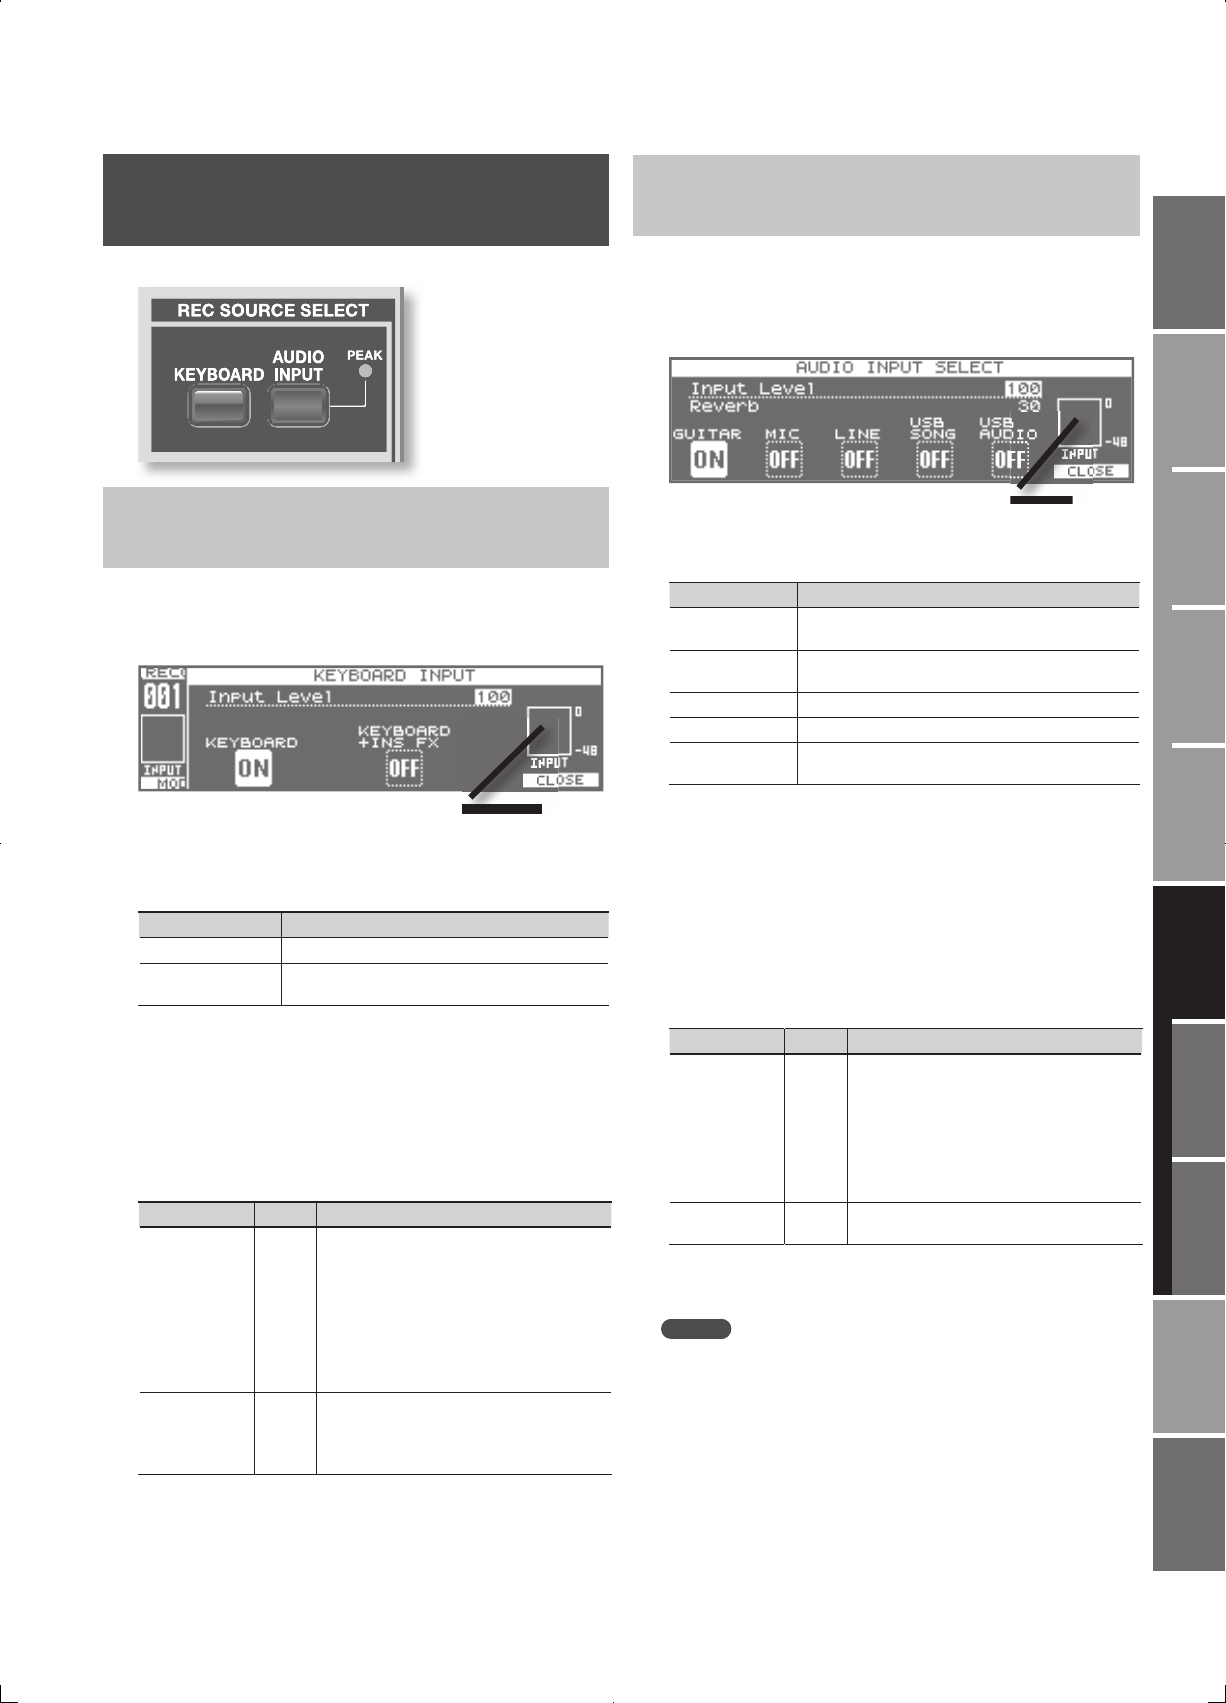
Selecting the Sound of the External Audio
Input (AUDIO INPUT)
If you want to record the sound from a guitar, microphone, line input,
or USB audio, select the desired sound as follows.
1. Press the [AUDIO INPUT] button.
The AUDIO INPUT SELECT window will appear.
Input Level Mater
2. Press the [1] (GUITAR)–[5] (USB AUDIO) button to select the
input source.
Button Explanation
[1] (GUITAR)
Sound of a guitar or bass connected to the GUITAR/
MIC jack.
[2] (MIC)
Sound of a microphone connected to the GUITAR/MIC
jack.
[3] (LINE) Sound of the device connected to the LINE IN jack.
[4] (USB SONG) Sound of the USB Memory Song Player.
[5] (USB AUDIO)
Sound of the USB audio from the computer connected
to the USB COMPUTER connector.
• When you press a button, the input corresponding to the button you
pressed will be switched on.
• When you press the same button again, its input will be switched o .
• Multiple buttons cannot be on at the same time.
• If you’re not recording anything, turn o all of the inputs in order to
minimize the noise from the input jacks.
3. Set the input level and reverb. Use the cursor buttons to
select a parameter, and use the VALUE dial or the [DEC] [INC]
buttons to set the value.
Parameter Value Explanation
Input Level 0–127
Adjusts the internal digital input level.
For example, if you apply an insert e ect to
the input sound, this may increase the internal
digital level. In such cases, play the input sound
and adjust the Input Level value so that the
level meter in the screen does not reach the
maximum position (“CLIP” is shown when the
level meter reaches the maximum position).
Reverb 0–127
Level of signal sent from the input sound to
reverb
4. Press the [6] (CLOSE) button to close the AUDIO INPUT
SELECT window.
MEMO
By holding down the [SHIFT] button and pressing the [KEYBOARD]/
[AUDIO INPUT] button, you can access the KEYBOARD INPUT/
AUDIO INPUT SELECT window without turning the audio input on/
o .


