25
Overview
Appendix
USB Memory
Song Player
Digital Recorder
Synthesizer
Selecting Sounds Perform. Functions Editing/Eects Other Settings
Rec/Play/Edit Eects Rhythm Pattern
Each Live Set has four “ Layers” (Upper 1, 2, Lower 1, 2), and a “ Tone”
is assigned to each of these Layers. A tone is the lowest-level unit of
sound; you can’t play a tone by itself.
Live Set
Layer: Upper 1
Layer: Upper 2
Layer: Lower 1
Layer: Lower 2
Tone
The JUNO-Gi has the following types of tones.
Tone Type
TONE
These are instruments such as piano or strings. All
keys will play the sound of the same instrument.
RHYTHM
( Rhythm Set)
These are instruments such as drum sets. Each key
will play the sound of a di erent instrument.
Tones and rhythm sets have the following groups.
Tone Group
PRESET These are the tones unique to the JUNO-Gi.
GM (GM2)
These are tones compatible with the GM2
speci cation which was created as a common
standard for MIDI devices across manufacturers
and models.
It’s not possible to edit or rewrite tones themselves on the JUNO-Gi.
However, you can select the tones that will be played by a live set, and
make relative adjustments (o sets) to the values of each tone. You can
save the edited result in a user live set.
Selecting Tones or Rhythm Sets
1. Press the [MENU] button.
2. Use the VALUE dial or the cursor buttons to select
“3. Layer/Split”, and press the [ENTER] button.
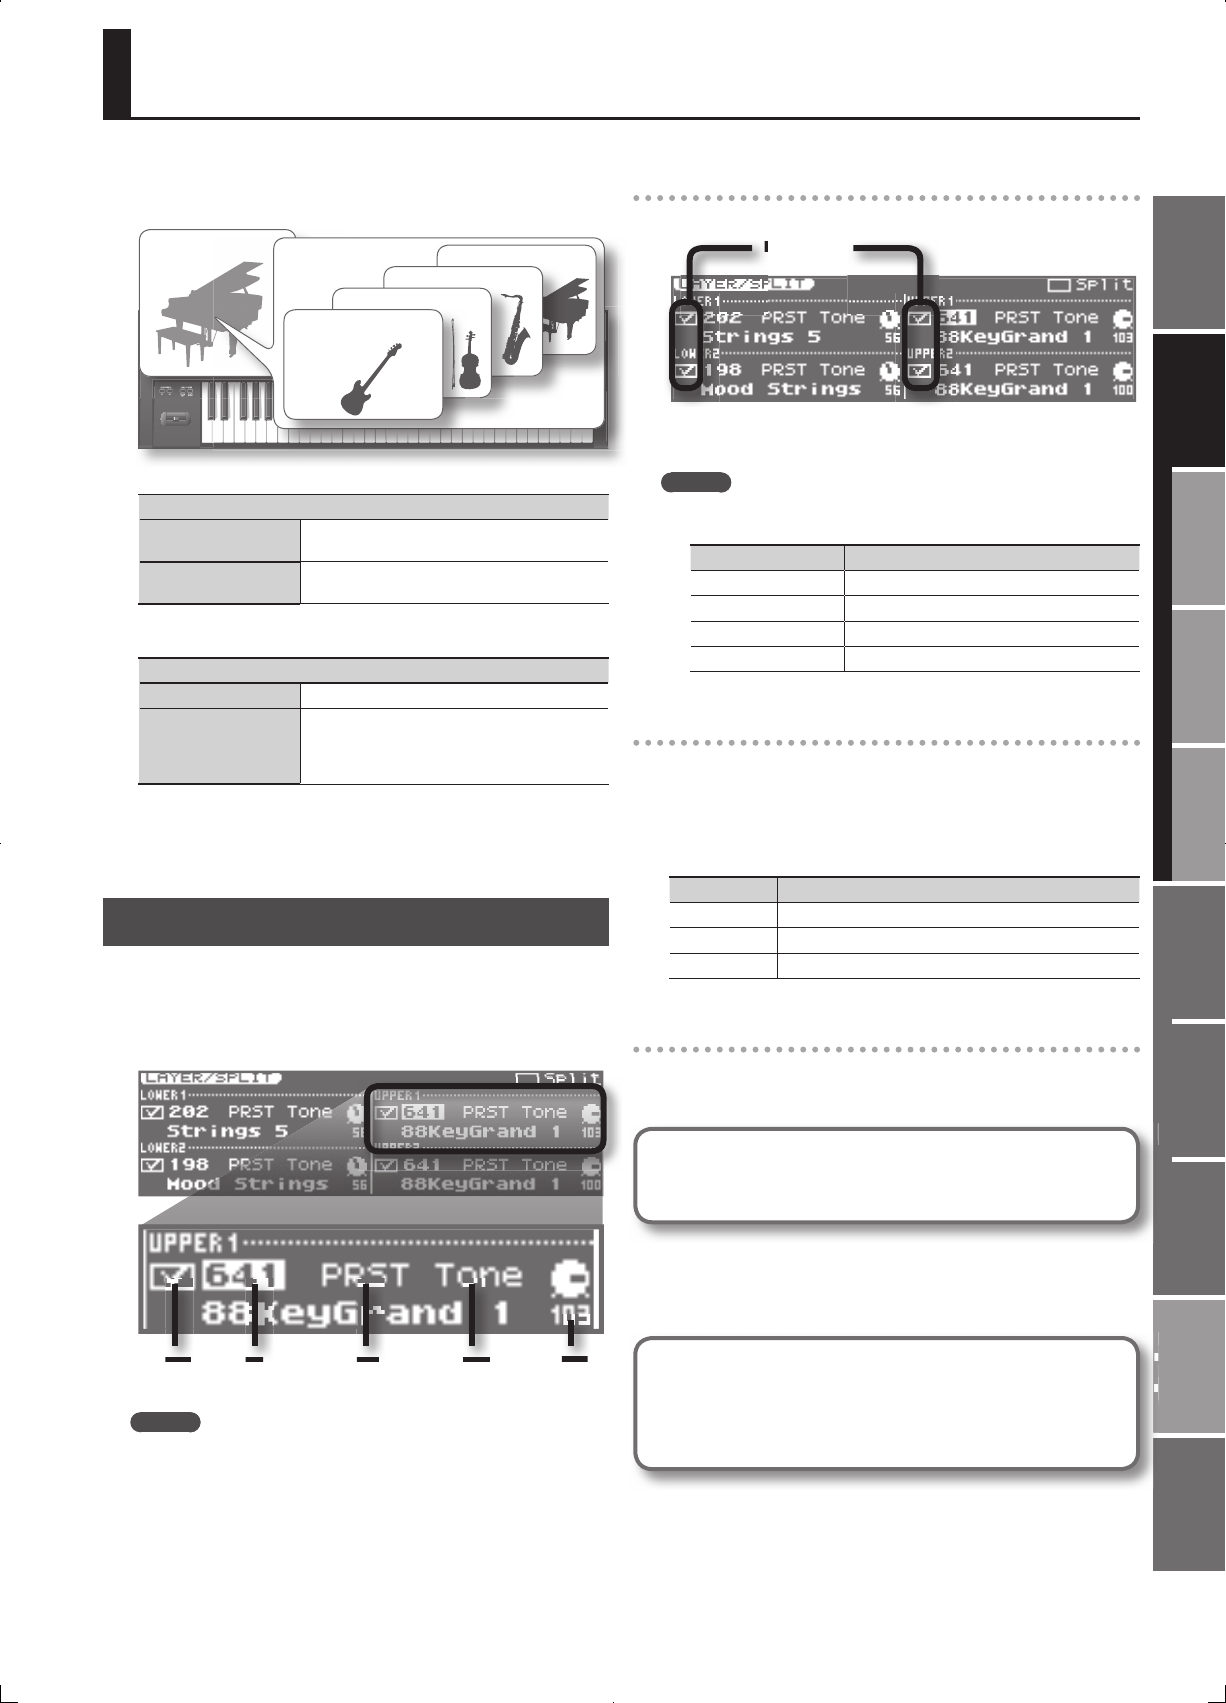
The LAYER/SPLIT screen will appears.
Layer
Switch
Tone
Number
Tone
Group
Tone
Type
Level
MEMO
You can also access the LAYER/SPLIT screen by holding down the
[SHIFT] button and pressing the [SPLIT] button.
Layer On/O
Each layer’s on/o setting is indicated as shown below.
✔ means on
3. Use the cursor buttons to move the cursor, and use the
VALUE dial or the [DEC] [INC] buttons to turn layer on/o .
MEMO
You can turn each layer on/o by holding down the [SHIFT] button
and pressing the [1]–[4] buttons.
Button Layer
[SHIFT]+[1] Upper 1 On/O
[SHIFT]+[2] Upper 2 On/O
[SHIFT]+[3] Lower 1 On/O
[SHIFT]+[4] Lower 2 On/O
Selecting Tones
4. Use the cursor buttons to move the cursor to the tone
number eld of the tone that you want to change, and
use the VALUE dial or the [DEC] [INC] buttons to select the
desired tone number.
You can select the tone group or tone type in the same way.
Parameter Value
Tone Number 001–
Tone Group PRST (PRESET), GM
Tone Type Tone, Rhy (Rhythm)
Selecting Tones from the List
When you move the cursor to the tone number eld and press the
[ENTER] (LIST) button, the tone list will appear. Use the VALUE dial to
select a tone, and then press the [ENTER] button to con rm.
Auditioning a Tone ( [PREVIEW] Button)
In the tone list screen, you can hold down the [PREVIEW] button
to audition the tone.
5. Press the [EXIT] button to return to the previous screen.
If you want to save these settings, save the live set.
For details, refer to “Saving a Live Set (WRITE)” (p. 35).
Setting the Octave for Each Layer
In the LAYER/SPLIT screen, you can press the OCTAVE [DOWN]
button or [UP] button to raise or lower by an octave the key
range of the layer at the position of the cursor.
Selecting Tones (LAYER/SPLIT)


