89
Overview
Appendix
USB Memory
Song Player
Digital Recorder
Synthesizer
Selecting Sounds Perform. Functions Editing/Eects Other Settings
Rec/Play/Edit Eects Rhythm Pattern
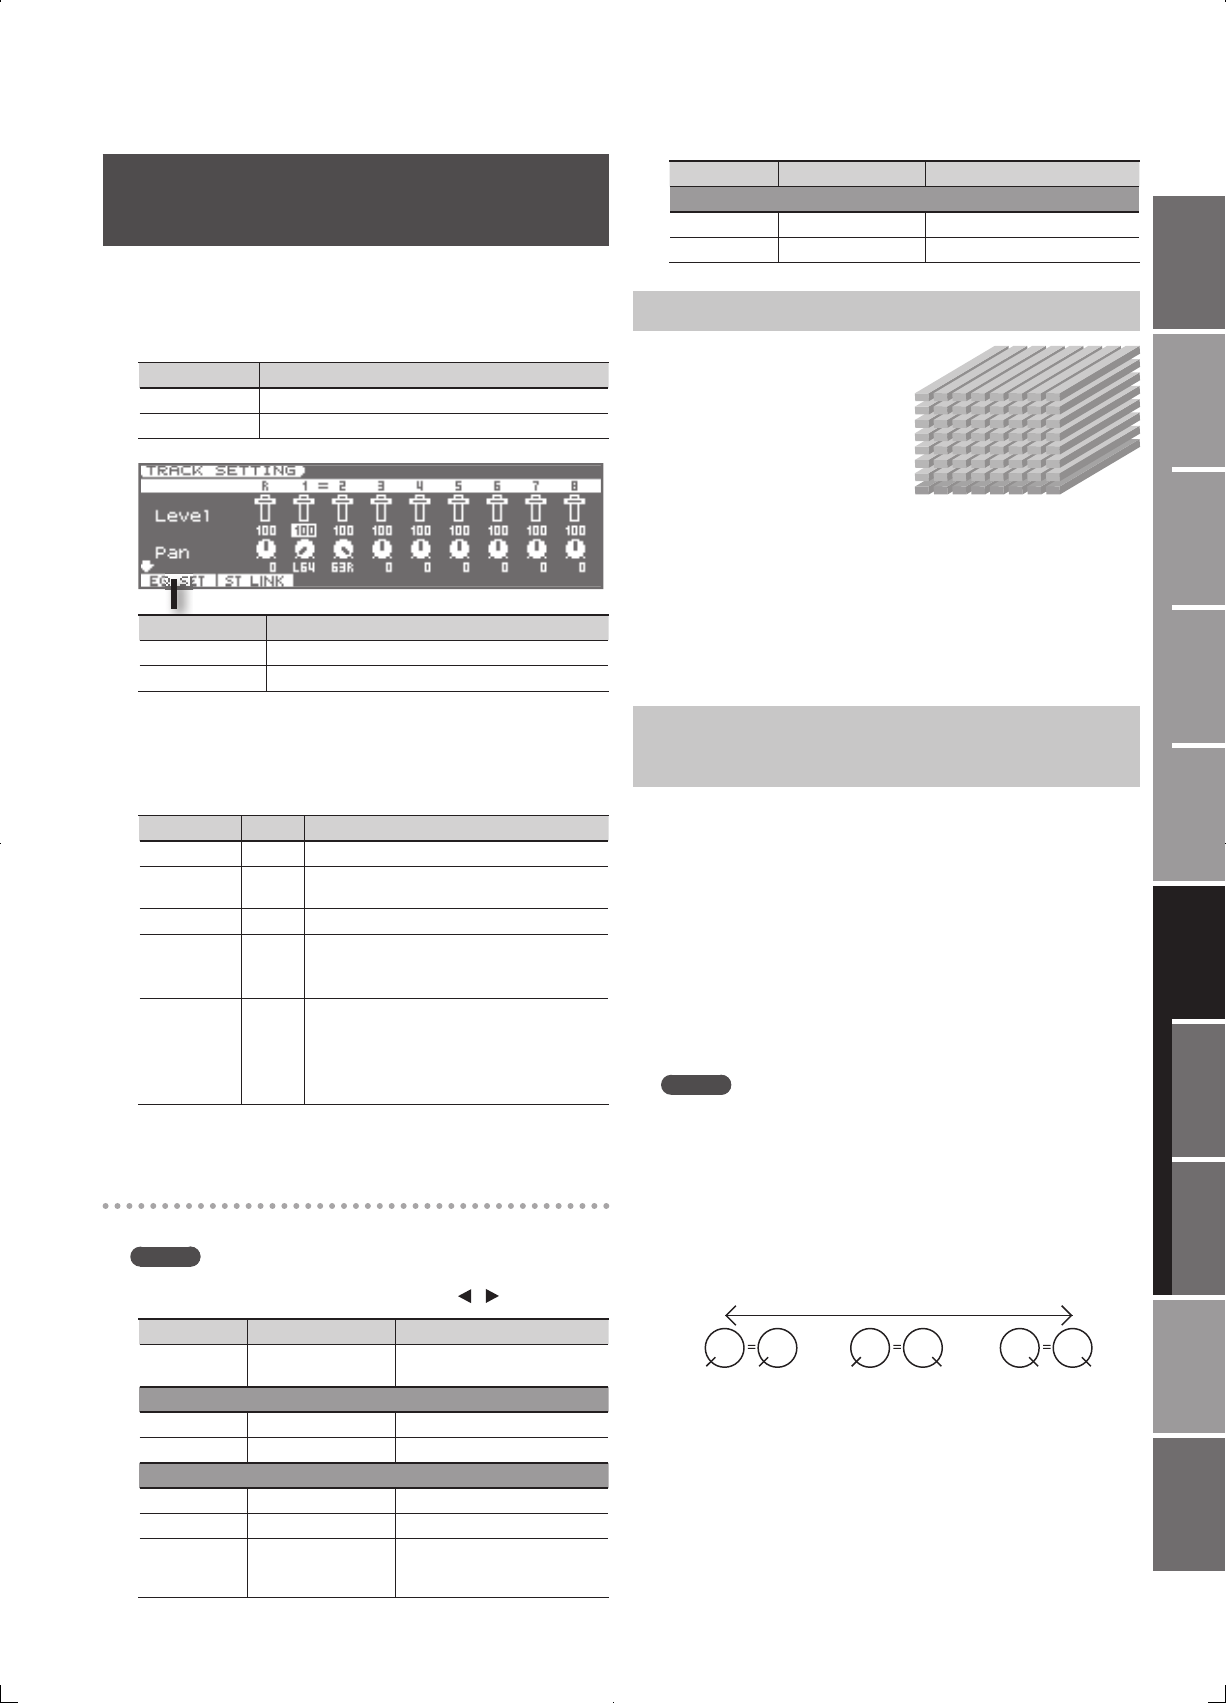
Adjusting the Pan, Reverb, and EQ
( TRACK SETTING)
In the TRACK SETTING screen you can adjust the pan and reverb of
tracks 1–8 and the Rhythm Pattern.
1. In the RECORDER screen, press the [4] (TRK SET) button.
The TRACK SETTING screen will appear.
Track Number Explanation
R Rhythm Pattern
1–8 Track 1–8
Function Buttons Explanation
[1] (EQ SET) Accesses the equalizer setting screen (EQ SETTING).
[2] (ST LINK) Enables Stereo Link.
2. Use the cursor buttons to select to the parameter that you
want to set.
3. Use the VALUE dial or the [DEC] [INC] buttons to set the
value.
Parameter Value Explanation
Level 0–127 Volume of each track
Pan
L64–
0–63R
Pan (left/right position) of each track
Reverb 0–127 Level of signal sent from each track to reverb
EQ
OFF,
ON
Equalizer (EQ) switch for each track
Press the [1] (EQ SET) button to open the
equalizer setting screen for each track.
V-Track 1–8
V-Track number
The status of the V-track is shown in the screen
(n indicates that data exists).
* The Rhythm Pattern does not have
V-tracks.
4. Press the [EXIT] button to return to the RECORDER screen.
Equalizer setting screen ( EQ SETTING)
Here you can make equalizer (EQ) settings for each track.
MEMO
To switch the track that appears in the EQ SETTING screen, hold
down the [SHIFT] button and use the cursor [ ] [ ] buttons.
Parameter Value Explanation
On/O OFF, ON
Equalizer (EQ) switch for each
track
Low
Low Gain -12–+12 dB Gain of the low range
Low Freq 40 Hz–1.6 kHz Frequency of the low range
Mid
Mid Gain -12–+12 dB Gain of the middle range
Mid Freq 20 Hz–10 kHz Frequency of the middle range
Mid Q 0.5–16
Width of the middle range
Set a higher value for Q to narrow
the range to be a ected.
Parameter Value Explanation
High
High Gain -12–+12 dB Gain of the high range
High Freq 400 Hz–16 kHz Frequency of the high range
Switching V-tracks ( V-Track)
The digital recorder
provides eight tracks. Each
track consists of eight
virtual tracks (V-tracks), and
you can select one of these
V-tracks for playback and
recording.
In other words, you can use
8 x 8 = 64 tracks to record
your performance, and
choose eight of these for
playback.
1. In the TRACK SETTING screen, change the value for “ V-Track.”
The status of the V-track is shown in the screen (n indicates that data
exists).
Controlling the Parameters of Two Tracks
Simultaneously ( Stereo Link)
In some cases you may wish to adjust the parameters of two tracks
simultaneously, such as when you’re using two tracks to record or play
back a stereo source. You can do this using the Stereo Link function.
1. In the TRACK SETTING screen, move the cursor to the
parameter for which you want to enable (or disable) stereo
link.
2. Press the [2] (ST LINK) button.
• The indication “=” is shown for parameters that are stereo-linked.
• When you use the VALUE dial or the [DEC] [INC] buttons to modify the
value of a track parameter that is stereo-linked, the two values will
change together.
MEMO
• The value will not change immediately when you enable stereo
link. Stereo-linked operation begins when you modify the value.
• Simply selecting stereo tracks for recording does not turn Stereo
Link on. When you select stereo tracks for recording (two REC
indications are shown) and then nish recording, Stereo Link will
automatically be enabled for those tracks.
• The pan parameter changes as shown below when Stereo Link is
on.
L50 R50 36R46L 36R46L
]+[]-[
VALUE
46L 36R
(Default)
V-Track 1
V-Track 2
V-Track 3
V-Track 4
V-Track 5
V-Track 6
V-Track 7
V-Track 8


