123
Overview
Appendix
USB Memory
Song Player
Digital Recorder
Synthesizer
Selecting Sounds Perform. Functions Editing/Eects Other Settings
Rec/Play/Edit Eects Rhythm Pattern
Placing Patterns to Create an Arrangement (ARRANGE EDIT)
Here’s how to create an arrangement by placing patterns in the desired
order from the intro through the ending. The arrangement you create
is saved in the song.
Displaying the ARRANGE EDIT screen
1. In the RHYTHM PATTERN screen, press the [1] (ARG EDIT)
button.
The ARRANGE EDIT screen will appear.
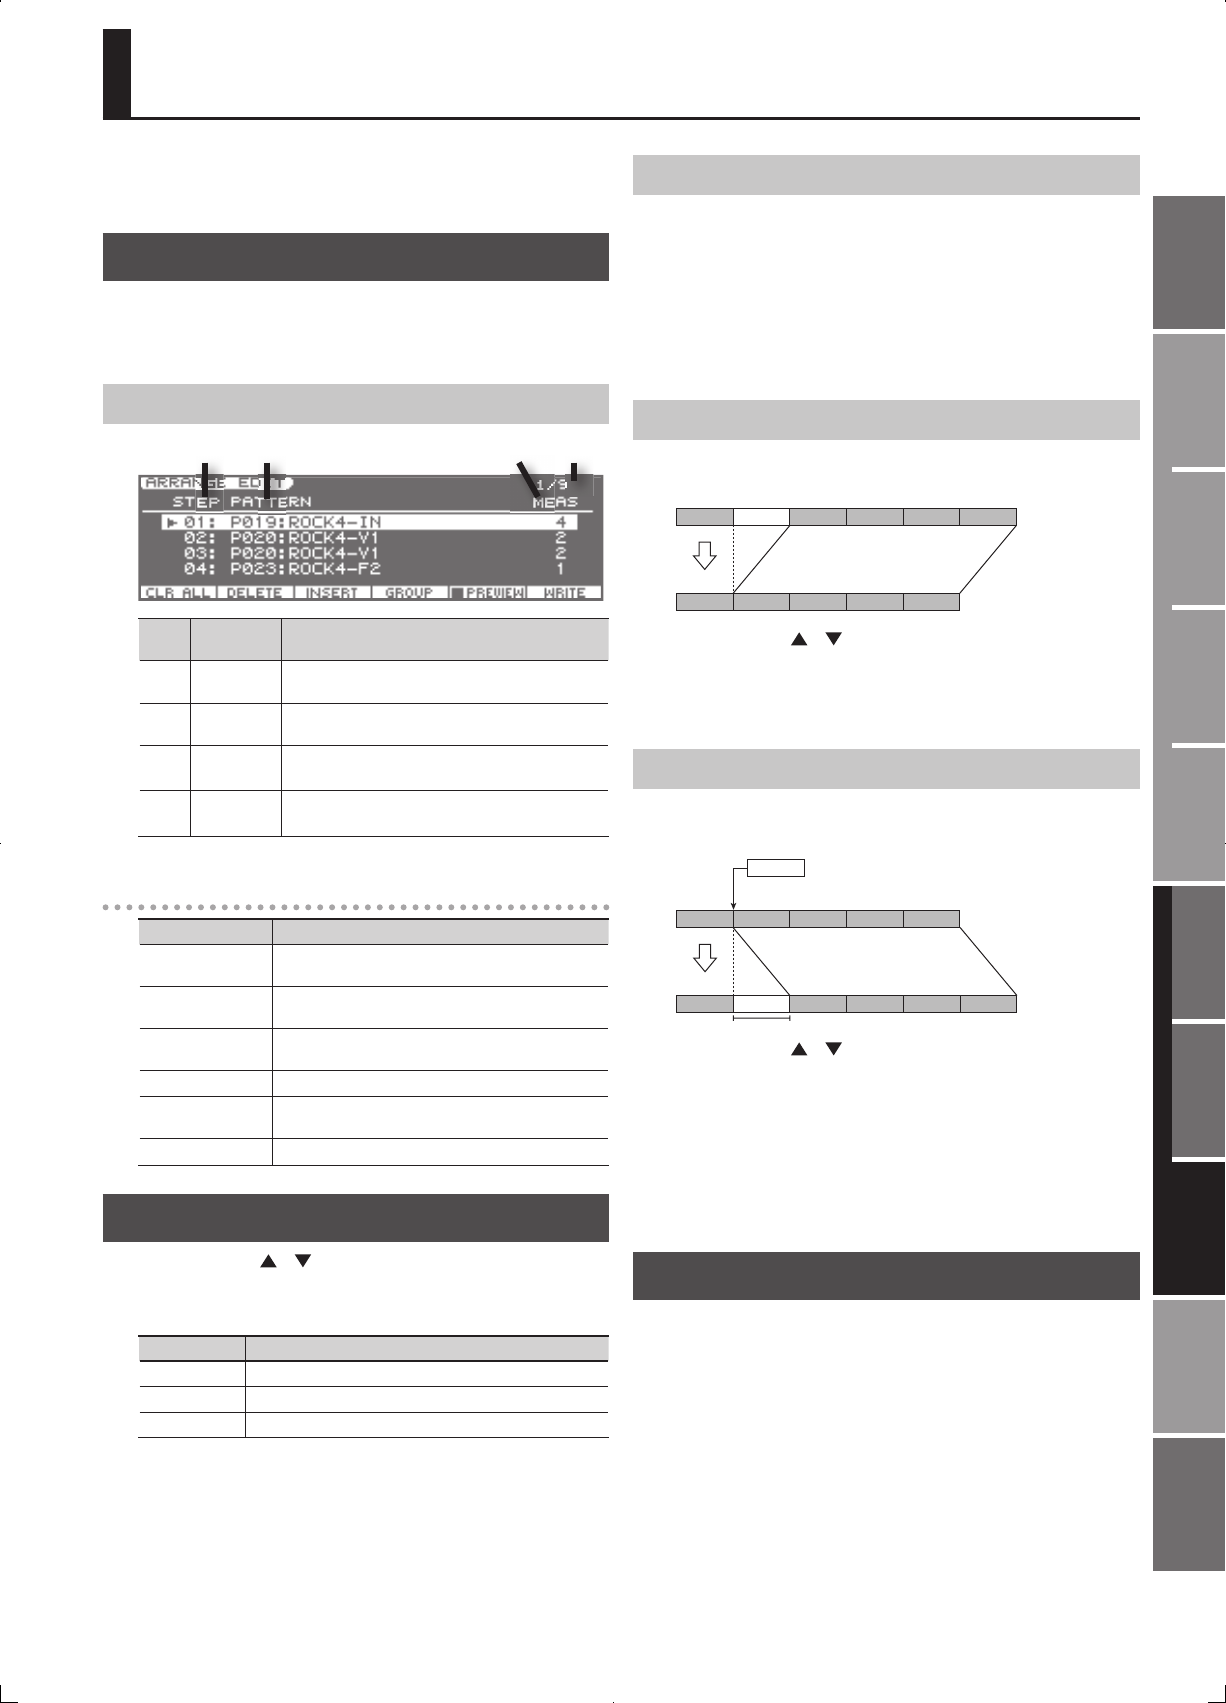
About the ARRANGE EDIT screen
41 2 3
Num-
ber
Name Explanation
1 Step
This step number indicates the order of each pattern
within the arrangement.
2
Rhythm
Pattern
This indicates the rhythm pattern placed at each step.
3 Meas
This indicates the number of measures in the rhythm
pattern.
4
Current
Meas
This indicates the number of measures at the cursor
location.
Function buttons
Button Explanation
[1] (CLR ALL)
This operation clears all of the steps that you input,
returning them to the blank condition.
[2] (DELETE)
This operation deletes an unwanted step, and joins the
two sections.
[3] (INSERT)
This operation inserts a step, and moves subsequent
steps backward by one.
[4] (GROUP) This operation switches the pattern group.
[5] (PREVIEW)
This operation auditions the currently selected
pattern.
[6] (WRITE) This operation saves the arrangement.
Switching Patterns
1. Use the cursor [ ] [ ] buttons to select the step whose
pattern you want to change.
2. Use the [4] (GROUP) button to select the pattern group.
Group Explanation
P Preset Pattern
U User Pattern
S Song Pattern
3. Use the VALUE dial or [DEC] [INC] button to select the
desired pattern.
CLEAR ALL (Clear All Steps)
This operation clears all of the steps that you input, returning them to
the blank condition. Use this when you want to create an arrangement
from scratch.
1. Press the [1] (CLR ALL) button.
A con rmation message will appear.
2. Press the [5] (EXEC) button.
To cancel, press the [6] (CANCEL) button.
DELETE STEP
This operation deletes an unwanted step, and joins the two sections.
1 2 3 4 5 6
1 2 3 4 5
1. Use the cursor [ ] [ ] buttons to select the step that you
want to delete.
2. Press the [2] (DELETE) button.
The selected step will be deleted.
INSERT STEP
This operation inserts a step, and moves subsequent steps backward
by one.
1 23 4 5 6
1 2
2
3 4 5
1. Use the cursor [ ] [ ] buttons to select the step at which
you want to insert a pattern.
In the example shown above, select step 2.
2. Press the [3] (INSERT) button
A step containing the same pattern as the step you selected in step 1
will be inserted, and the subsequent steps will be moved backward by
one.
The upper limit for the step value is 99.
WRITE (Saving the Arrangement)
The edited arrangement will be saved when you save the song. If
you want to save the arrangement immediately, press the [6] (WRITE)
button in the ARRANGE EDIT screen.


