


107
Overview
Appendix
USB Memory
Song Player
Digital Recorder
Synthesizer
Selecting Sounds Perform. Functions Editing/Eects Other Settings
Rec/Play/Edit Eects Rhythm Pattern
Editing the Insert Eects Settings
(EDIT)
If you want to create a new eect sound, start by selecting an existing
patch that’s close to the sound you want, then modify (edit) the patch
settings. If you want to save the eect settings you’ve edited, save the
patch as a user patch or song patch.
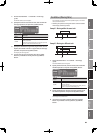
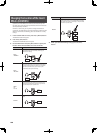
1. In the recorder’s eects screen, press the [1] (INS FX) button.
The INSERT FX screen will appear.
2. Use the cursor buttons to move the cursor to each algorithm
of the patch.
3. Press the [5] (EDIT) button.
The INSERT FX EDIT screen will appear.
MEMO
You can switch between algorithms in the edit screen by holding
down the [SHIFT] button and using the cursor [
] [ ] buttons.
Entering a value
4. Use the cursor buttons to move the cursor to the parameter
that you want to edit, and use the VALUE dial or the [DEC]
[INC] buttons to edit the value.
For details on each parameter, refer to “Insert Eects Parameters” (p. 109).
5. If you want to save the current eect settings, press the [6]
(WRITE) button.
For the save procedure, refer to “Saving Insert Eects Settings (WRITE)”
(p. 107).
When you’ve nished editing
6. When you’ve nished editing, press the [EXIT] button.
Saving Insert Eects Settings (WRITE)
Here’s how to assign a name (patch name) to the eect settings you’ve
edited, and save them as a new eect patch.
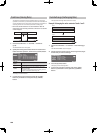
1. In the INSERT FX EDIT screen, press the [6] (WRITE) button.
The INSERT FX PATCH NAME screen will appear.
2. Assign a name.
For details on how to enter a name, refer to ”Assigning a Name” (p. 19).
3. When you’ve nished assigning a name, press the [6] (NEXT)
button.
A screen will appear, allowing you to select the save destination.
4. Press the [1] (USER) or [2] (SONG) button to select the
save-destination group.
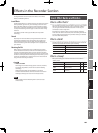
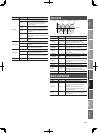
Group Explanation
USER Patches saved in internal memory
SONG Patches saved for each song
5. Use the cursor buttons to move the cursor, and use the
VALUE dial or the [DEC] [INC] buttons to select the bank
and patch number into which you want to write your edited
patch.
6. Press the [6] (WRITE) button.
A conrmation message will appear.
7. Press the [5] (EXEC) button to write to the patch.
To cancel, press the [6] (CANCEL) button.
NOTE
• Never turn o the power while saving is in progress.
• You can’t save eect patches while recording or playing a song.