


Reference [Rhythm]
ZOOM HD8/HD16
103
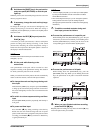
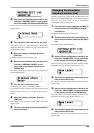
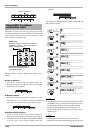
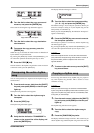
8. Repeatedly press the cursor right key to
move to the measure number for which
“EOS” is shown.
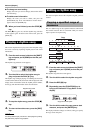
During step input, you can use the cursor left/right keys to
move the input position in measure units. When you reach the
end of the song, the indication “EOS” is shown on the second
line of the display.
HINT
• The REW [T] and FF [Y] keys in the transport section can be
used to move the current position in beat units.
• When “Event→” is shown on the display, turning the dial moves
the current position in sixteenth note units. By bringing up the
“Event→” indication to move to a point within a measure and
then using the cursor up/down keys to display event
information, you can enter event information in sixteenth note
units (→ p. 107).
9. Repeat steps 4 – 8 to enter all required
pattern information.
10
. When all required pattern information has
been entered, press the STOP [P] key.
The REC [O] key goes out and the rhythm song selection
screen appears again. If you press the PLAY [R] key, the
created rhythm song will be played.
To edit the entered rhythm pattern information, proceed as
follows.
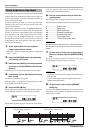
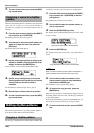
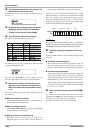
●
Selecting a different rhythm pattern
Use the cursor left/right keys to move to the point where the
respective rhythm pattern information is input, and then
turn the dial to select the new rhythm pattern.
By turning the dial at a point where no rhythm pattern
information is input (“←Pattern” is shown), you can add new
rhythm pattern information for this point.
In any case, the newly selected rhythm pattern information will
be valid until the point where the next rhythm pattern
information is input.
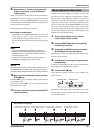
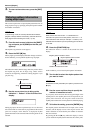
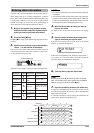
●
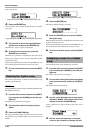
Inserting a rhythm pattern in a song
Move to the point you want to insert the rhythm pattern, and
perform steps 4 – 7. A new rhythm pattern is inserted at the
current location, and all subsequent patterns are shifted
back by the duration of the inserted pattern.
●
Erasing entered rhythm pattern information
Use the cursor left/right keys to move to the position of the
rhythm pattern information that you want to erase, and press
the [FUNCTION] key twice. This brings up the indication
“Event Erase?”. Then press the [ENTER] key. When
rhythm pattern information was erased, the previous pattern
will remain valid until the point where the next rhythm
pattern information is input.
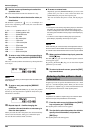
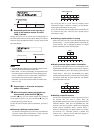
●
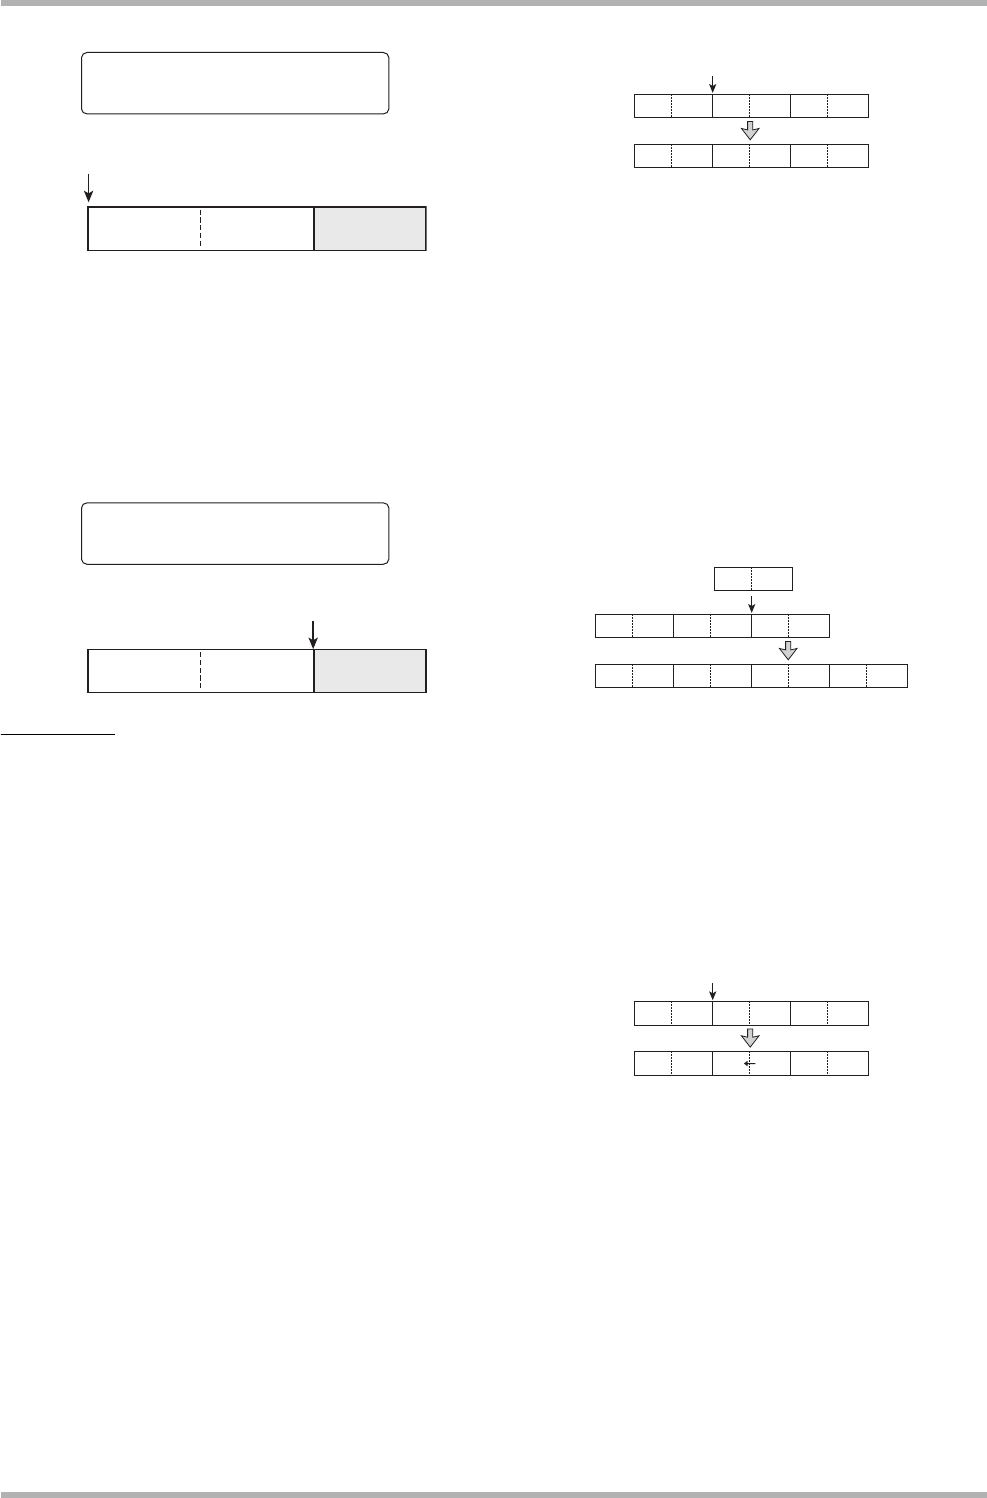
Deleting a specific measure
Use the cursor left/right keys to move to the start position of
the measure that you want to delete. Press the
[FUNCTION] key three times. This brings up the indication
“Measure Delete?”. Then press the [ENTER] key. The
measure at the current position is deleted, and subsequent
rhythm pattern information moves forward. When a
measure at the beginning of a rhythm pattern (for example
first measure of a 2-measure pattern) is deleted, that
measure only is deleted, and the indication changes to
“←Pattern” for the second measure.
Pattern
Pattern
No.2:08Beat03
No.2:08Beat03
Current position
Song
1 2
(measure number)
3
PATTERN 002 End of Song
çPattern
Pattern
EOS
EOS
End of Song
PATTERN 002
Current position
Song
1 2
(measure number)
3
Select pattern D
PATTERN A PATTERN B PATTERN C
PATTERN A PATTERN D PATTERN C
PATTERN A PATTERN B PATTERN C
PATTERN A PATTERN B
PATTERN D
PATTERN D PATTERN C
Insert
Delete
PATTERN A PATTERN B PATTERN C
PATTERN A PATTERN C