


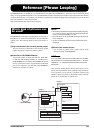
Reference [Track Editing]
ZOOM HD8/HD16
63
2. Use the cursor left/right keys to select
“Track1-Track8” as source, and press the
[ENTER] key.
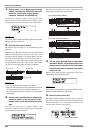
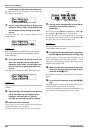
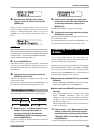
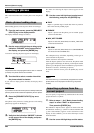
When you select “Track1-Track8” as move source, the
indication “MOVE V-TAKE on the first line of the display
changes to “8TRACKS MOVE”. When you press the
[ENTER] key in this condition, the destination tracks are
shown.
NOTE
When “8TRACKS MOVE” is shown on the first line of the display
and you have pressed the [ENTER] key, the destination is fixed
to “Track9-Track16”. The move source will the currently selected
V-takes of tracks 1 – 8, and the move destination will be the
currently selected V-takes of tracks 9 – 16.
3. Press the [ENTER] key.
The indication “Move?” appears on the display. If audio data
exist at the move destination, the indication “Overwrite?” is
shown. When the move operation is performed, these data will
be overwritten.
4. To execute the move operation, press the
[ENTER] key once more.
When the move operation is completed, the unit returns to the
V-take selection menu.
By pressing the [EXIT] key instead of the [ENTER] key, you
can cancel the operation and back up one step at a time.
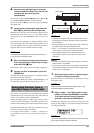
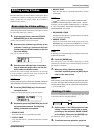
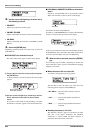
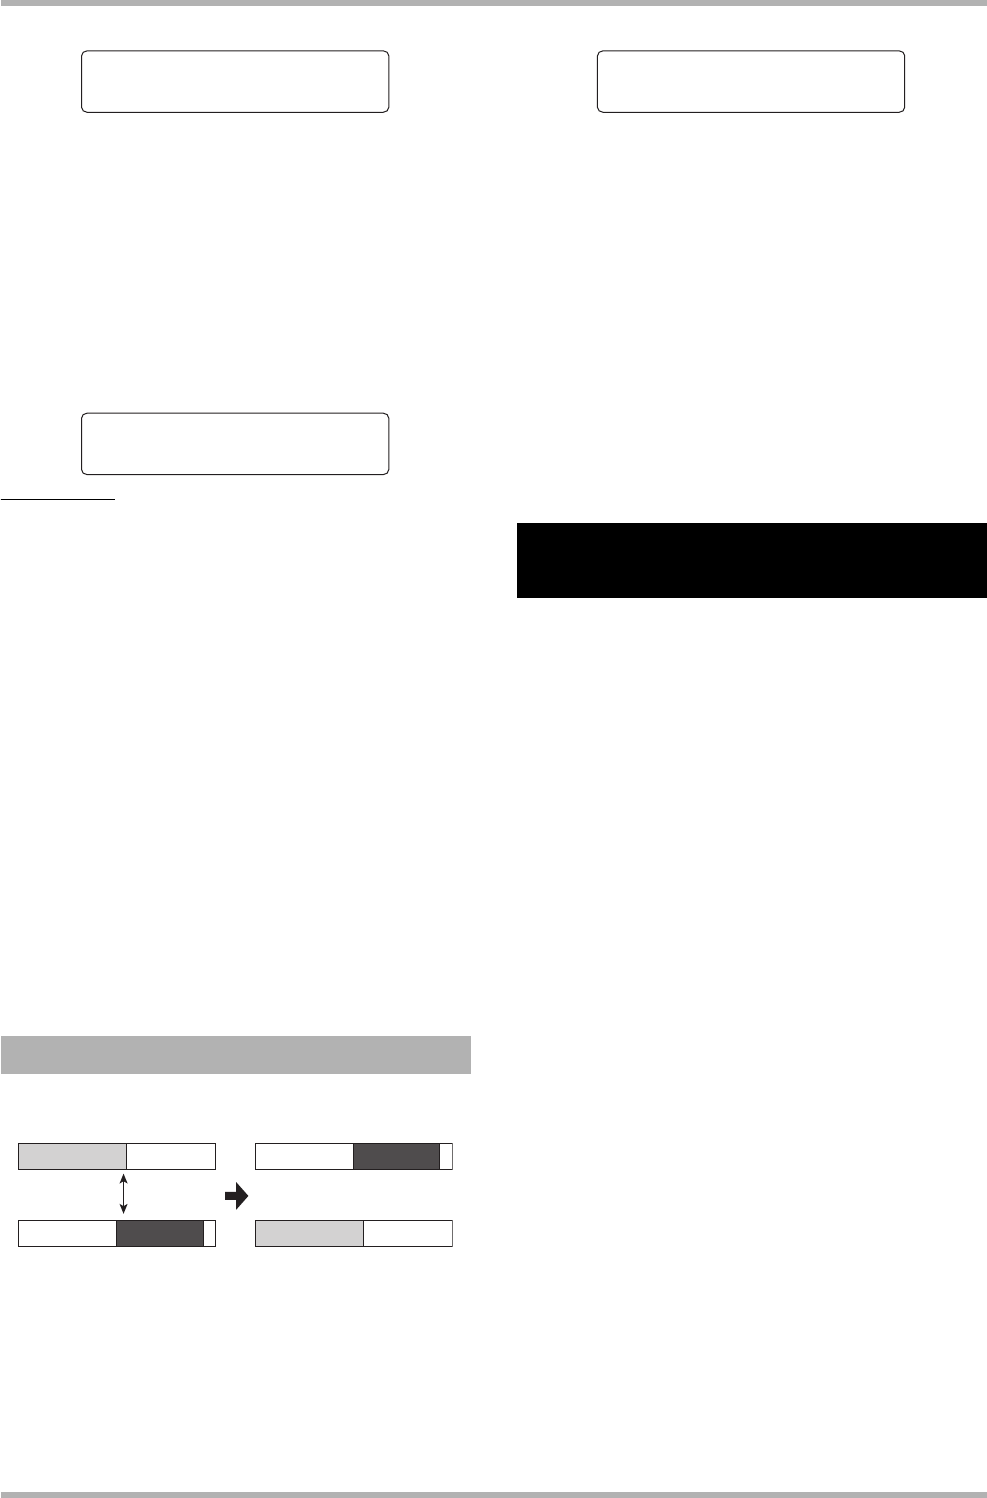
You can exchange the audio data of two specified V-takes.
1. Refer to steps 1 – 6 of “Basic steps for V-take
editing” to select the track/V-take to
exchange and bring up the indication
“EXCHANGE V-TAKE” on the display. Then
press the [ENTER] key.
A screen for selecting the exchange destination track/V-take
appears on the display.
2. Use the cursor left/right keys, status keys,
and the dial to select the track/V-take to use
as exchange destination, and press the
[ENTER] key.
The indication “Exchange?” appears on the display.
3. To execute the exchange operation, press the
[ENTER] key once more.
When the exchange operation is completed, the unit returns to
the V-take selection menu.
By pressing the [EXIT] key instead of the [ENTER] key, you
can cancel the operation and back up one step at a time.
You can import audio data into any track/V-take of the
currently selected project. Any audio data on the destination V-
take are overwritten by the imported data.
Besides V-takes from other projects, data that can be imported
include WAV/AIFF files located on a CD-ROM or CD-R/RW
disc or on the internal hard disk. Before importing a WAV/
AIFF file from a CD-ROM/R/RW disc or the internal hard
disk, the following preparations are necessary.
■
When importing a WAV/AIFF file from a CD-ROM/
R/RW disc
Insert the CD-ROM or CD-R/RW disc with the WAV/AIFF
file into the CD-R/RW drive of the HD8/HD16.
■
When importing a WAV/AIFF file from the internal
hard disk
Copy the WAV/AIFF file from a computer into a folder
named “IMPORT” immediately under the folder
“PROJxxx” (where xxx is the project number) located in the
root directory (top level folder) of the internal hard disk.
(For details, see page 161.)
The file must have the extension “.WAV” (for WAV files) or
“.AIF” (for AIFF files).
1.
Refer to steps 1 – 6 of “Basic steps for V-take
editing” to select the track/V-take to use as
import destination and bring up the indication
“IMPORT V-TAKE” on the display. Then press
the [ENTER] key.
A screen for selecting the import source appears on the display.
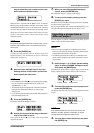
Exchanging V-takes
MOVE V-TAKE
MOVE V-TAKE
Track1-1
Track1-1
Move to
Move to
Track9-Track16
Track9-Track16
Exchange
Importing audio data to a
V-take
Exchange to
Exchange to
Track3-1
Track3-1