Reference [Recorder]
ZOOM HD8/HD16
42
before the In point.
6. Repeatedly press the status key for the track
on which to perform punch-in/out, until the
key flashes red.
NOTE
If the current location is between the In point and Out point, the
status key (and the REC [
O] key if during recording) will be lit
red. In this case, use the locate function once again to go to a
point that is earlier than the In point.
7. To rehearse the auto punch-in/out process,
press the PLAY [R] key.
The recorder will begin playing. When you reach the In point, the
track on which you are punching-in/out will be muted. When you
reach the Out point, muting will be defeated. (You will always be
able to monitor the input signal during this time.) Performing this
action will not delete or record anything on the track.
To change the positions of the In point or Out point, press the
[AUTO PUNCH-IN/OUT] key so that the key goes out, and
then repeat steps 3 and 4.
When you are finished rehearsing, move again to a location
earlier than the In point.
8. To actually perform auto punch-in/out, hold
down the REC [O] key and press the PLAY
[R] key.
The recorder will begin playing. When you reach the In point,
recording will begin automatically (punch-in). When you
reach the Out point, recording will end automatically, and
playback will resume (punch-out).
9. When you are finished recording, press the
STOP [P] key.
10
. To listen to the recorded result, repeatedly
press the status key for the track on which
you recorded, until the key is lit green. Then
move to a location earlier than the In point,
and press the PLAY [R] key.
To re-do the punch-in/punch-out recording, repeat steps 5 – 9.
11
. When you are satisfied with the recording,
press the [AUTO PUNCH-IN/OUT] key so that
the key goes out.
The auto punch-in/out function is turned off, and the In point
and Out point settings are discarded.
This section explains how to play recorded audio tracks as well
as drum/bass track sounds and record them as a stereo mix on
a master track (mixdown).
The master track is a set of stereo tracks that is separate from
the normal tracks. The most common use of the master track is
as a track on which the end result of a mixdown process is
recorded. The contents of the master track can then be used to
create an audio CD.
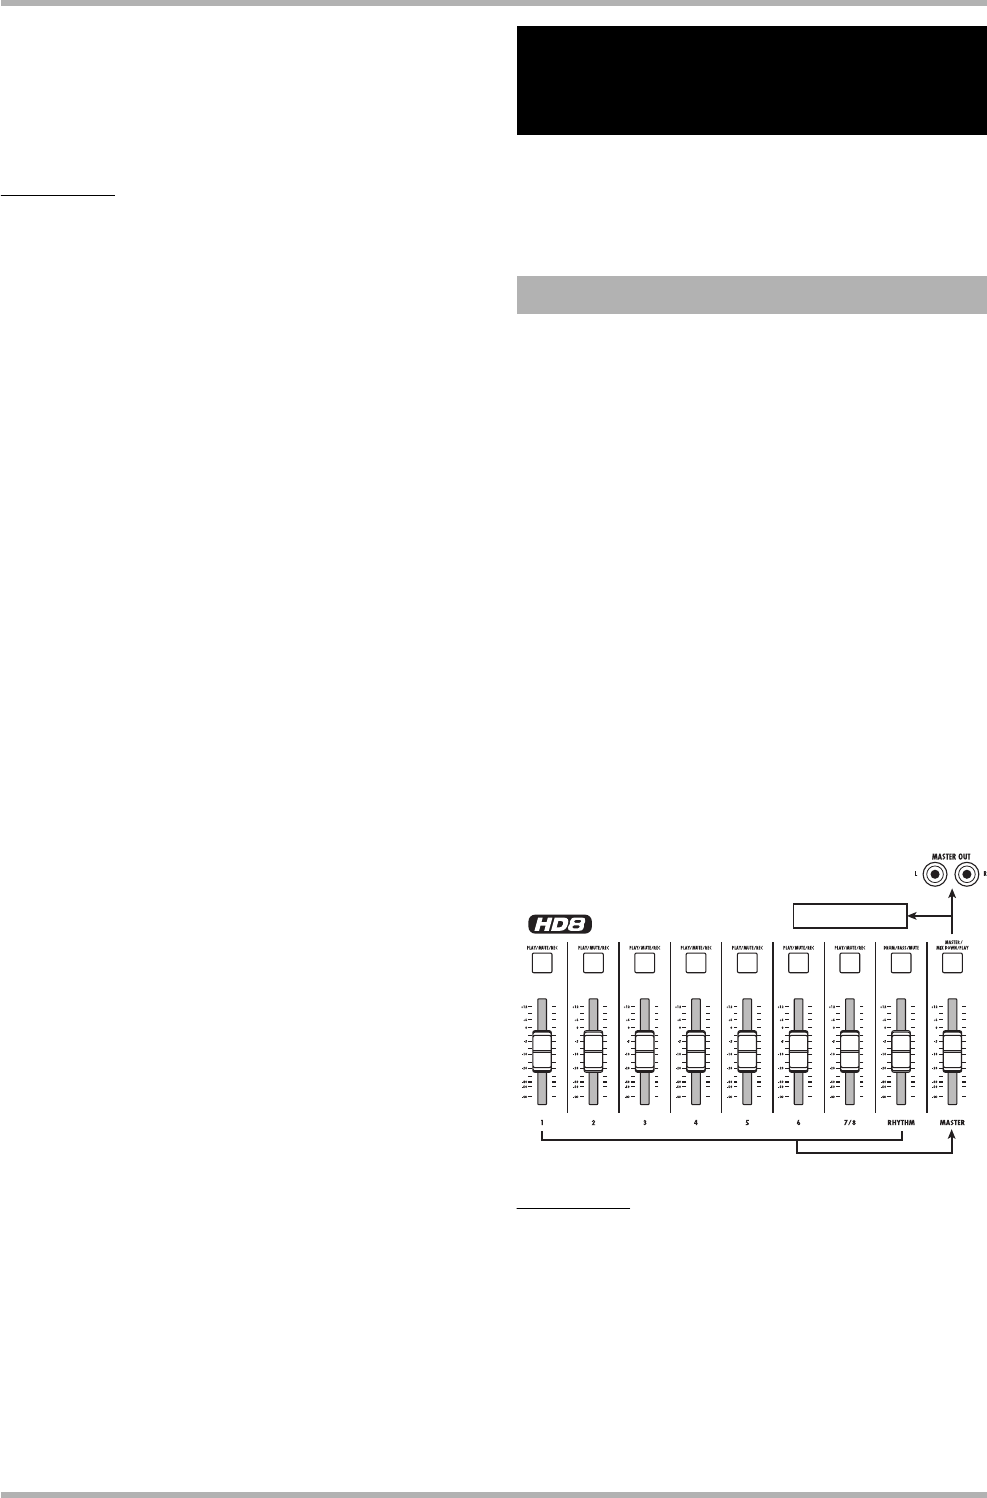
When you switch the master track to the recording condition,
the signal after passing the [MASTER] fader (the same signal
as available from the MASTER OUTPUT jacks) is sent to the
master track.
The HD8/HD16 offers one master track for each project.
Similar to the regular tracks, the master track also has ten
virtual tracks (V-takes). This allows you to record different
mixes on several V-takes and select the optimum take later.
It is possible to convert the contents of the master track into a
stereo WAV file. If you copy this file via the USB interface to
a computer, you can use it to create a CD with the software and
CD-R/RW drive of the computer.
The illustration below shows the signal flow for recording on
the master track of the HD8.
HINT
• It is possible to play the master tracks of several projects
recorded on the hard disk in succession (→ p. 165).
• The data recorded on all tracks including the master track are
saved as mono WAV files (2 mono WAV files for stereo tracks).
To save data as a stereo WAV file, special steps are necessary
(→ p. 43).
Recording several tracks
on a master track
(mixdown function)
About the master track
Master track
Tracks 1 – 8, Drum/Bass track


