


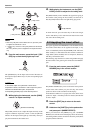

Quick Tour
ZOOM HD8/HD16
30
HINT
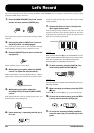
If the [RHYTHM] status key is lit in green, the [RHYTHM] fader
can be used to adjust the drum track. If the key is lit in red, the
fader adjusts the bass track.
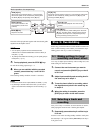
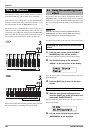
2. Set the [MASTER] fader to 0 dB and use fader
2 to adjust the monitoring level.
If necessary, set the recorder to playback and operate faders 1/
2 and the [RYTHM] fader to adjust the monitor level balance
between tracks.
HINT
• For tracks in the recording standby condition (status key lit in
red), the level meter can be used to check the input signal level.
• For tracks in playback mode (status key lit in green), the level
meter shows the playback signal level.
3. To begin recording, press the ZERO [U] key
to return to the beginning of the song. Then
hold down the REC [O] key and press the
PLAY [R] key.
After the pre-count, recording on track 2 will begin. Record
your instrument play while listening to the guide rhythm and
track 1.
4. When you have finished recording track 2,
press the STOP [P] key.
5. To check the recorded content, press the
ZERO [U] key to return to the beginning of
the song, and press the PLAY [R] key.
The guide rhythm of the rhythm section and tracks 1/2 will be
played back. Adjust faders 1/2 as necessary to adjust the level
balance.
6. To stop playback, press the STOP [P] key.
HINT
To redo the recording, repeat steps 3 – 5. You can also start
rerecording from partly into the track and use the punch-in/
punch-out function to redo a limited passage only (
→ p. 41).
7.
When you are satisfied with the recorded
content, press status key 2 until it is lit in green.
You can now record more tracks in the same way.
HINT
Even when all tracks have been filled, you can still use the
bounce function (also called ping-pong recording) to move the
contents from multiple tracks onto 1 or 2 tracks. Then you can
select another V-take for the bounce source tracks and record
more (
→ p. 44).
When you have finished recording all tracks, you can use the
built-in mixer to adjust parameters such as volume level, EQ
(equalizer), and panning (stereo left/right positioning) to create
a pair of stereo tracks.
In order to keep unwanted signals from being included in the
mix, you should turn off the input and the guide rhythm from
the rhythm section.
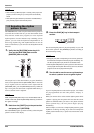
1. To mute the rhythm section, press the
[RYTHM] status key so that the key goes out.
2. To mute the input, press the [ON/OFF] key for
the input where the instrument is connected,
so that the key goes out.
HINT
If desired, you can add the drum kit/bass program sound and/
or sound from input signals to the mix.
Adjust the volume, panning, and equalization for each track by
using the faders or controlling the track parameters of the built-
in mixer.
To change the track parameter settings, you can either call up the
respective track and parameter on the display and use the dial to
change the setting, or you can select main parameters with the
keys and use the parameter knobs on the panel to quickly change
the setting. This section explains how to use the parameter knobs
for main track parameters.
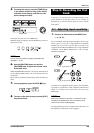
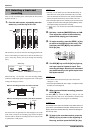
1. To adjust the volume balance between
tracks, operate the faders to set the volume
for the respective track.
Operating the fader of a pair of stereo tracks adjusts the level
in both channels.
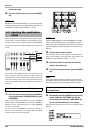
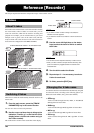
2. To select the track parameter to adjust, press
the [SELECT] key in the function/transport
section while the main screen is shown.
The [SELECT] key allows you to select main track parameters.
The parameter can then be adjusted with one of the parameter
knobs. The first time you press the [SELECT] key, the most
recently adjusted track parameter appears on the display.
Step 4: Mixing
4.1 Turning off the input and
rhythm section
4.2 Adjusting volume,
panning, and EQ