


Reference [Creating a CD]
ZOOM HD8/HD16
139
This section describes how to create an audio CD using a
completed project as source material.
You can write the contents of the master track of the current
project to a CD-R/RW disc. When creating an audio CD by
project, you can select any desired V-take of the master track
as source.
1. Insert a CD-R/RW disc into the integrated
CD-R/RW drive.
To newly write audio data, use a blank CD-R/RW disc or a CD-
RW disc that has been completely erased.
Even when audio data are present, adding data is possible as
long as the disc has not been finalized.
2. Select the project to be used as write source.
NOTE
Before starting the procedure, use the trimming function on the
V-take to make sure that it does not include unwanted blank
portions at the beginning and end (
→ p. 53).
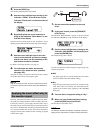
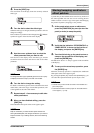
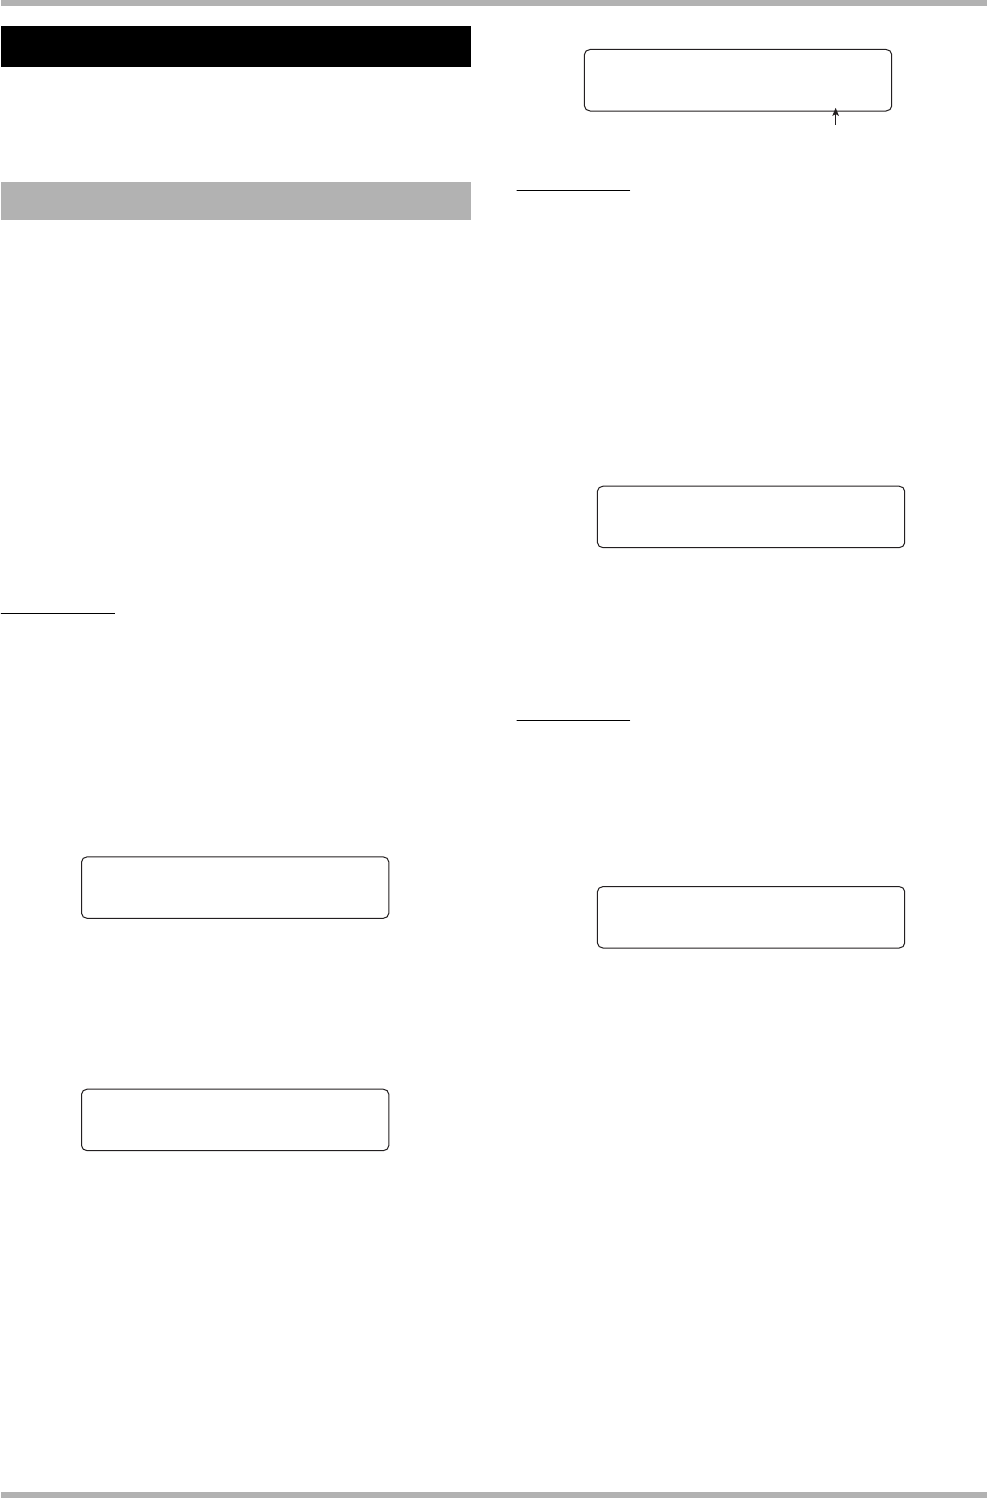
3. From the main screen, hold down the [SHIFT]
key and press pad 1 (CD-R/RW).
The menu for various CD-R/RW functions appears.
4. Verify that “AUDIO CD” is shown on the
second line of the display, and press the
[ENTER] key.
The display indication changes as follows.
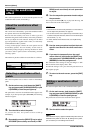
5. Verify that “BURN CD” is shown on the
second line of the display, and press the
[ENTER] key.
The indication “Time” appears on the second line of the
display is shown, along with the duration of the master track
(V-take) that is currently selected for writing.
By pressing the PLAY [R] key at this point, you can listen to
the contents of the V-take.
HINT
When you press the cursor down key, the second line of the
display shows “Remain”, and the remaining write time on the
inserted CD-R/RW disc appears on the counter. Press the
cursor up key to return to the previous indication.
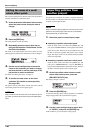
6. To change the V-take to be used as source
material, press the [EDIT] key.
When the key is pressed, the display indication changes as
follows.
By turning the dial in this condition, you can select the V-take.
To return to the condition of step 5, press the [EXIT] key. If
necessary, listen to the V-take to verify that the correct V-take
is selected.
NOTE
Unrecorded V-takes of the master track cannot be selected.
7. Press the [ENTER] key.
The display indication changes as follows.
The indication “CD Trackxx” is shown on the first line of the
display (where xx is the track number). When adding to a CD-
R/RW disc, this indication lets you check which track of the
project will be written.
8. To carry out the write process, press the
[ENTER] key once more.
By pressing the [EXIT] key instead of the [ENTER] key, you
can cancel the operation and back up one step at a time.
When writing is complete, the display shows “Complete!”.
9. To return to the main screen, press the [EXIT]
key several times.
By repeating steps 2 – 8, you can add audio data to the disc.
Creating an audio CD
Creating an audio CD by project
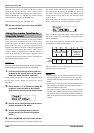
CD-R/RW 1/2
CD-R/RW 1/2
>AUDIO CD
>AUDIO CD
AUDIO CD 1/5
AUDIO CD 1/5
>BURN CD
>BURN CD
Master track duration
Burn CD
Burn CD
Time 03:27
Time 03:27
Take Select
Take Select
VTake1:Master 1
VTake1:Master 1
CD Track1
CD Track1
Burn?
Burn?