


Reference [Recorder]
ZOOM HD8/HD16
47
NOTE
• In 8-track recording mode, recording on tracks 9/10 – 15/16 and
the master track is not possible. The auto punch-in/out and
bounce functions are also not available.
•To perform overdubbing on a mono track after you have
recorded tracks 1 – 8, you must move the recorded takes to
tracks 9 – 16 first (→ p. 62).
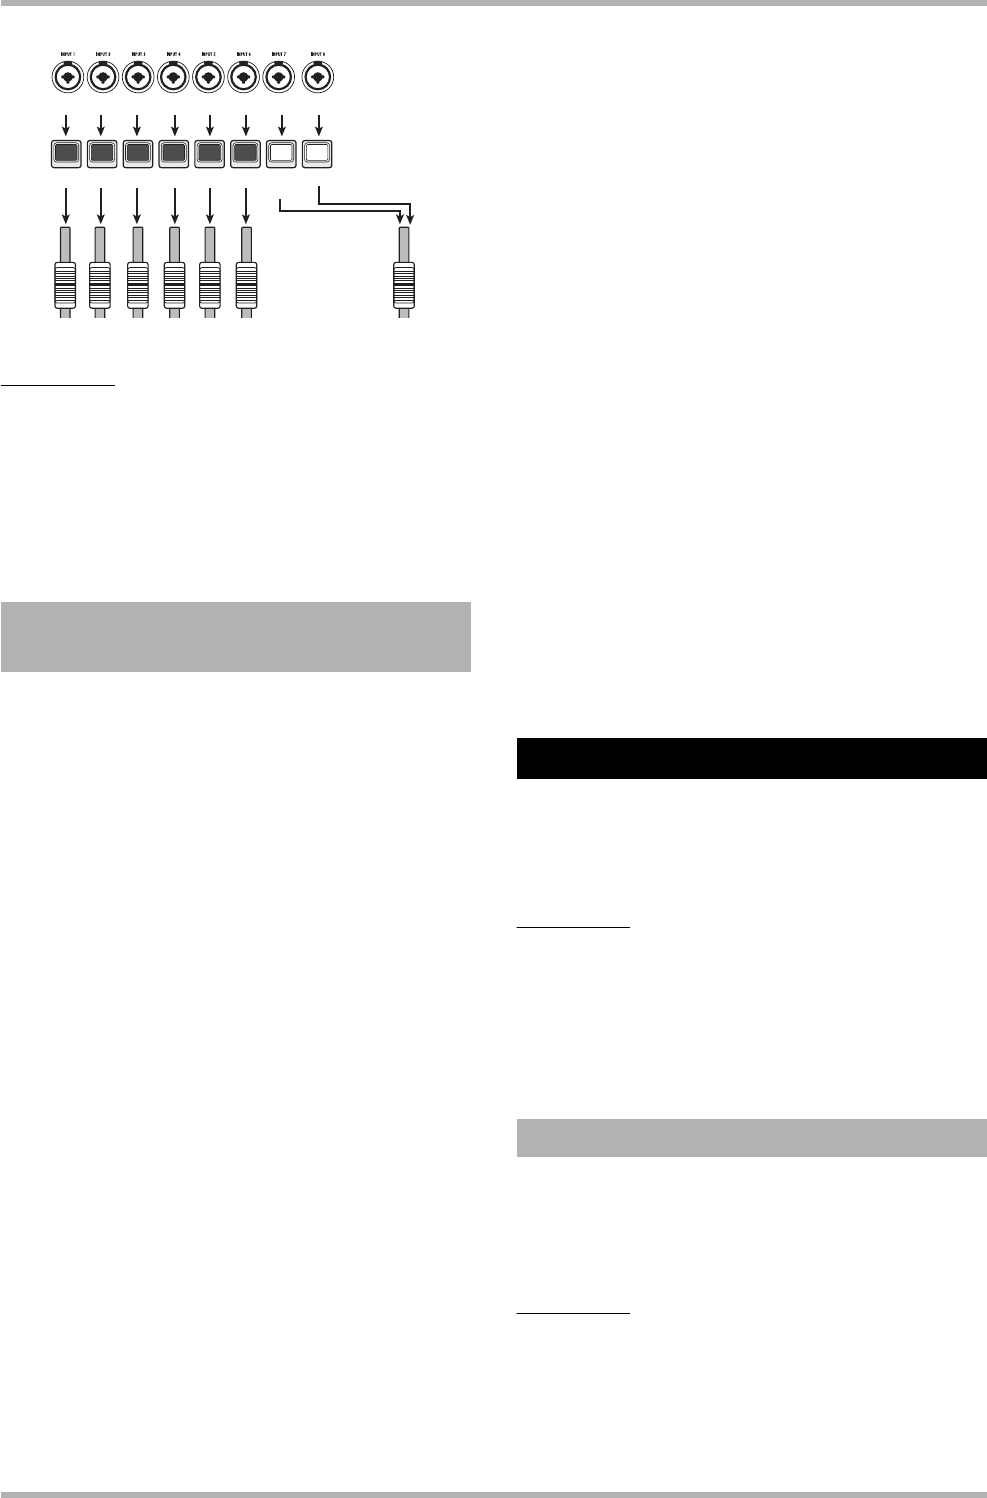
After adjusting the level of the signals from the INPUT jacks 1
– 8, the signals are sent to tracks 1 – 8 in the recorder section.
1. Verify that the instruments or microphones to
be recorded are connected to the INPUT
jacks 1 – 8.
2. Press the [8TRACK RECORDING] key in the
input section.
The key lights up and the unit switches to 8-track recording
mode.
3. Press the [ON/OFF] keys for the INPUT jacks
1 – 8.
When pressed, a key lights up, and the corresponding input is
active.
4. While the instruments are played, adjust the
respective [GAIN] controls to obtain a
suitable input sensitivity level.
5. To use an insert effect, press the [INPUT
SOURCE] key in the control section, and
press the [ON/OFF] key for the input to which
you want to apply the effect.
The respective [ON/OFF] key lights up orange, and the insert
effect is applied. When 8 x COMP EQ is selected as algorithm
for the insert effect, all channels can be processed by the effect.
Otherwise, two selected channels can be effect-processed.
6.
While the instruments are played, use the [REC
LEVEL] control to adjust the recording level.
Set the recording level as high as possible, but avoid settings
that cause the [CLIP] indicator to light. In the recording
standby condition (status key lit in red), the level of the input
signal can be checked with the respective level meter.
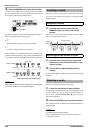
7. Repeatedly press the status keys for the
tracks to be recorded so that the keys are lit
in red.
Up to eight status keys can be activated simultaneously. When
a track is switched to the recording standby condition, the
signal from the input mixer will be sent to the corresponding
recording track.
If the [ON/OFF] key for an input is ON but the corresponding
status key is lit green (or is off), the respective input will not be
recorded.
8. Move to the start point of the recorder, and
start recording.
When recording is finished, stop the recorder.
9. To cancel the 8-track recording condition,
press the [8TRACK RECORDING] key.
The key goes out.
This function lets you set marks at any recorder position, and
return to the mark using a simple operation. Up to 100 marks
can be set.
HINT
• It is also possible to switch mixer settings or effect setting
groups (scenes) at a marked position (→ p. 84).
• When creating an audio CD, marks can be used to provide index
information. This will allow the CD player to access specific
points within a song (→ p. 142).
Here’s how to assign a mark at the desired location in a song.
1. Locate the point where you want to set a
mark.
HINT
•A mark can be assigned either during playback or when
stopped.
•You can use the scrub function (→ p. 40) to locate the point with
high precision.
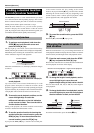
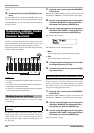
Assigning an input signal to a
track
12345678
12345678 MASTER
Input
Status keys
Red Red Red Red Red Red
Green Green
(or out)
(or out)
Marker function
Setting a mark