102
Paste
Beginning at the “S (Edit Range Start)” address, this com-
mand places the sample data that was loaded into the buffer
by “Copy” command. The original data will be deleted, and
overwritten by the sample data from the buffer. You can also
place sample data into a blank sample. This is convenient
when you wish to “Copy” part of a sample and create a new
sample based on it.
Pasting to a sample that contains sample data
1 Use “SMPL” (2.1–1a) to select the sample that you wish
to edit, and set “S (Edit Range Start)” (2.1–2b) to specify
the starting address. The “E (Edit Range End)”setting is
ignored.
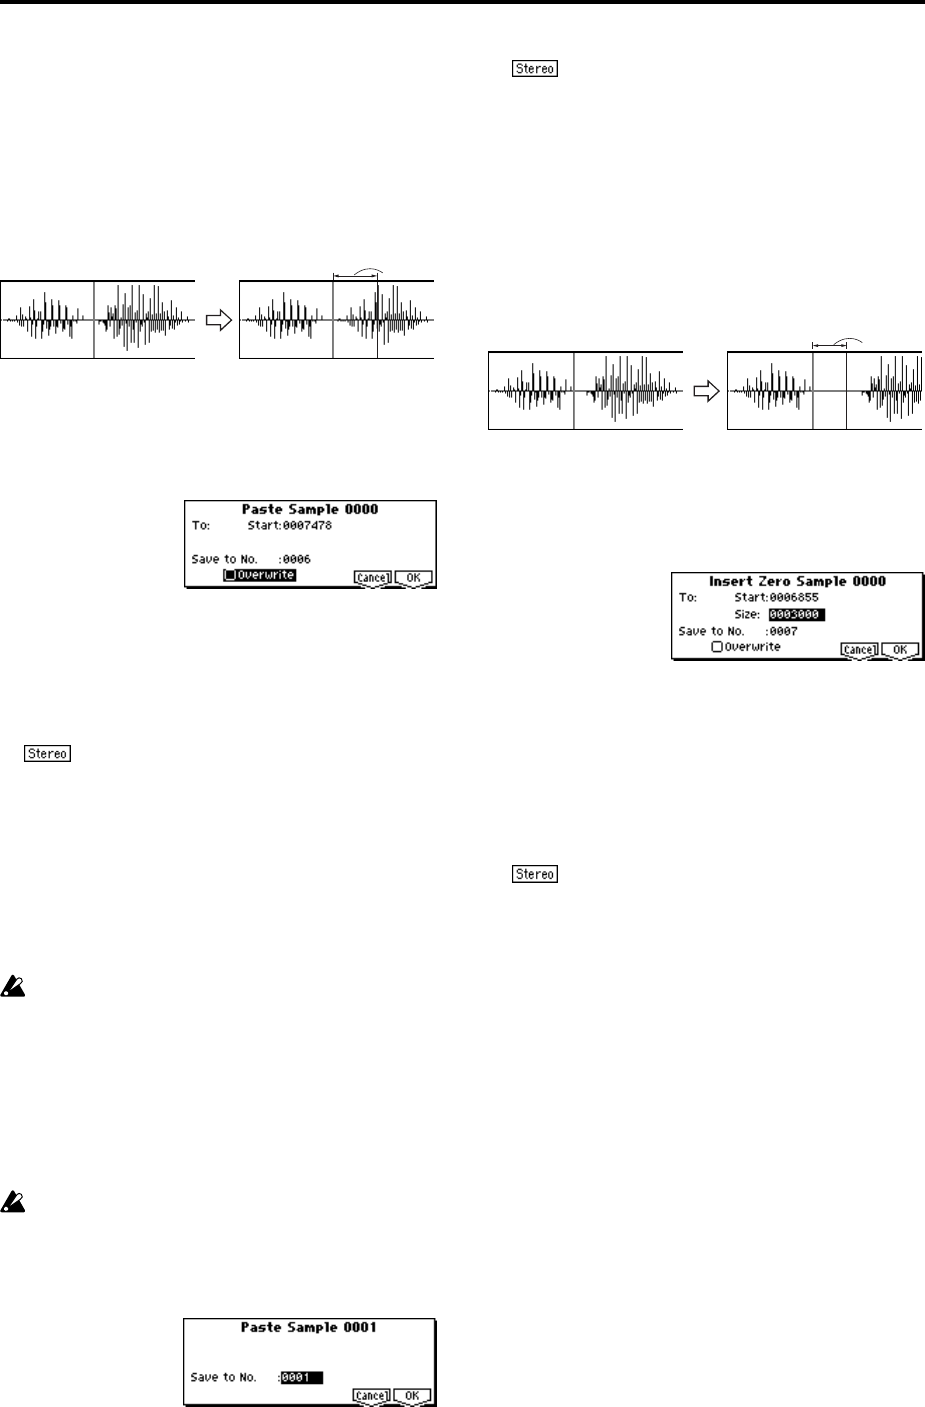
2 Select “Paste” to open the following dialog box.
3 To “Start” will indicate the starting address at which the
data will be pasted.
4 In “Save to No.,” specify the save destination sample
number. By default, an unused sample number will be
selected. If you have checked “Overwrite,” this cannot be
set.
For a stereo sample, “Save to No.(L)” and “(R)”
will be displayed. Specify the save destination sample
number for the L channel and R channel respectively.
5 If you wish to delete the original sample data and over-
write it with the edited sample data, check “Overwrite”.
Normally, you will leave “Save to No.” at its default set-
ting, and execute without checking “Overwrite.” (
☞p.99
“
*1
: About “Overwrite””)
6 To execute the “Paste” command, press the [F8] (“OK”)
key. To cancel, press the [F7] (“Cancel”) key.
If the buffer into which data was placed by the “Copy”
command contains no data, the display will indicate
“Source sample is empty.”
Pasting to a sample that contains no sample data
1 Use “SMPL” (2.1–1a) to select the vacant sample number
that you wish to paste.
If you select ----:---No Assign---- for “SMPL” and then
access the dialog box for this command, a vacant sample
number will be selected automatically.
The “S (Edit Range Start)” and “E (Edit Range End)”
(2.1–2b) settings will be ignored, and will have no
effect. The beginning of the sample will be placed at
address 0.
2 Select “Paste” to open the following dialog box.
3 In “Save to No.,” specify the save destination sample
number. If you wish to change it, re-specify the desired
number.
If the sample data loaded into the buffer by
“Copy” is stereo, the display will indicate “Save to
No.(L)” and “(R).” Specify the save destination sample
number for the L channel and the R channel.
4 To execute the “Paste” command, press the [F8] (“OK”)
key. To cancel without executing, press the [F7] (“Can-
cel”) key.
Insert Zero
This command inserts zero-level sample data (silence),
beginning at the “S (Edit Range Start)” address. The data
that previously occupied that location will be moved back-
ward.
1 Use “SMPL” (2.1–1a) to select the sample that you wish
to edit, and set “S (Edit Range Start)” (2.1–2b) to specify
the starting address. The “E (Edit Range End)” setting is
ignored.
2 Select “Insert Zero” to open the following dialog box.
3 To “Start” will indicate the starting address at which the
data will be inserted.
4 In “Size,” specify the length of the data that will be
inserted.
5 In “Save to No.,” specify the save destination sample
number. By default, an unused sample number will be
selected. If you have checked “Overwrite,” this cannot be
set.
For a stereo sample, “Save to No.(L)” and “(R)”
will be displayed. Specify the save destination sample
number for the L channel and R channel respectively.
6 If you wish to delete the original sample data and over-
write it with the edited sample data, check “Overwrite”.
Normally, you will leave “Save to No.” at its default set-
ting, and execute without checking “Overwrite.” (
☞p.99
“
*1
: About “Overwrite””)
7 To execute the “Insert Zero” command, press the [F8]
(“OK”) key. To cancel, press the [F7] (“Cancel”) key.
From the
buffer
Size


