


107
SMPL
1.1
2.13.14.15.15.27.1
■ 3.1–1c: UTILITY
☞“Delete SMPL,” “Copy SMPL,” “Move SMPL,” “Rename
SMPL,” “SMPL To Stereo,” “Delete MS,” “Copy MS,”
“Move MS,” “Rename MS,” “MS To Stereo/MS To
Mono,” “Conv. To Prog,” “Keyboard Disp.” (1.1–3f)
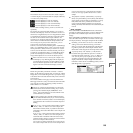
3.1–2: Edit2
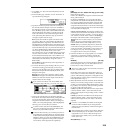
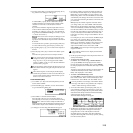
3.1–2a: Sample waveform display
Sample waveform display
The waveform of the “SMPL (Sample)” is displayed here
(
☞2.1–2a).
3.1–2b: Sample Address, Zero, LpL, (Grid Tempo)
S (Start) [0000000...]
Specifies the starting address for sample playback. This
value is in units of a sample address.
LpS (Loop Start) [0000000...]
Specifies the loop start address for sample playback. This is
valid when Loop is On. This value is in units of a sample
address, (
☞“S.Ofs” PROG 2.1–2b).
E (End) [0000000...]
Specifies the ending address for sample playback. This value
is in units of a sample address.
Loop Start Address and End Address must be located at
least eight addresses apart. This setting will be applied
automatically when you set the addresses.
Zero (Use Zero) [Off, On]
On (checked): “S (Start),” “E (End),” and “LpS (Loop
Start)” parameters can be set only at “zero-cross” addresses
where the waveform level crosses ±0 (the center line of the
waveform display). (
☞2.1–2b)
Off (unchecked): “S,” “E,” and “LpS” can be set in steps of
1. This is the normal setting.
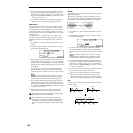
LpL (Loop Lock) [Off, On]
This fixes the length of the loop being edited.
On (checked): When the “LpS (Loop Start)” or “End”
address is edited, the “E (End)” or “LpS” will be automati-
cally adjusted so that the distance between “LpS” and “E
(End)” (i.e., the loop length) does not change. This is conve-
nient when you are creating a rhythm loop to match a spe-
cific tempo.
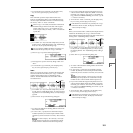
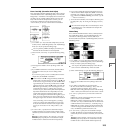
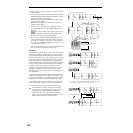
(Grid Tempo) [040...480(BPM)]
This displays vertical dotted lines in the “sample waveform
display” to indicate the resolution and tempo. Use this when
you wish to cut or edit the sample data based on a BPM
value or beat.
The grid will be displayed if you check and execute the
“Grid” (2.1–2e/3.1–2e) utility command. The spacing of the
grid is determined by the “Resolution” setting of the “Grid”
page menu command, relative to the playback pitch of the
base key (the key displayed in gray in “Keyboard & Index”
1.1–1a) at the tempo value you specify here. The grid will
begin at the “S (Start)” address (when looping is off) or at
the “LpS (Loop Start)” address (when looping is on). This
parameter can also be set from the 2.1: Sample Edit, Edit2
page.
This is not related to the setting of the REALTIME
CONTROLS C-mode [TEMPO] knob.
■ 3.1–2c: L/R
This option is valid only if a stereo sample is selected.
It switches the display between the L channel and R channel
of a stereo sample. (
☞2.1–2c)
■ 3.1–2d: ZOOM
These buttons let you zoom-in and zoom-out the “sample
waveform display” in the horizontal axis (sample addresses)
or vertical axis (sample level). (
☞2.1–2d)
■ 3.1–2e: UTILITY
For details on how to select the desired utility function, refer
to “2.1–2e: UTILITY.”
☞“Grid” (2.1–2e)
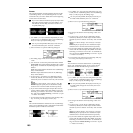
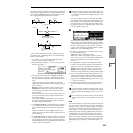
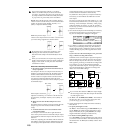
Truncate
This command deletes unwanted data that lies outside of
the “S (Start),” “LpS (Loop Start ),” and “E (End )” (3.1–2b).
After setting the start address, loop start address, and end
address of the sample, use this command to delete
unwanted sample data.
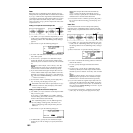
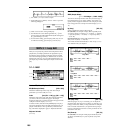
1 Use “SMPL” (3.1–1b) to select the sample that you wish
to edit, and use “S (Start)” or “LpS (Loop Start)” and “E
(End)” (3.1–2b) to specify the editing range.
You can press the [AUDITION] key to hear the portion
that will be left by the “Truncate” command.
2 In the Edit2 page “UTILITY,” choose “Truncate” to open
the following dialog box.
3.1–2a
3.1–2b
3.1–2e
3.1–2c 3.1–2d