


71
SEQ
1.1
1.22.12.23.13.23.33.44.14.24.34.45.15.26.17.17.2
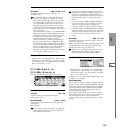
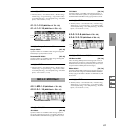
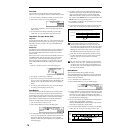
Get From Track
This command loads musical data from a track into the
specified pattern.
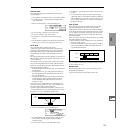
1 Use “Pattern” and “Pattern Select” to specify the pattern.
2 In “Pattern Param.”, specify the pattern length of the
“get” destination.
3 Select “Get From Track” to access the dialog box.
4 In “From: Song,” select the “get” source song.
5 In “Track,” select the “get” source track.
6 In “Measure,” specify the first measure of the “get”
source.
7 To execute the Get From Track command, press the [F8]
(“OK”) key. To cancel, press the [F7] (“Cancel”) key.
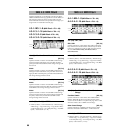
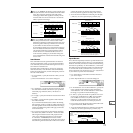
Put To Track
This command places a pattern into a track.
Unlike the Copy to Track command, this command only
places the pattern number in the song, so that when play-
back reaches that point, the pattern will be recalled. The
musical data of the pattern will not actually exist in the
track.
By creating patterns that contain frequently-used phrases or
drum patterns, and then placing them on the tracks, you can
conserve memory.
Be aware that when you edit a pattern, all locations in the
song where that pattern has been placed will be affected.
When you execute the Put to Track command, the musical
data will be affected as follows.
•Musical data previously existing at the “put” destination
will be erased.
• The pattern that you “put” will playback according to
the time signature that is specified by the measures of
the “put” destination.
• Control data such as pitch bend etc. (but not including
volume data) previously existing in the track will be
reset immediately before the measure at which the
pattern was “put.”
If you wish to use control data such as pitch bend in the
measures in which a pattern is “put,” you must first write
the control data into the pattern (
☞BG p.81).
To delete a pattern that has been placed in a track you can
use “Erase Measure” (5.2–1b), specifying the area in which
the pattern was “put,” and setting “Kind” to All.
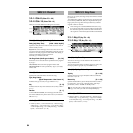
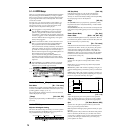
1 Select “Put to Track” to access the dialog box
2 In “Pattern Bank” and “Pattern Select,” select the “put”
source pattern. (By default, this will be the pattern
selected in page)
3 In “To: Track,” select the “put” destination track.
4 In “Measure,” specify the first measure of the “put” des-
tination.
5 To execute the Put to Track command, press the [F6]
(“Put”) key. When you execute the command, “Measure”
will automatically count up. If you wish to, you can con-
tinue “putting” the pattern. To exit the command, press
the [F7] (“Exit”) key.
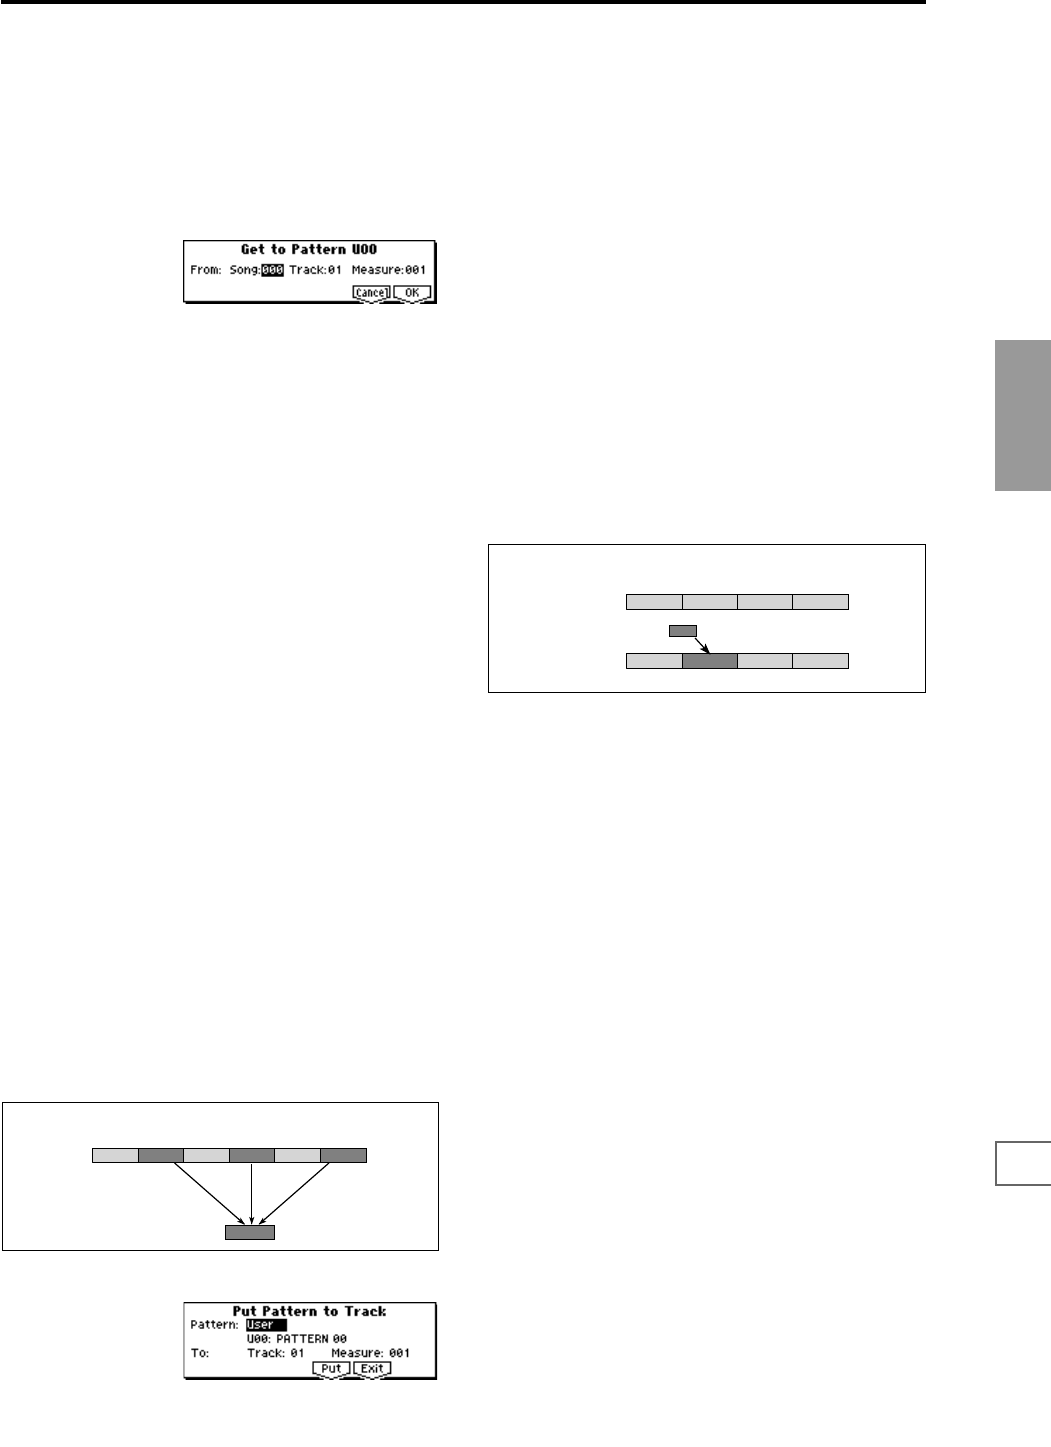
Copy To Track
This command copies the specified area of musical data
from the specified pattern to a track as musical data.
Unlike the Put To Track command, this command actually
writes the musical data of the pattern into the track, so that
you can edit the copied data in the track. Even if you later
edit the copy source pattern, the musical data of the song
will not be affected.
When you execute the Copy to Track command, the musical
data will be affected as follows.
•Musical data previously existing in the copy destination
measures will be erased.
• The musical data that is copied will playback according
to the time signature specified at the beginning of the
copy destination measures.
The procedure is the same as for the Put to Track command.
☞“Put To Track” (5.1–1c).
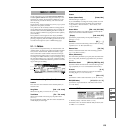
Rename Track
Press the [F5] (“Name”) key to access the dialog box and
rename the selected track.
Up to sixteen characters can be input. (☞BG p.43)
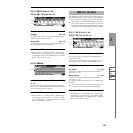
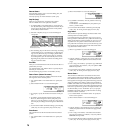
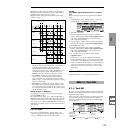
1
2
Track 10
(Drums)
3
4
5
6
Pattern 20
Example: Pattern 20 has been Put at measures 2, 4, and 6 of track 10. When those measures
are reached, pattern 20 is called and its data is played.
1 432
1 432
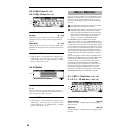
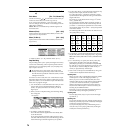
Pattern 41
Example: Copy the musical data of pattern 41 to measure 2
Before Copy
After Copy