MEDIA
1.1
151
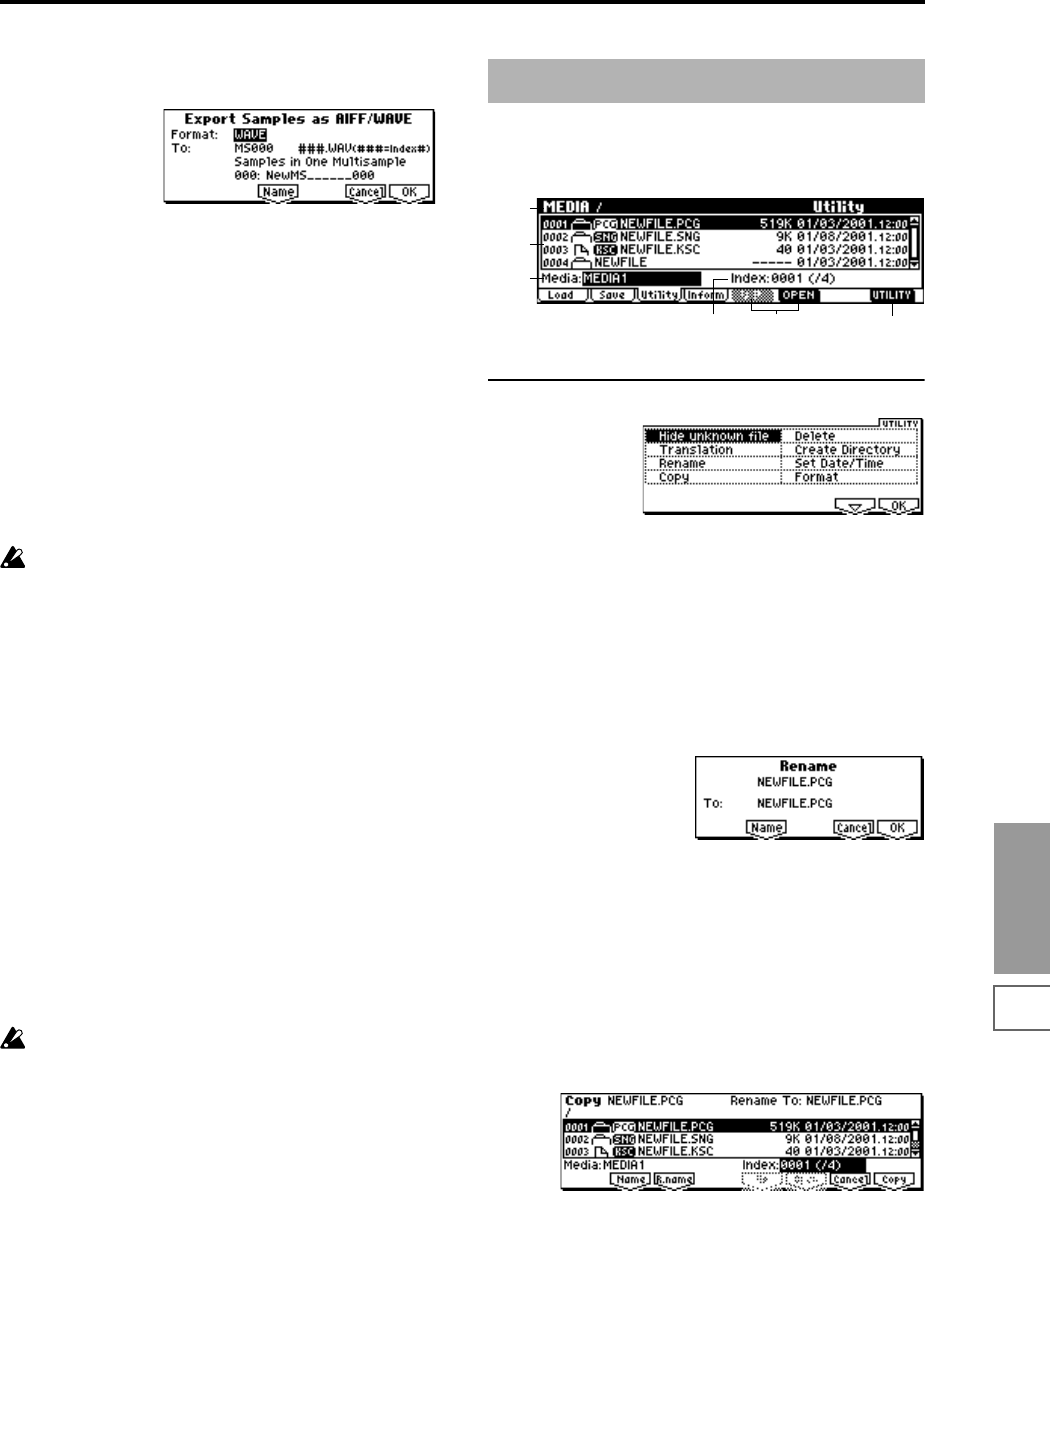
1 Select “Export Smpl AIF/WAV” to access the following
dialog box.
2 In “Format,” select either AIFF or WAVE as the file for-
mat for export.
3 Press the [F5] (“Name”) key to move to the text dialog
box, and specify the filename (
☞BG p.43).
4 In “To,” specify the content that will be exported.
One Sample: The single selected sample will be
exported.
The filename will be the filename of the .AIF or .WAV file.
Initially, the filename will automatically be set to the first
four characters (uppercase) of the sixteen-character sam-
ple name + the sample number.
[Examples]
0000: NewSample_0000→NEWS0000.AIF
0001: C#3-EGuitar→C#3-0001.WAV
If the sample data being exported will not fit on a single
volume of media (e.g., SmartMedia), it cannot be
exported.
All Samples: All samples will be exported.
It will not be possible to specify the filename. The file-
name will automatically be assigned as the first four
characters (uppercase) of the sixteen-character sample
name + the sample number.
Samples in One Multisample: All samples used by the
selected multisample will be exported.
Only five characters of the filename can be specified. The
five-character filename + the index number (001–128) in
the multisample will be assigned automatically.
Initially, the filename will automatically be set to the MS
+ the multisample number (000–999).
[Examples]
000: NewMS___000:
Sample selected for index 001 → MS000001.AIF
Sample selected for index 002 → MS000002.AIF
001: 108bpmDrLoop00:
Sample selected for index 001 → MS001001.AIF
Sample selected for index 002 → MS001002.AIF
When exporting All Samples or Samples in One Mul-
tisample, and all of the sample data does not fit on one
volume of media (e.g., SmartMedia), another dialog
box will appear, directing you to specify the next
media. (
☞p.148 “If the data does not fit on the media
when saving”) However at this time if a single sample
is larger than the capacity of the media, the sample can-
not be exported. Either specify media with a larger
capacity, or press “Skip” to omit exporting that sample
and proceed to exporting the next sample.
5 To export the data, press the [F8] (“OK”) key. To cancel
without exporting, press the [F7] (“Cancel”) key.
Here you can rename, copy, or delete the selected media or
file, create a new directory, and set the date and time.
After selecting a media or file, select the Utility menu [F8].
■ 1.1–3a: UTILITY
☞“Hide unknown file,” “Translation” (1.1–1f)
For details on how to select the desired utility function, refer
to “PROG 1.1–1c: UTILITY.”
Rename
This command renames the selected file or directory.
This command is valid only when a DOS file or a DOS direc-
tory is selected.
1 Select “Rename” to access the following dialog box.
2 Press the [F5] (“Name”) key to access the text dialog box,
and modify the name (
☞BG p.43).
3 To rename the file or directory, press the [F8] (“OK”) key.
To cancel, press the [F7] (“Cancel”) key.
Copy
This command copies the selected file or directory.
This command is valid only when a DOS file or a DOS direc-
tory is selected.
1 Select “Copy” to access the following dialog box.
2 In the upper left of the dialog box, “Copy” indicates the
selected file and directory name.
If you wish to change the file or directory that will be
copied, use the [F2] (“Name”) key to move to the text
dialog box, and specify the filename that you wish to
copy (
☞BG p.43).
(Can use */? as Wildcard): When you use the [F2]
(“Name”) key to access the text dialog box and specify
the name of the file or directory to be copied, you can use
“*” and “?” characters as wildcards. For example, if in the
above example you specify NEWFILE1.* (instead of
NEWFILE1.PCG), all filenames of NEWFILE1. with any
1.1–3: Utility
1.1–1a
1.1–1b
1.1–1c
1.1–3a
1.1–1e1.1–1d
