


111
SMPL
1.1
2.13.14.15.15.27.1
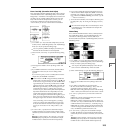
It is not possible to make settings that would cause “Src
BPM (Source BPM)” or “New BPM” to exceed the range
of 40–480.
It is not possible to make settings that would cause
“Ratio” to exceed the range of 50.00–200.00.
Press the [F5] (“Strch”) key to execute Time Stretch.
When you execute, the time-stretched samples will auto-
matically be assigned to keys D2 and above, so that you
can audition them by playing the keyboard or by chang-
ing “Index” and pressing the [AUDITION] key. You can
also keep trying various settings for “Ratio” and “New
BPM.”
Index: Selects the index of the sample that will be
sounded by the [AUDITION] key. After Time Stretch is
executed, the time-stretched samples will sound. How-
ever, it will not be possible to select Source (C2).
When you audition the time-stretched samples, the
sound you hear is the sound of each divided sample as
it will be played in Sequencer mode. If there is obtru-
sive noise or if the attack is not sound cleanly, return to
step
7 and adjust the “S (Start)” and “E (End)”
addresses, etc.
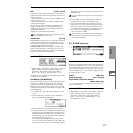
0 When you execute Save, use “With” to specify the data
that will be created simultaneously.
Program: If this check box is checked, the multisample
will be converted to a program when you save it. Specify
the destination program number.
In the case of a stereo sample, the program pan
will automatically be set. This allows the stereo position
in Sampling mode to be reproduced by the program.
Seq.Event: If this check box is checked, sequence data to
play the sliced samples will be created when you save.
Set “Song,” “Track,” and “Meter” to specify the song
number, track number, and time signature that will be
created.
Events will be created from measure 1 of the specified
track.
If you specify a vacant song number for the song, the
song will be created with the number of measures speci-
fied by the Sequencer mode parameter “Set Length” (a
parameter in the dialog box that appears when you cre-
ate a new song
☞p.51). The default is 64 measures.
If you executed Time Stretch, the Song parameter
“Tempo” (
☞p.50, SEQ 1.1–1a) of the created song will be
the value specified by “New BPM.” If you did not exe-
cute Time Stretch, it will be the value specified by
“Source BPM.” If a tempo event exists only at the begin-
ning of the master track, the tempo of that event will also
be set to the value specified for “New BPM” or “Source
BPM.”
If you save to a song that already contains data and the
time signature is different, the samples may not sound
as they did originally. You will need to set the time sig-
nature of the master track to match.
If both “Program” and “Seq.Event” are checked, the song
parameters “Program Select” (
☞p.54) and “Track Play
Loop” (
☞p.57) will also be set automatically.
For “Track Play Loop,” “Loop On” will be turned on and
“Play Intro” will be turned off. “Loop Start Meas (Loop
Start Measure)” will be set to 000, and “Loop End Meas
(Loop End Measure)” will be calculated according to
“Meter” and “Src BPM (Source BPM)” and set accord-
ingly.
You can hear the results immediately by selecting and
playing the song in Sequencer mode.
Normally you will leave both checked.
A If you wish to save, press the [F8] (“Save”) key. If you
decide not to save, press the [F7] (“Cancel”) key. When
you save, the samples and multisample will automati-
cally be saved to vacant samples and multisamples.
In the case of stereo samples, the samples and
multisample will be saved in stereo.
B By repeating steps 6–A you can create as many samples
and multisamples as desired.
C Press the [F7] (“Exit”) key to exit the Time Slice com-
mand.
Be aware that the created samples and multisample will
be lost if you exit Time Slice without saving the samples
or multisample (“Save” in the Save dialog box).
Before executing Time Slice on a long sample, you
should first divide the sample into measures. In some
cases, it may not be possible to assign the sample to the
keyboard or create sequence data.
Time Slices requires vacant samples, multisamples, and
relative parameters in order to execute. Be sure that
there is sufficient free area before you execute. If there is
insufficient free area, an error will occur.
If you open the Time Slice dialog box on the same sam-
ple, it will be sliced in the same way as previously.
These slice locations will also be used if you execute
Slice in “Time Stretch” (
☞3.1–2e), so that you can exe-
cute Time Stretch without having to make the settings
again.
If you wish to detect the attacks again or to re-do the
operation, change the “Sensitivity” after you open the
dialog box.
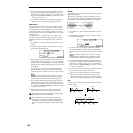
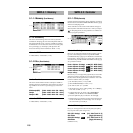
Time Stretch
Time Stretch is a function that modifies the tempo by length-
ening or shortening a sample without changing its pitch.
This is convenient when you wish to change the tempo of a
rhythm loop (drums) or a melodic sample (e.g., vocal,
strings, winds) to match the tempo of another sample or of
the sequencer. The TRITON Le provides two ways in which
Time Stretch can be executed. This command also supports
stereo samples.
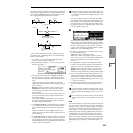
Sustaining
This type is suitable for sustained sounds such as vocal or
instruments. Using it to change the tempo of phrases such as
guitar or piano will also produce good results.
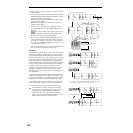
Slice
This type is suitable for decay-type instruments such as
drums. Using it to change the tempo of drum or percussion
loops will produce good results with minimal effect on the
attack.
There is a way to change the pitch as well when chang-
ing the tempo of a rhythm loop sample (“Pitch BPM
Adj.” 4.1–2b, “Detune BPM Adjust” COMBI 3.1–3b,
SEQ 3.1–5(6)b). You can create unique effects by raising
or lowering the pitch of drums etc.
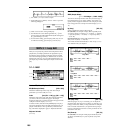
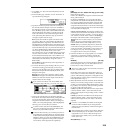
To use Time Stretch (Sustaining)
1 Use “SMPL” (3.1–1b) to select the sample that you wish
to time stretch as Sustaining.
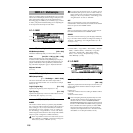
2 From the Edit2 page “UTILITY,” choose “Time Stretch”
to open the following dialog box.