


MOTIF XS Owner’s Manual
186
Voice mode Song mode Pattern mode Mixing mode Master mode Utility mode File mode
Performance
mode
Sampling
mode 1
Sampling
mode 2
Reference
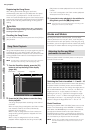
Song Recording
In the Song Record mode, you can use the sequencer to record your keyboard performance, track by track, to a selected
Song. Press the [I] (Record) button from the Song Play mode to enter the Song Record mode.
n Recording the audio data for a Song can be executed in the Sampling Record mode (page 244).
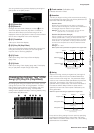
Realtime Recording
This method lets you record the performance data as it is
played, allowing you to capture all the nuances of an actual
keyboard performance. Recording can be carried out
while monitoring playback of other already-recorded
tracks. You can also transmit sequence data from an
external MIDI instrument to the MOTIF XS and
simultaneously record up to 16 tracks (page 190).
The Realtime recording consists of three methods:
Replace, Overdub, and Punch.
Song Recording procedure
Here in outline form is the process of recording a Song.
1 Press the [SONG] button to enter the Song
Play mode, then select a Song to be recorded
(page 178).
Select an empty Song if you wish to create a new Song
from scratch. If an empty Song is not found, delete any
unnecessary Song(s) by using the Clear Song Job
(page 207).
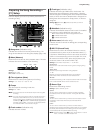
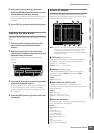
2 Press the [I] (Record) button to call up the
Record Setup display (page 187).
Prepare for recording by setting the time signature,
tempo, track to be recorded, Voice, and recording
method. If you wish to record using an Arpeggio, set
the necessary parameters from the Arpeggio display
(page 189).
3 Record your keyboard performance.
For details, see page 189.
4 Edit the recorded Song using the Song Job
(page 195) and Song Edit (page 192).
5 Press the [STORE] button to store the
recorded Song to internal User Memory.
The recorded Song will be lost when selecting a different
Song, calling up a different mode, or turning the power off.
Make sure to store the Song data to internal memory by
pressing the [STORE] button before selecting a different Song,
calling up a different mode, or turning the power off.
6 Save the created Song data to a USB storage
device or to a connected computer as desired
(page 278).
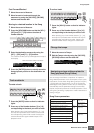
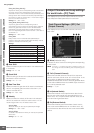
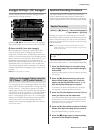
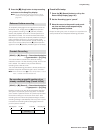
Song Store—[STORE]
This section covers how to store the Songs you have
recorded and edited. By executing the Store operation, the
Song data you have created will be maintained even if the
power has been turned off. Pressing the [STORE] button
calls up the Song Store window.
The following data will be stored by the Song Store
operation.
Sequence data
MIDI data generated and recorded by your keyboard
performance including the controller operations.
Tone Generator data
Mixing settings (Common Edit parameters and Part Edit
parameters)
n The Mixing Voices can be edited in the Mixing Voice Store
window (page 240).
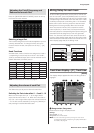
To use Song Store:
1 Call up the Song Store window.
Pressing the [STORE] button calls up the Song Store
window.
2 Select a destination Song number.
The name of the selected Song number is shown.
This operation overwrites any data already existing in the
destination Song.
3 Press the [ENTER] button. (The display
prompts you for confirmation.)
Press the [DEC/NO] button to cancel the Store
operation. Song Store is canceled, and operation
returns to the previous display.
4 Press the [INC/YES] button to execute the
Store operation.
After the Song has been stored, a “Completed”
message appears and operation returns to the Song
Play display.
n If there is not enough memory space for the Song/Pattern,
an alert message appears, and you will not able to store
any additional Songs/Patterns. If this happens, delete
unnecessary Patterns/Songs by using the Song/Pattern
Job, then try the Store operation again.
CAUTION
CAUTION