


Connecting to
a Computer
Creating a Song by Using a Computer
MOTIF XS Owner’s Manual
48
n
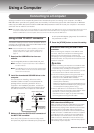
The above explanation can be applied to the case when
connecting the MOTIF XS to the computer via an IEEE1394 cable
as well as via a USB cable.
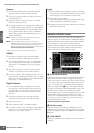
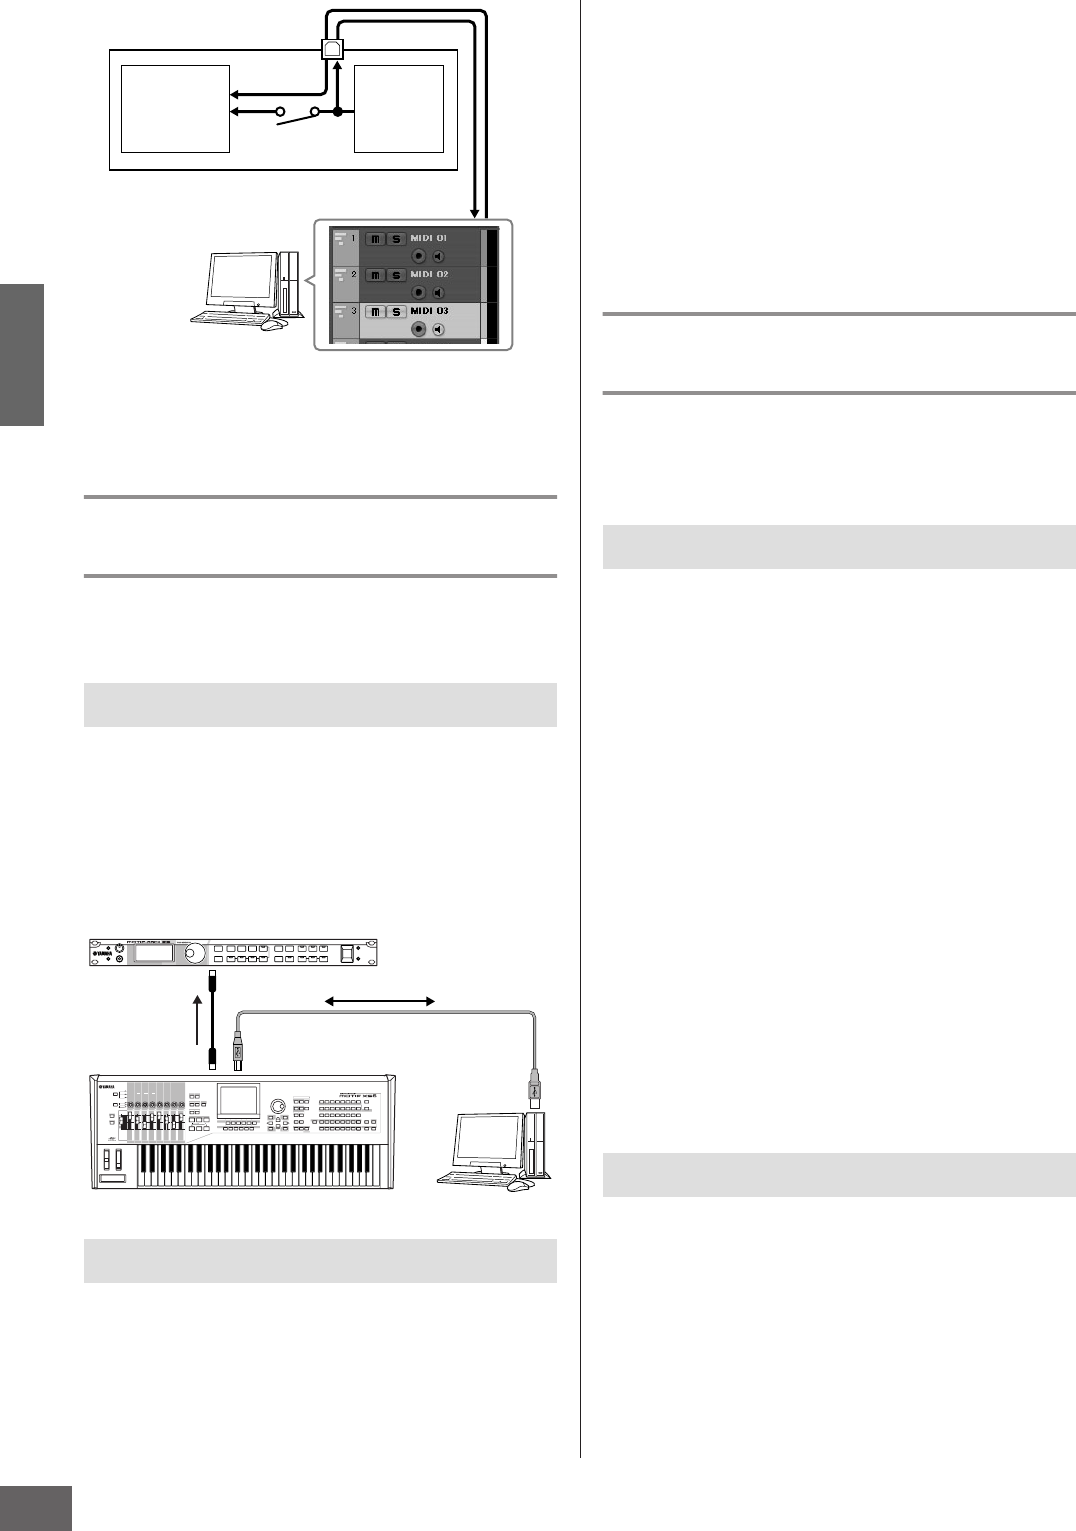
Using another tone generator
together with the MOTIF XS
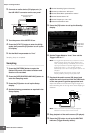
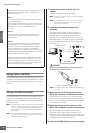
By using another tone generator (such as the MOTIF-RACK
ES) together with the MOTIF XS as illustrated below, you can
play up to 32 Parts simultaneously.
1
Connect the MIDI OUT connector to the MIDI IN
connector of the external tone generator module
such as MOTIF-RACK ES, as illustrated below.
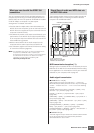
2
Make sure to set the MOTIF XS to the multi-
timbral tone generator by entering the Song
mode or Pattern mode.
1
Set the MIDI output port of the tracks (for playing
the MOTIF XS) to Port 1 of USB or mLAN.
When connecting via a USB cable, set this to “Yamaha
MOTIF XS6(7, 8)-1” or “YAMAHA MOTIF XS6(7, 8) Port1.”
When connecting via an IEEE1394 cable, set this to
“mLAN MIDI Out” or “MOTIF XS.”
2
Set the MIDI output port of the tracks (for playing
the MOTIF-RACK ES) to Port 3 of USB or mLAN.
When connecting via a USB cable, set this to “Yamaha
MOTIF XS6(7, 8)-3” or “YAMAHA MOTIF XS6(7, 8) Port3.”
When connecting via an IEEE1394 cable, set this to
“mLAN MIDI Out (3)” or “MOTIF XS MIDI OUT.”
n
Please keep in mind that the MIDI Thru Port of the MOTIF XS
(in other words, the port with which the received MIDI data is
to be transmitted to another external device via the MIDI
OUT connector) is fixed to 3.
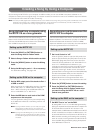
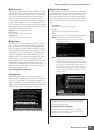
Using the MOTIF XS as an audio
interface
By using the A/D INPUT connector and mLAN connector, the
MOTIF XS can conveniently be used as an audio interface for
your computer. Note that you need install the optional
mLAN16E2 when using the MOTIF XS6/7 for this application.
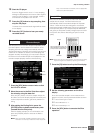
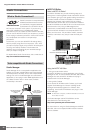
1
Set the parameters as below so that the audio
signal input via the A/D INPUT connector is
output via the mLAN connector to the computer.
In the Voice mode, press the [UTILITY] button to enter the
Utility mode, press the [F4] button followed by the [SF1]
button to call up the Output display (page 265). From this
display, move the cursor to the Output Select of the A/D
Input, then select one of the following settings: “m1&2” –
“m9&10,” “m11&12” and “m13&14.”
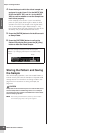
2
Set the parameters as below so that the audio
signal output from the computer and input to the
MOTIF XS via the mLAN connector is output from
the OUTPUT L/R or ASSIGNABLE OUTPUT L/R
connectors.
From the Output display called in step 1, move the cursor
to the Output Select of the mLAN, then select “L&R” or
“asL&R.”
n The setting here applies to the audio signals output from
mLAN ports 3 and 4 of a computer.
3 Press the [STORE] button to store this setting.
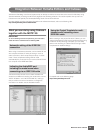
Install the AI Driver and make the proper settings. Select
ASIO mLAN (when using an ASIO driver) or mLAN Audio
Out (when using a WDM driver) as Audio driver.
n
Confirming the Audio Ports is much easier when using Cubase
and installing the Extensions for Steinberg DAW. For details, see
below.
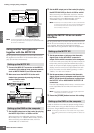
Setting up the MOTIF XS
Setting up the DAW on the computer
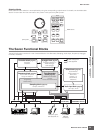
USB TO HOST connector
Tone generator
block
(recognizing
MIDI Channel 3
data)
Keyboard
(output via
MIDI
Channel 1)
Local Control
= off
Computer
(Cubase, etc.)
MIDI Through = on
MOTIF XS
IN
CH1
OUT
CH3
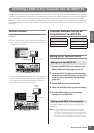
MOTIF XS
MOTIF-RACK ES, etc.
MIDI IN
connector
MIDI OUT
connector
USB TO HOST connector
Computer
Setting up the MOTIF XS
Setting up the DAW on the computer