


File Management (File mode)
MOTIF XS Owner’s Manual
276
Voice mode Song mode Pattern mode Mixing mode Master mode Utility mode File mode
Performance
mode
Sampling
mode 1
Sampling
mode 2
Reference
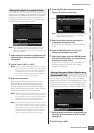
8 [SF3] Rename
Pressing this button calls up the window for entering the
new name of the selected file. The File name can contain
up to 20 characters. For detailed instructions on naming,
refer to “Basic Operation” on page 82.
9 [SF4] Delete
Pressing this button to call up the Delete window.
) [SF5] New Dir (New Directory)
Pressing this button creates a new directory in the current
directory. The directory name can contain up to 10
characters. For detailed instructions on naming, refer to
“Basic Operation” on page 82.
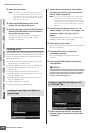
! [F1] File
Pressing this button calls up the File window from another
window in the File mode.
@ [F2] Mount
Pressing this button calls up the Mount window. For details,
see page 277.
# [F3] Format
Pressing this button calls up the Format window. For
details, see page 278.
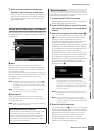
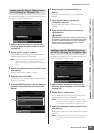
1 Press the [FILE] button to enter the File mode.
The File window (page 275) appears.
2 Mount the memory devices to which the file is
saved or from which the file is loaded.
The USB storage device is automatically mounted as
soon as it is connected to the USB TO DEVICE
connector on the rear panel. The hard disk drive of the
computer connected to the MOTIF XS via the network
can be mounted in the Mount display (page 277).
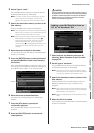
3 Select the desired device.
Select the desired device from the ones mounted in
step 2.
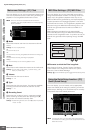
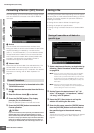
4 Move the path to the desired directory.
Select the desired directory in the selected device. To
go down from the current directory, move the cursor to
the desired directory in the Directory/File list then press
the [ENTER] button. To go up from the current directory,
move the cursor to the top line in the Directory/File list
then press the [ENTER] button. The Dir line indicates
the current directory name with the path and the lower
box lists the directories and files belonging to the
current directory.
n If you wish to create a new directory and save the file
there, press the [SF5] New Dir button. For detailed
instructions on creating a new directory, see the left
column.
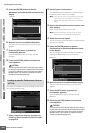
5 Select the desired data type from the Type
column (4).
In the Directory/File list box, only files related to the
selected file type are listed.
n Depending on the mode selected before calling up the
File mode, the available data types differ. If you cannot
find the data type which you wish to handle, for example
“voice,” press the [EXIT] button to exit from the File
window, press the [VOICE] button to enter the Voice
mode, then press the [FILE] button to call up the File
window again.
6 Select the desired file by moving the cursor in
the Directory/File list (3).
This operation is not necessary when you execute Save
or New Directory. When you wish to execute the
Rename or Delete operation, press the [SF3] Rename
button or the [SF4] Delete button. For detailed
instructions on renaming and deleting, see page 276
and left column.
Follow the instructions below to change the name of the
file.
1 Select a file to be renamed by moving the cursor in
the Directory/File list.
2 Press the [SF3] button to call up the Input Character
window.
3 Enter the new name of the selected file.
4 Press the [ENTER] button to actually change the
name of the selected file.
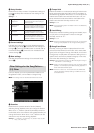
Follow the instructions below to delete a file.
1 Select a file to be deleted by moving the cursor in the
Directory/File list.
2 Press the [SF4] button to call up the Delete window.
3 Press the [ENTER] button to delete the selected file.
Follow the instructions below to create a new directory.
1 Press the [SF5] button to call up the Input Character
window.
2 Enter the name of the new Directory.
3 Press the [ENTER] button to actually enter the name
of the newly created directory.
Basic Procedure in the File mode