


Installing Optional Hardware
MOTIF XS Owner’s Manual
294
Appendix
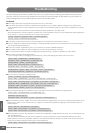
mLAN16E2
The optionally available mLAN expansion board
(mLAN16E2) can be installed to the MOTIF XS6 and MOTIF
XS7. The MOTIF XS8 is equipped with two mLAN
connectors equivalent to the mLAN16E2 by default.
1 Turn the power of the MOTIF XS off, and
disconnect the AC power cord. Also, make
sure to disconnect the MOTIF XS from any
connected external devices.
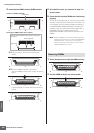
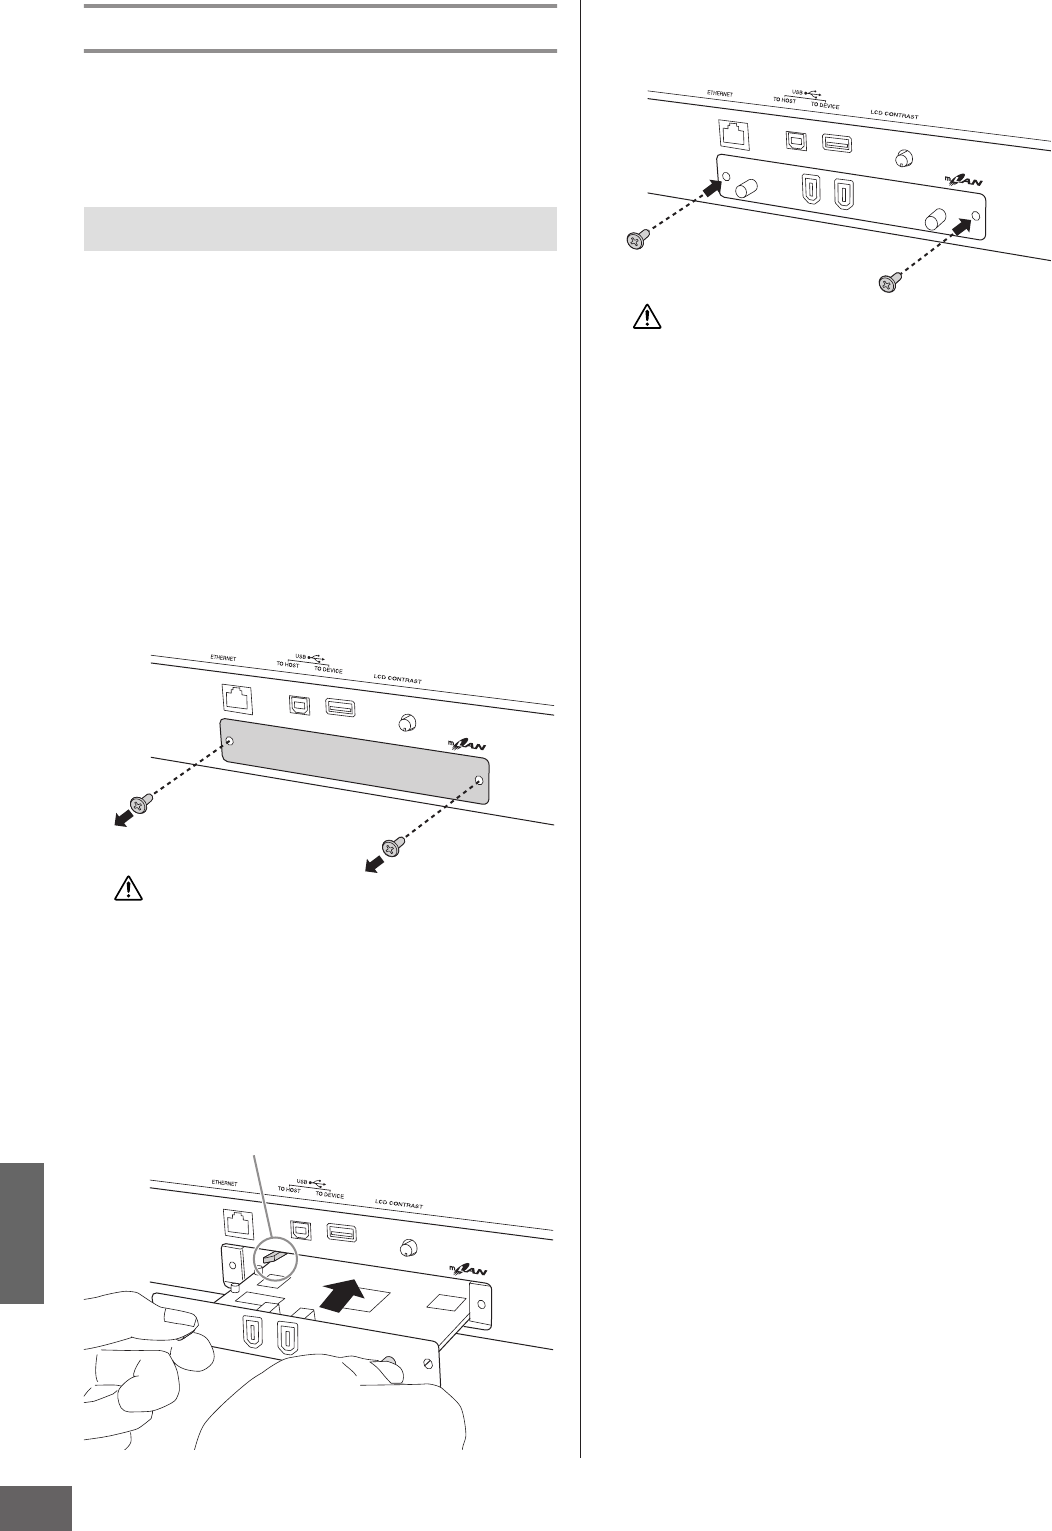
2 Remove the cover for the mLAN16E2 from the
rear panel.
With the rear panel of this synthesizer facing you,
remove the two screws from the cover.
Important
Keep the removed screws in a safe place. They will be used
when installing the mLAN16E2. Be careful not to misplace
them. Keep the cover and fixing screws in a safe place for
future use.
After removing the cover, you will see the metal fittings at the
bottom of the opening. To avoid cutting or scraping your
fingers, be careful not to touch them when installing the
mLAN16E2.
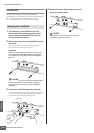
3 Insert the mLAN16E2 along the guide rails.
Push the mLAN16E2 all the way into the slot so that the
connector at the end of the mLAN16E2 is correctly
inserted into the connector inside the slot.
4 Replace the cover with the two screws you
removed in step 2 above.
Malfunctions or incorrect operation may occur if the
mLAN16E2 is not properly fastened.
Installing the mLAN16E2
CAUTION
Guide rails
CAUTION