


Editing a Normal Voice
MOTIF XS Owner’s Manual
97
Voice mode
Song mode
Pattern mode
Mixing mode
Master mode
Utility mode
File mode
Performance
mode
Sampling
mode 1
Sampling
mode 2
Reference
Convenient functions for editing
Voices
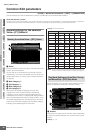
In the Voice Edit mode, you can always use the number
buttons [1] – [8] to select an Element. The [1] – [8] buttons
indicate the Element being edited. To switch each Element
on/off, turn the [MUTE] button on, and then use number
buttons [9] – [16].
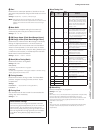
If you want to turn on only the Element you're editing, press
the [SOLO] button to turn it on, and then press a number
button [1] – [8] or [9] – [16]. For example, if you want to turn
on only Element 1 and edit it, press the [1] or [9] button to
make the [1] indicator light and the [9] indicator flash.
The [E] (Edit) indicator will appear in the Voice Edit mode
as well as in the Voice Play mode. For details, see page 97.
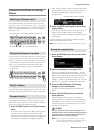
The Compare function lets you switch between the just-
edited Voice and its original, unedited condition, allowing
you to hear how your edits affect the sound.
1 Press the [EDIT] button to call up the Compare
mode.
In the Voice Edit mode (with the [EDIT] lamp lit), press
the [EDIT] button so that its lamp flashes. The [E]
indicator at the top right of the screen will change to the
[C] indicator and the Voice settings prior to editing will
temporarily be reinstated for comparison purposes.
When the [E] indicator is shown in the Voice Play mode,
press the [EDIT] button to enter the Voice Edit mode
then press the [EDIT] button again to call up the
Compare mode.
2 Press the [EDIT] button again to return to the
original status.
When the [C] indicator is shown at the right top of the
display, press the [EDIT] button (the lamp lights
continuously, and the [C] indicator changes back to the
[E] indicator).
Compare the edited sound with the unedited sound as
desired by repeating steps 1 and 2.
n While Compare is active, you cannot make edits to the Voice.
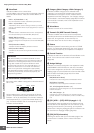
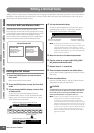
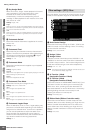
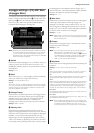
1 Press the [STORE] button to call up the Voice
Store window.
2 Set the destination for storing the Voice.
Select the destination User Bank (USER 1 – 3 for the
Normal Voice, USER DR for the Drum Voice) and the
Voice number to be stored by using the data dial, [INC/
YES] and [DEC/NO] buttons. You can also use the
[USER 1] – [USER 3], [USER DR], Group [A] – [H], and
Number [1] – [16] buttons to specify the destination.
3 Press the [ENTER] button. (The display
prompts you for confirmation.)
To cancel the Store operation, press the [DEC/NO]
button.
4 Press the [INC/YES] button to execute the
Store operation.
After the Voice has been stored, a “Completed”
message appears and operation returns to the Voice
Play display. In this condition, the just stored Voice is
selected as shown in the display, letting you instantly
play the just edited Voice.
When you execute the Store operation, the settings for the
destination memory will be overwritten. Important data should
always be backed up to a separate USB storage device. For
detailed instructions on saving, see page 278.
n Keep in mind that the destination of “Store” is internal
memory (Flash ROM) whereas the destination of “Save” is
external memory such as a USB storage device.
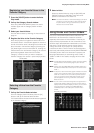
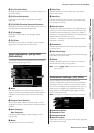
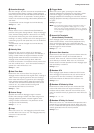
Switching an Element on/off
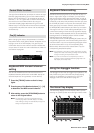
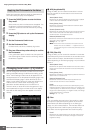
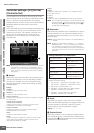
Soloing the Element to be edited
The [E] Indicator
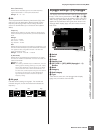
Compare function
PART SELECT ARP ON/OFF
PART MUTE ARP HOLD
PERFORMANCE
CONTROL
123456 87
910111213141516
TRACK
MUTE SOLO
Use number buttons [1] – [8] to select the Element you want to edit
Use number buttons [9] – [16] to turn each Element on/off
PART SELECT ARP ON/OFF
PART MUTE ARP HOLD
PERFORMANCE
CONTROL
123456 87
910111213141516
TRACK
MUTE SOLO
Use number buttons [1] – [8] / [9] – [16] to turn on only the Element
you want to edit
Storing the created Voice
Compare indicator (sound prior to editing)
CAUTION