


Voice mode
Song mode
Pattern mode
Mixing mode
Master mode
Utility mode
File mode
Performance
mode
Sampling
mode 1
Sampling
mode 2
Reference
Pattern Playback
MOTIF XS Owner’s Manual
213
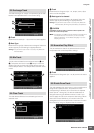
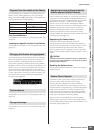
5 Assign the desired Phrase to each track.
Move the cursor to a track then set a Phrase number by
using the data dial, [INC/YES] and [DEC/NO] buttons.
Phrase assignment can be executed also during
Pattern playback.
To confirm whether the Phrase is assigned properly or
not, solo the track to which the Phrase is assigned by
following the procedure below. Press the [SOLO] button
so that its indicator lights and press any of the Number
[1] – [16] buttons to select a track to which you
assigned the Phrase.
There are three methods that can be used to create a
Phrase:
• Recording the new phrase using the Pattern Record
function (page 218)
• Copying the Phrase from another Pattern by using
the [SF5] button.
• Converting a Part of the Song data to a Phrase by
using the Get Phrase from Song Job (page 225).
6 Repeat steps 3 through 5 above to finalize an
entire Pattern.
Create Sections used for the intro, melody A, melody B,
main theme and ending of the entire Song.
n It is a good idea to use the Copy Pattern Job (page 227) if
you wish to create a Section that is based on or sounds
similar to an already existing Section.
7 Press the [STORE] button to store the Pattern.
For detailed instructions on storing a Pattern, see
page 218.
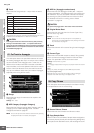
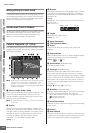
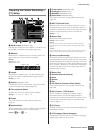
Pattern Chain—[F5] Chain (Pattern
Chain)
Pattern Chain allows you to string several different Sections
together to make a one complete Song. For example,
create a Section A for the intro, a Section B for the verse, a
Section C for the chorus, and a Section D for the ending—
and you have the basic blocks to build an original Song.
The created Pattern Chain data can be converted to MIDI
sequence data and stored to a Song. To call up the Pattern
Chain display, press the [F5] Chain button from the Pattern
Play mode.
A Pattern Chain can be created for each Pattern, letting
you call up a different, dedicated Pattern Chain each time
you select a Pattern.
The following events can be recorded to the Pattern Chain.
• Playback order of Sections
• Pattern track on/off—Solo and Mute
•Tempo change
• Time signature change
There are two methods to create a Pattern Chain:
Recording playback of a Pattern in the Pattern Record
display in real time, and programming the playback order
of Sections one by one in the Pattern Chain Edit display.
The Pattern Chain data recorded in real time can be edited
in the Pattern Chain Edit display.
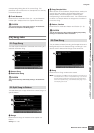
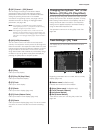
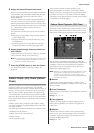
The Pattern Chain display lets you play the Pattern Chain
data you’ve created. Press the [F5] Chain button from the
Pattern Play mode to go to the Pattern Chain Play display.
The operation in the Pattern Chain display is basically
same as in the Pattern Play display with the exception that
the Pattern number cannot be selected. For details on
parameters which are not explained here, refer to the
Pattern Play display (page 210).
n Depending on the selected parameter, the NUM icon is shown
at the tab menu corresponding to the [SF6] button. In this
condition, you can use the [SF1] – [SF5] and [F1] – [F5]
buttons as number buttons by pressing the [SF6] NUM button.
For details, see page 81.
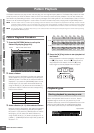
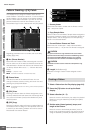
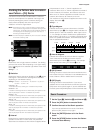
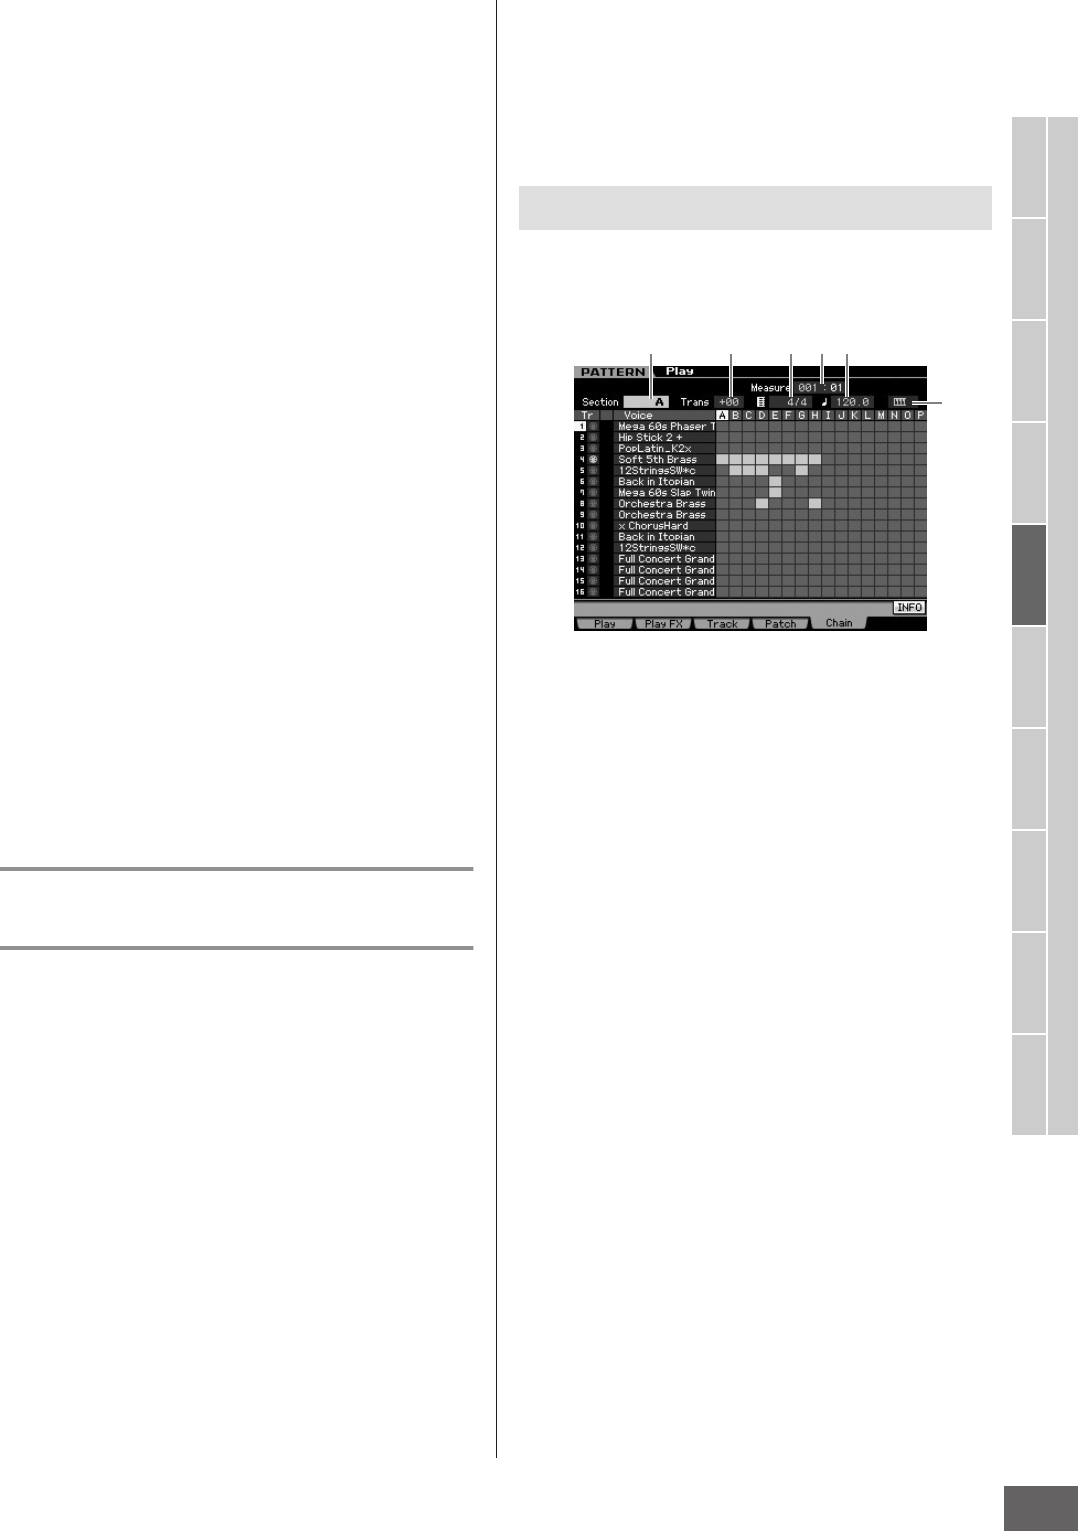
1 Section
Indicates the currently played Section. “NEXT” will be
shown here when playback is waiting for the timing of the
Section change.
2 Trans (Transpose)
Adjusts the pitch of the Pattern Chain playback in semitone
increments.
Settings: -36 – +0 – +36
3 Time signature
Indicates the time signature currently assigned to the
Pattern. During playback, the current time signature is
shown here.
4 Measure
Indicates the measure number of the currently playing
Pattern Chain. You can start playback from the middle of
the Pattern Chain by specifying the measure here then
pressing the [F] (Play) button.
Settings: 001 – 999
Pattern Chain Playback—[F5] Chain
1234
6
5