Introduction
15
Parts and their functionObjects in the display and
their function
Basic operationPreparationsListening to the demo song
1-3. Connections when using external record-
ing devices
Here are the connections for recording your song onto an ex-
ternal device (DAT, MD, tape recorder, etc.).
• Optical digital (S/P DIF) input jack of a DAT or MD
↔ [S/P DIF OUT] of the D1200 (use an optical digital
cable for connections)
• AUX IN jacks of a cassette tape recorder or other ana-
log recording device ↔ [MASTER OUT L/R] jacks of
the D1200
1-4. Connections when using an external effect
If you apply an external effect to the signal that is sent from
the [AUX OUT] jack, connect the return from the effect unit
to the [INPUT 1]–[INPUT 4] jacks.
You can select whether the effect will be returned to the
mixer channels in the same way as for conventional in-
puts, or sent directly to the master bus. (→p.45)
1-5. Pedal connections
Using a pedal switch to perform manual punch recording
or play/stop operations
Connect a pedal switch (separately sold option: PS-1) to
the [FOOT SWITCH] jack.
Using a foot pedal to control an effect
Connect an expression pedal (separately sold option:
EXP-2, XVP-10) to the [EXPRESSION PEDAL] jack.
A volume pedal will not function correctly even if con-
nected.
1-6. MIDI connections
Controlling effects or switching scenes from an external
MIDI device
• MIDI OUT connector of the external MIDI device ↔
[MIDI IN] connector of the D1200 (→p.79)
Synchronizing the D1200 with a MIDI sequencer etc.
• MIDI IN connector of your sequencer ↔ [MIDI OUT]
connector of the D1200 (use a MIDI cable for connec-
tions)
• MIDI OUT connector of your sequencer ↔ [MIDI IN]
connector of the D1200 (→p.79)
1-7. USB connections
Save or backup data on your pc
•Your PC’s USB connector ↔ the D1200’s [USB] con-
nector (use a USB cable for connections) (→p.77)
2. Turning the power on/off
2-1. Connecting the power supply
1 Connect the included AC/DC power.
Connect the included power cable to the AC/DC power
supply.
2 Plug the power cable from the AC/DC power supply
into an AC outlet.
2-2. Turning the power on
Follow this procedure to turn on the power of the D1200 and
each connected device.
Before you turn on the power, be sure to set the volume
of each device to the minimum position, and turn on the
power switches starting with the “upstream” devices
that output the audio signal.
1 Lower the D1200’s [MASTER] fader to –∞.
Lower the volume on external devices to the minimum
position.
2 Turn on the power of external input devices, such as a
keyboard that sends an audio signal to the D1200.
3 Press the [POWER] switch of the D1200 to turn on the
power.
The display will show the opening message. Then the
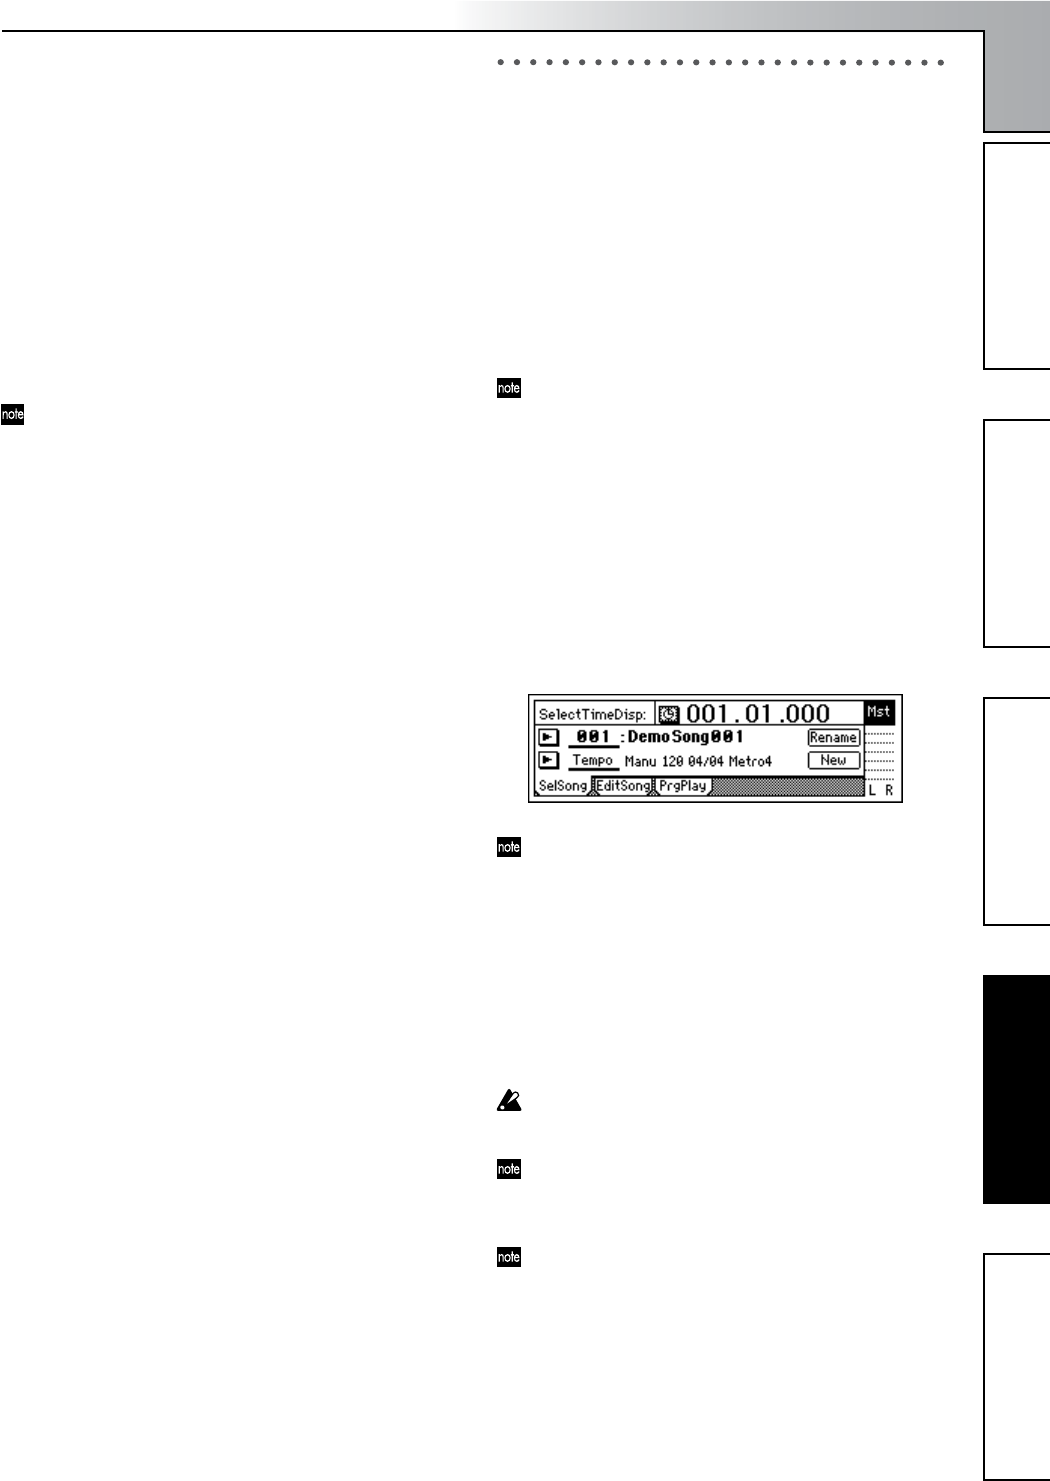
[SONG] “SelSong” tab page will appear.
The song number that had been selected when you
turned off the power will be selected.
4 Turn on the power of external output devices such as
the monitor system to which the audio from the D1200
is being sent.
2-3. Turning the power off
Turn off the power when you are finished all operations
such as song playback and recording. Use the following pro-
cedure to turn off the power of the D1200 and of each con-
nected device.
Never disconnect the AC/DC power supply until the
power has been turned completely off. Doing so may
cause data to be lost.
When turning the power off, set the volume of all devic-
es to the minimum position, and turn off the power
switches starting with the “downstream” devices to
which the audio signal is being sent.
Audio that you record on the D1200 and mixer settings
etc. that you make are saved automatically when you se-
lect or change songs, or when you turn off the power.
However, effect settings you edit outside of Modeling
mode will be lost if you turn off the power without sav-
ing them.
1 If you want to keep the effect settings you edited out-
side of Modeling mode, save them (→p.43).
2 Lower the [MASTER] fader of the D1200 to –∞. Set the
volume of externally connected device to the minimum
position.
Preparations


