


38
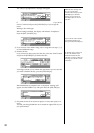
4 Record the sound as processed by the EQ. (→p.53)
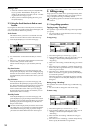
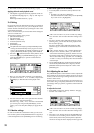
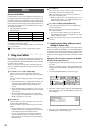
Applying EQ to the track playback sound
• The EQ that is applied to the track playback sound can
be adjusted in the [EQ] “Eq1–4,” “Eq5–8,” and “Eq9–12”
tab pages.
Refer to Quick Start Tutorial. (→p.26)
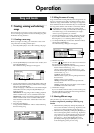
2-4. Pairing
By specifying adjacent odd-numbered and even-numbered
channels (1–2, 3–4, 5–6) as a pair, you can adjust the values
of both channels simultaneously by editing the value of the
odd-numbered channel.
This is convenient when you want to make mixer settings for
a stereo-recorded track.
The following settings can be paired.
• [TRACK STATUS] key
• EQ (channel EQ)
•EffSnd1+2 (effect send)
• AuxSend (external send)
•[PAN] knob
• [CHANNEL] fader
The [TRACK STATUS] keys and [CHANNEL] faders
will be paired automatically when you pair two chan-
nels. For [EQ], [EffSnd], [AuxSend], and [Pan], you can
specify individually whether pairing will be enabled.
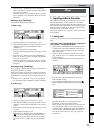
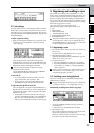
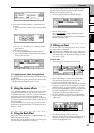
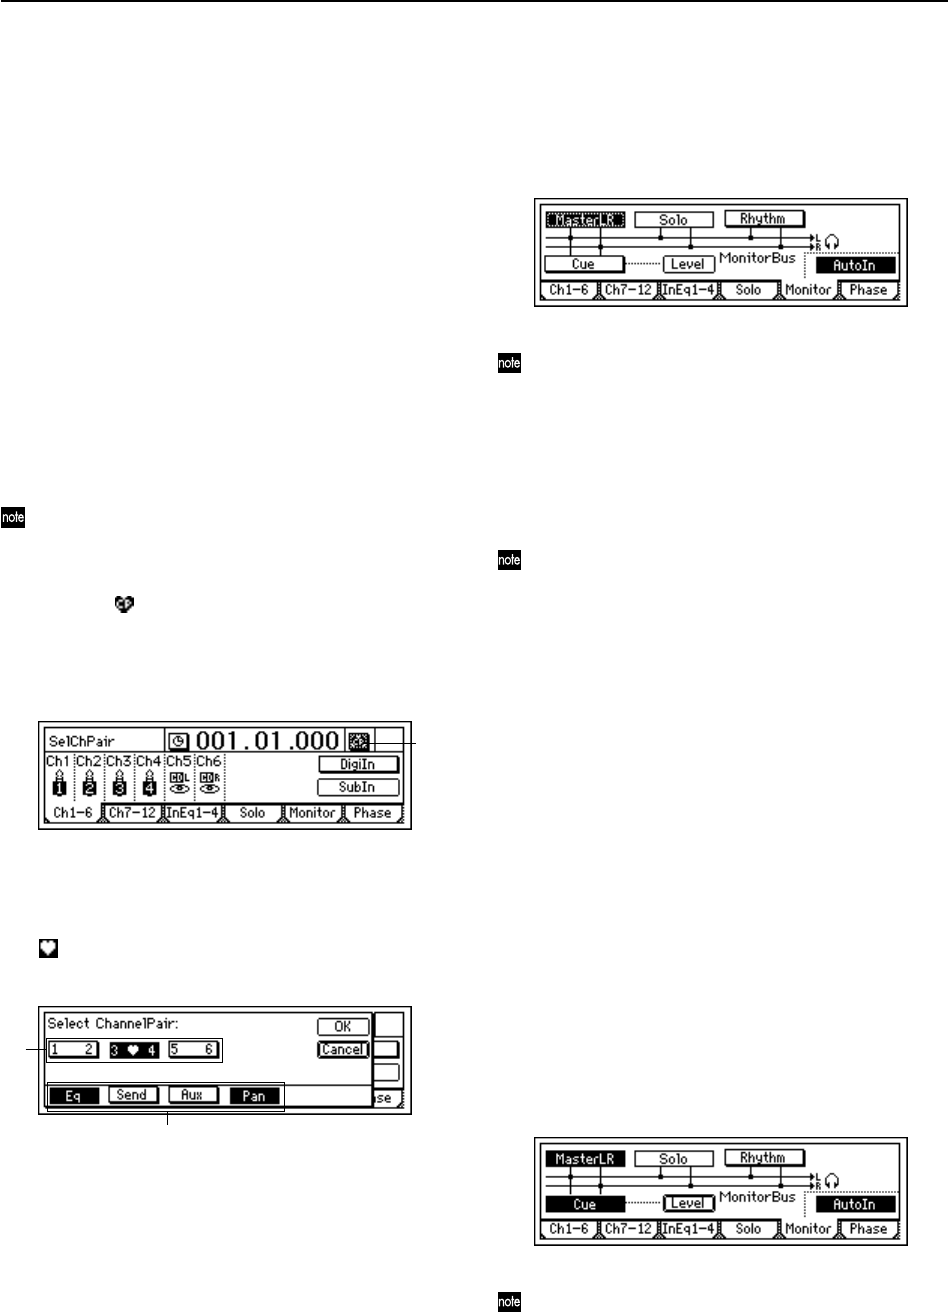
1 Select the “ ” (SelChPair) button in the [INPUT/OUT-
PUT/SOLO], [EQ], or [INSERT EFFECT] pages, and
press the [ENTER] key to open the “Select Channel
Pair” dialog box.
2 Here you can select which channels you would like to
pair. Select one of the “1 2”–“5 6” button, and press the
[ENTER] key so that the button is displayed with a
“.”
3 Select the functions that will be paired for the channels
you selected in “Select Channel Pair.”
Select the “Eq,” “Send,” “Aux,” and “Pan” function that
you want to pair, and press the [ENTER] key to turn
pairing “On.” Press the [YES/OK] key to apply the set-
ting.
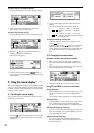
2-5. Monitor settings
In order to monitor the sound of the D1200, you must con-
nect monitor speakers to the [MONITOR OUT L/R] jacks, or
connect headphones to the [PHONES] jack for monitoring.
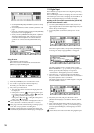
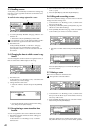
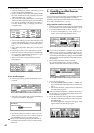
To select which signals will be monitored
1 Access the [INPUT/OUTPUT/SOLO] “Monitor” tab
page.
• Normally you will select “MasterLR.”
Select the “MasterLR” button and press the [ENTER]
key to turn it “On” (highlighted).
If the “Solo” function is on, it will overide any settings
here. Turn the “Solo” function off before making a selec-
tion.
2 For mixer channels whose [TRACK STATUS] is PLAY
(LED lit green), you will hear the track playback when
the recorder is playing.
For mixer channels whose [TRACK STATUS] is REC
(LED lit red), you will hear the sound of the external
input.
If the “AutoIn” button is “On,” and the [TRACK STA-
TUS] of a mixer channel is “REC,” you will hear the
sound of that track during playback, and the sound of
the external input while recording and when stopped.
This is useful when doing “punch in/out” recording. If
“AutoIn” is “Off,” you will always hear the sound of the
external input.
3 Use the [MONITOR OUT LEVEL] knob to adjust the
volume of the [MONITOR OUT L/R] jacks, and the
[PHONES LEVEL] knob to adjust the volume of the
[PHONES] jack.
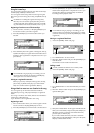
2-6. Adjusting the cue level
The [CHANNEL] faders of the D1200 are used to adjust both
the recording level of each track and the volume level of each
channel, so the levels being recording will be the same as the
monitor volume levels.
For this reason, a Cue Level function is provided so that you
can monitor using a completely different mix of volume and
pan settings while you perform, regardless of the master LR
settings.
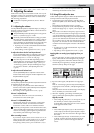
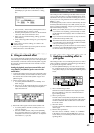
To adjust the Cue Level
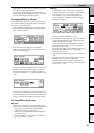
1 In the [INPUT/OUTPUT/SOLO] “Monitor” tab page,
turn the “Cue” button “On.”
If the “Solo” function is on, it will overide any settings
here. Turn the “Solo” function off before making a selec-
tion.
2 Select the “Level” button and press the [ENTER] key to
access the Cue Level setting screen. Select the icons for
each channel, and turn the [VALUE] dial to adjust the
volume level and pan that is displayed in the upper left.
1
2
3