


48
The D1200 contains numerous rhythm patterns in a variety
of time signatures (→p.156: “Rhythm Pattern List”).
When you have a sudden idea for a song, you can record a
performance immediately by using these rhythm patterns as
a guide track.
You can also join different rhythm patterns to create drum
patterns for an entire song.
1. Selecting and playing a rhythm
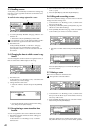
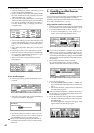
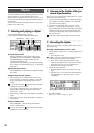
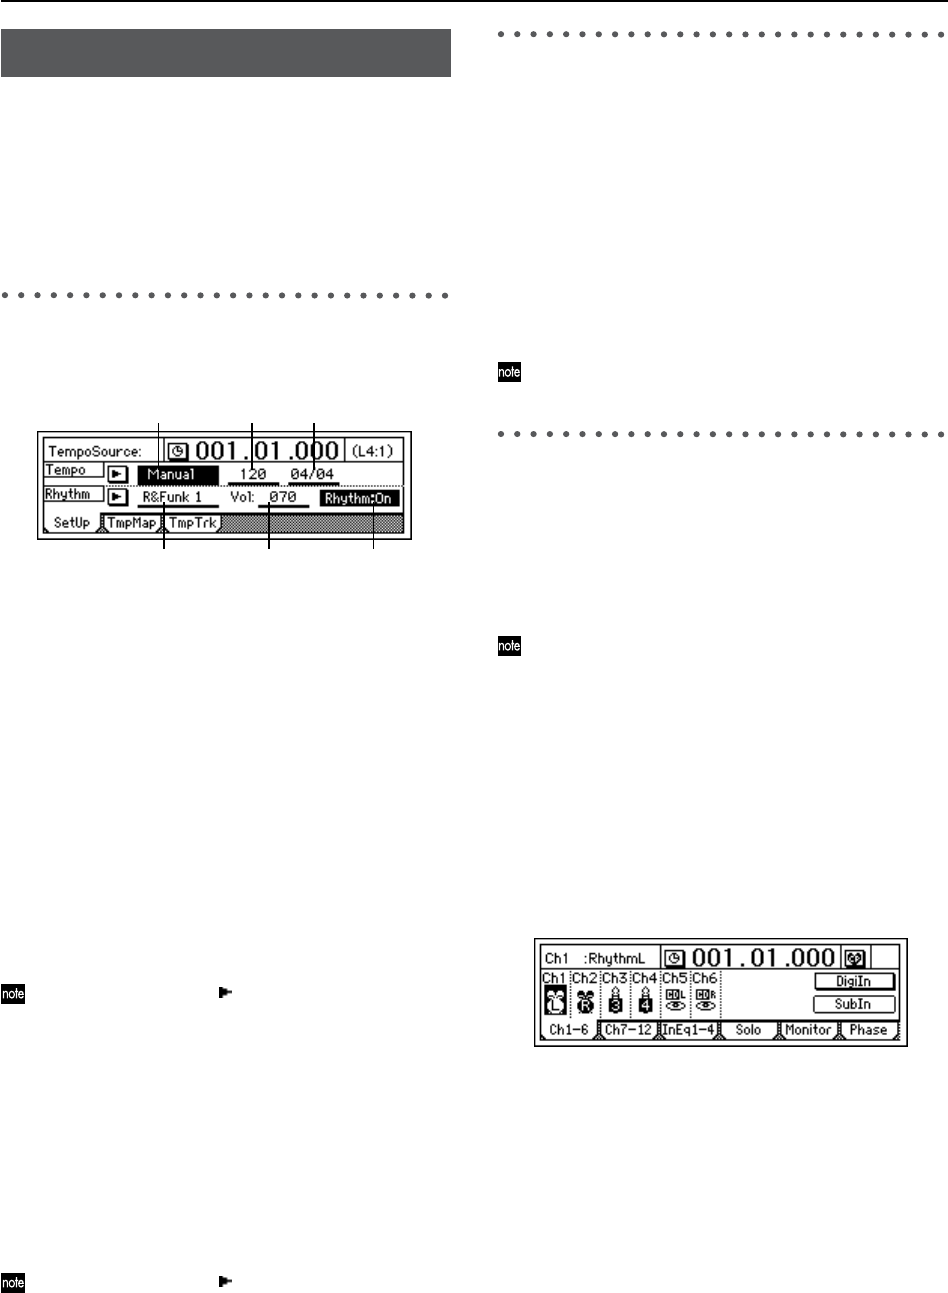
Access the [RHYTHM] “SetUp” tab page.
Use this page to make the settings described below.
Turning the rhythm on/off
Select the “Rhythm On/Off” button and press the
[ENTER] key to turn it “Rhythm:On” (highlighted).
The [RHYTHM] key will light, and the currently
selected rhythm will sound.
The rhythm will sound during playback and recording.
If you want to record the rhythm, refer to “3. Recording
the rhythm.”
Adjusting the rhythm volume
Select “RhythmVol” and turn the [VALUE] dial to adjust
the volume.
Setting the tempo and time signature
1 Select “TempoSource” and choose the tempo source.
For this example, we will select “Manual,” so that the
tempo, time signature, and rhythm pattern will not
change.
You can also select the “ ” button and press the [EN-
TER] key to choose from a list.
If you want to change the tempo, time signature, and
rhythm pattern during the song, you must create a
tempo map. (→p.49)
2 Select “Tempo,” and turn the [VALUE] dial to adjust the
tempo.
3 Select “Beat,” and turn the [VALUE] dial to specify the
time signature.
Selecting a rhythm pattern
Select “SelRhythm,” and turn the [VALUE] dial to
choose a rhythm pattern.
You can also select the “ ” button and press the [EN-
TER] key to choose from a list.
2. Listening to the rhythm while you
record a performance
Here’s how you can listen to the rhythm pattern as a guide
while you record your playing.
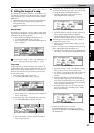
1 Use the procedures described in “1. Selecting and play-
ing a rhythm” to turn the “Rhythm” “On” and make
any other necessary settings.
2 Connect your instrument, and get ready to record.
Refer to “1. Assigning inputs to the mixer” (→p.22).
Press the [REC] key to enter record-ready mode, and the
rhythm will start playing. Press the [PLAY] key and
recording will begin. Play along with the rhythm pat-
tern you selected.
With these settings, the rhythm cannot be recorded.
3. Recording the rhythm
Here’s how you can take a rhythm pattern and record it as
part of your song.
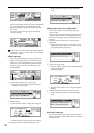
Recording a rhythm pattern on tracks 1 and 2
1 Make settings as described in “1. Selecting and playing a
rhythm.”
•Turn “Rhythm” “Off.”
If this is “On,” the sound will be output in duplicate;
both to the tracks and to the master LR bus.
• The volume will be adjusted by the mixer input
channels. The“RhythmVol” is the send level only to
the master LR bus, so you do not need to set it.
• Make any other settings as necessary.
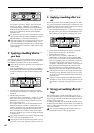
2 Specify the input channels.
• Select the [INPUT/OUTPUT/SOLO] “Ch1–6” tab
page.
• Select the “Ch1” icon, and turn the [VALUE] dial to
select “RhythmL.” In the same way, set “Ch2” to
“RhythmR.”
3 Record the rhythm.
Refer to “1-1. Basic recording” (→p.53).
Rhythm
TempoSource
SelRhythm RhythmVol RhythmOn/Off
Tempo Beat