


22
Step 2: Overdubbing
1. Assigning inputs to the mixer
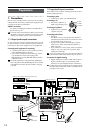
In this section, you’ll connect your keyboard to the [INPUT 3] and [IN-
PUT 4] jacks, assign the signals to mixer channels 9 and 10, and record the
signal on tracks 9 and 10.
1 Set the INPUT 3 and INPUT 4 [TRIM] knobs to the minimum posi-
tion (+4 dB), lower the [MASTER] fader, and connect your keyboard
to the [INPUT 3] and [INPUT 4] jacks.
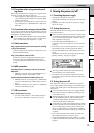
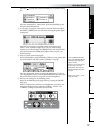
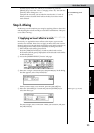
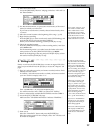
2 Specify the input channels.
Access the [INPUT/OUTPUT/SOLO] “Ch7–12” tab page. Select the
“Ch9” icon, and use the [VALUE] dial to select “INPUT 3.” In the
same way, select the “Ch10” icon and use the [VALUE] dial to select
“INPUT 4.”
Using these settings, the [INPUT 3] and [INPUT 4] jacks will be
assigned to mixer channels 9 and 10.
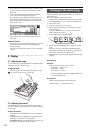
3 Press the track 9/10 [TRACK STATUS] key to select INPUT (LED lit
orange).
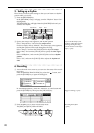
4 Use the [TRIM] knobs to adjust the input level.
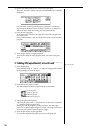
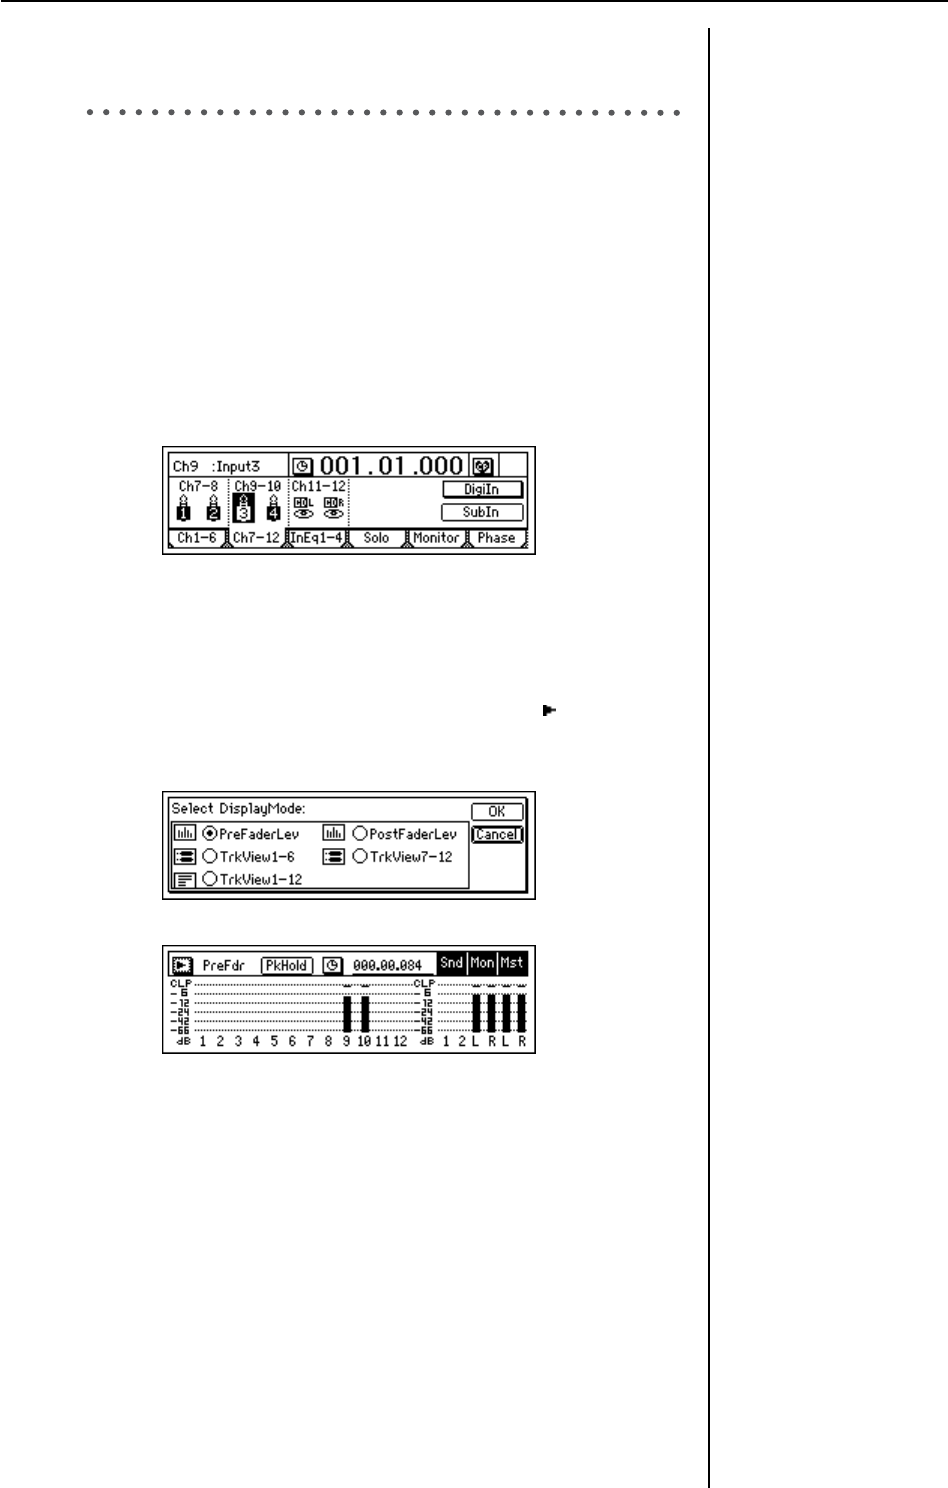
Press the [METER/TRACK VIEW] key. Select the “ ” button and
press the [ENTER] key to open the dialog box. Select “PreFaderLev,”
and press the [YES/OK] key.
As you play the keyboard, watch the Ch9 and Ch10 levels and adjust
the INPUT 3 and 4 [TRIM] knobs.
Set the levels as high as possible without allowing the level meters to
reach “CLP” when you play the keyboard at your loudest level.
In general, you should adjust the [TRIM] knob so that the peak indi-
cator (the LED near the [TRIM] knob) lights when the maximum
input level is reached.
5 Set the [CHANNEL 9–10] fader to unity gain (0 dB).
If you are using a stereo input
source, it will be easier to edit
track and effect settings if you
select adjacent inputs (1–2 or
3–4), and route them to adja-
cent mixer channels.
Use the [PHONES LEVEL]
knob or the [MONITOR OUT
LEVEL] knob to adjust the
output volume.