72
Importing a WAV file into the beginning of a track
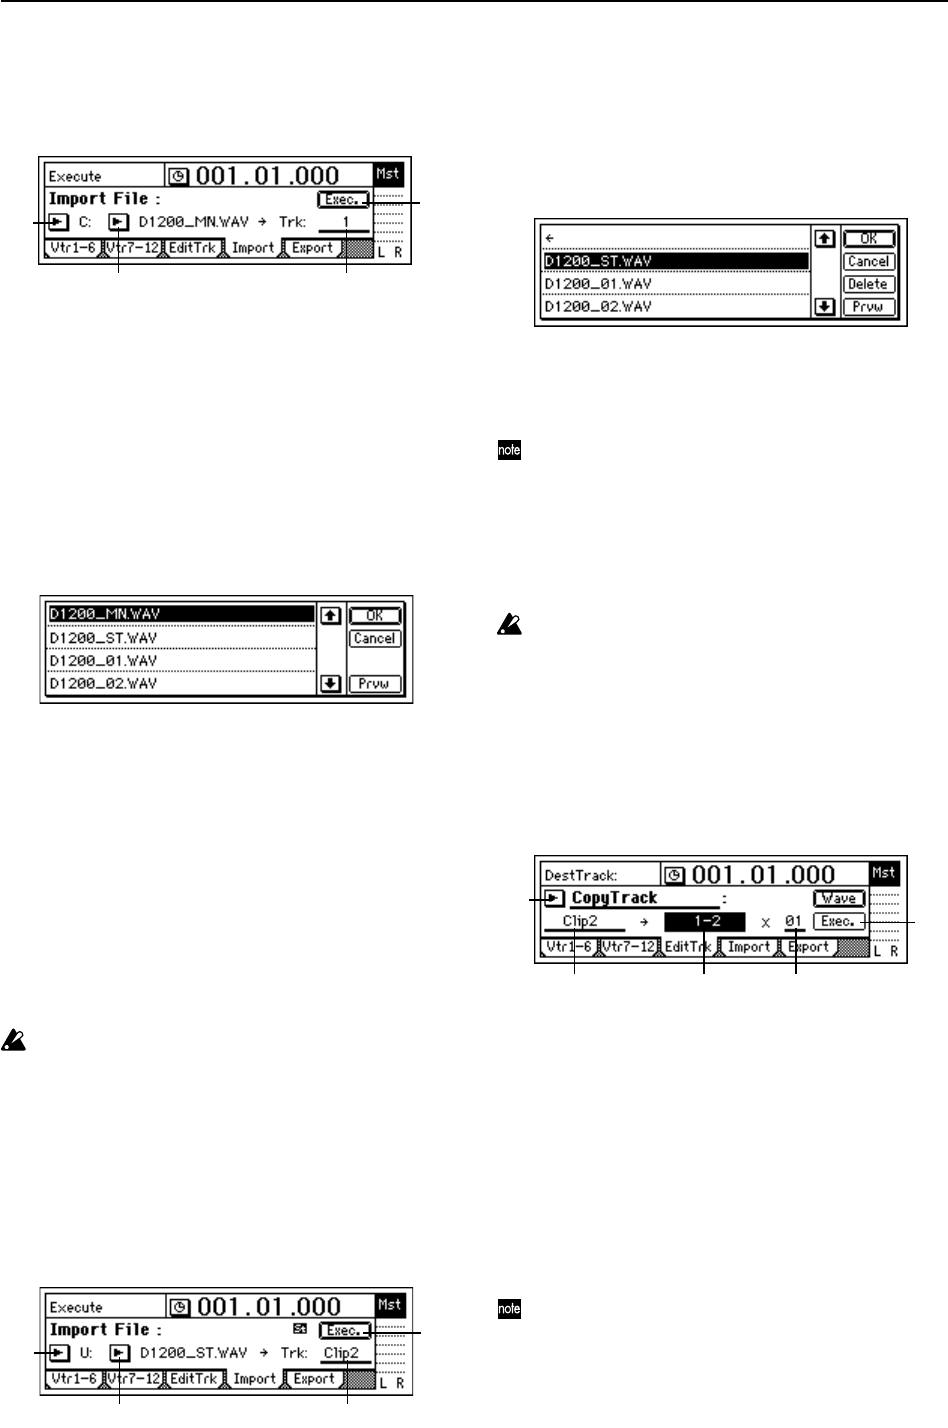
Here’s how to import a monaural WAV file named
“D1200_MN.WAV from a CD, and paste it into the
beginning of track 1.
1 Insert the CD-R/RW disc containing the WAV file into
the CD-R/RW drive.
2 Select the Import command.
• Access the [TRACK] “Import” tab page.
3 Select the import-source drive.
• Select the “DriveList” button and press the [ENTER]
key to open the dialog box.
• Select “C:CD” and press the [YES/OK] key.
4 Select the WAV file that you want to import.
• Select the “WavFileList” button and press the
[ENTER] key to open the dialog box.
•You can use the “Prvw” button to hear approxi-
mately two seconds of the beginning of the selected
WAV file.
• Select “D1200_MN.WAV” and press the [YES/OK]
key.
5 Select the import-destination track number.
• Set “DestTrack” to track “1.”
6 Import the file.
• Select the “Exec.” button and press the [ENTER] key.
• The display will ask “AreYouSure?” Press the [YES/
OK] key to execute the operation.
• When the operation is completed, the display will
indicate “Completed.” Press the [YES/OK] key.
The longer the file being imported, the longer this oper-
ation will take until the “Completed” display appears.
7 Move the time location to the beginning of the song, and
check that the file was imported correctly.
Importing a WAV file into the middle of a track
Here’s how to import a stereo WAV file named
“D1200_ST.WAV from the USB drive, and paste it in to
tracks 1 and 2 at the TO location (the location registered
in the [TO/LOC3] key).
1 Select the Import command.
Access the [TRACK] “Import” tab page.
2 Select the import-source drive.
• Select the “DriveList” button and press the [ENTER]
key to open the dialog box.
• Select “U:USB DOS” and press the [YES/OK] key.
3 Select the WAV file that you want to import.
• Select the “WavFileList” button and press the
[ENTER] key to open the dialog box.
Select “D1200_ST.WAV” and press the [YES/OK] key.
4 Select the clipboard as the import-destination track.
Set “DestTrack” to “Clip2.”
The number indicates the number of tracks in the clip-
board. In the case of a monaural file, this will be “Clip1.”
5 Import the data to the clipboard.
• Select the “Exec.” button and press the [ENTER] key.
• The display will ask “AreYouSure?” Press the [YES/
OK] key to execute the operation.
• When the operation is completed, the display will
indicate “Completed.” Press the [YES/OK] key.
The longer the file being imported, the longer it will take
for this operation to be finished and the “Completed”
display to appear.
6 Register the TO location.
(→p.33: “Registering a location to one of the Locate
keys”)
7 Select the Copy command.
In the [TRACK] “EditTrk” tab page, set “EditType” to
“CopyTrack.”
8 Select the clipboard as the copy-source track.
Set “SourceTrack” to “Clip2.”
9 Select the tracks 1 and 2 as the copy-destination tracks.
Set “DestTrack” to “1-2.”
0 Specify the number of times that the data will be copied.
Set “Times” to “1.”
A Copy the clipboard data to the track.
• Select the “Exec.” button and press the [ENTER] key.
• The display will ask “AreYouSure?” To execute, press
the [YES/OK] key.
• When the copy operation has been completed, the
display will indicate “Completed.” Press the [YES/
OK] key.
The data will be overwritten onto the copy-destination
track.
B Press the [TO/LOC3] key, play back from the TO loca-
tion, and listen to the playback to verify that the data
was imported correctly.
4 5
3
6
3 4
2
5
8 9 0
7
A


