Operation
69
Song and Locate
MixerEffects
Modeling mode
Rhythm
The Recorder
MasteringDataDriveUSBMIDIUpgrading
the system
• When the backup is complete, the display will indi-
cate “Completed.” Press the [YES/OK] key.
After data is backed up to CD-R/RW, the automatic
compare function will compare the disc to ensure that a
faulty backup CD is not created.
If you press the “Cancel” button while data is being
written to CD-R, writing will be aborted and the disc
will be incomplete. In the case of a CD-RW, the data that
had been written up to that point will be erased.
Backing up to the internal USB drive
Here’s how to back up the selected song to the internal
USB drive.
1 Select the song that you want to back up.
(→p.31: “1-3. Selecting different songs”)
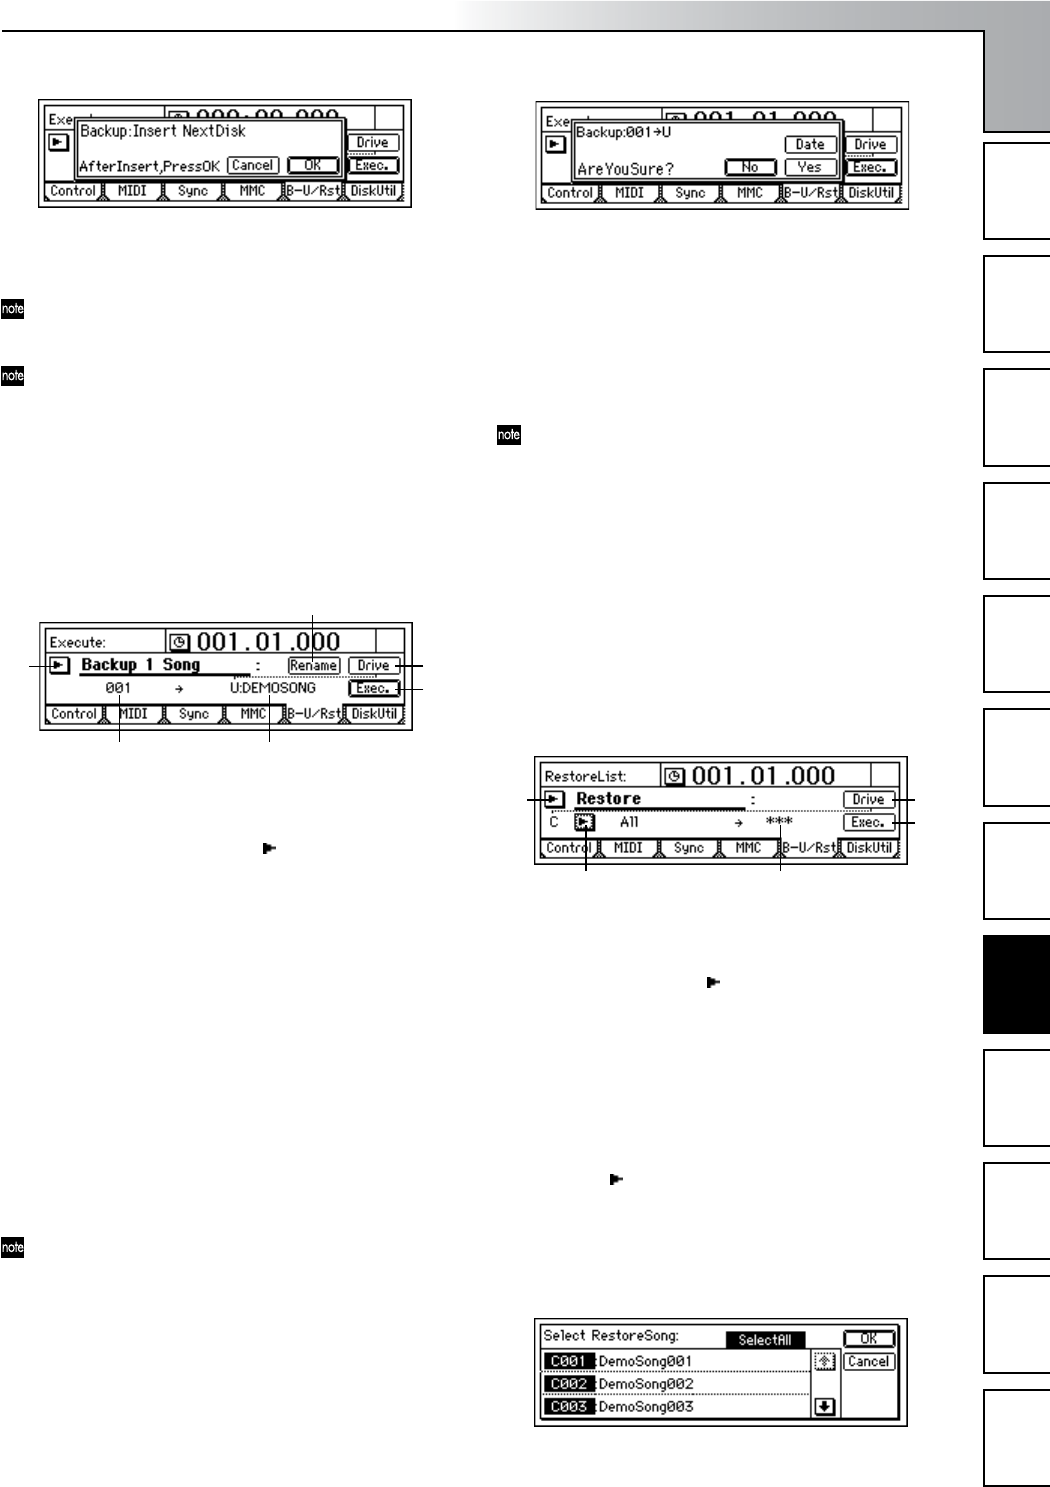
2 Select “Backup 1 Song.”
In the [SYSTEM/USB] “B-U/Rst” tab page, select “B-U/
RstType” and turn the [VALUE] dial to select “Backup 1
Song.” You can also press the “ ” button and press the
[ENTER] key to view and choose “Select Backup/
Restore Type.”
3 Verify the song for backup.
Make sure that the song you want to back up is selected
in “Source.”
4 Select the backup-destination drive.
Select the “Drive” button and press the [ENTER] key to
open the dialog box.
Select U:USB DOS, and press the [YES/OK] key.
5 Check the backup-destination drive and file name.
The name of the song being backed up will be the file
name. Make sure that “Destination” is set to “U:(song
name).”
6 Edit the file name.
If you want to edit the file name, select the “Rename”
button and press the [ENTER] key. Edit the file name in
the “RenameFile” dialog box. (→p.31)
If an identically-named file already exists on the USB
drive, you will be unable to save. You will need to re-
name the file.
7 Back up the data.
• Select the “Exec.” button and press the [ENTER] key.
A screen will ask you for confirmation.
•You can specify the date and time that the file was
created. Select the “Date” button and press the
[ENTER] key to open the dialog box, use the cursor
to select the date or time that you want to set, and use
the [VALUE] dial to specify the date and time.
• When you press the [YES/OK] key, backup will
begin. Effect user data will also be backed up at this
time.
Effect user data will be saved using the same file name
that you specified in steps 6 and 7 followed by the suf-
fix .DFX. This data cannot be saved if an identically-
named file already exists on the USB drive. You will
need to rename the file.
1-2. Restoring song data
Here’s how you can restore previously backed up song data,
so that it can be played.
Restoring
1 If you are restoring data from a CD-R/RW disc, insert
the disc into the CD-R/RW drive.
2 Select “Restore.”
In the [SYSTEM/USB] “B-U/Rst” tab page, select “B-U/
RstType” and turn the [VALUE] dial to select “Restore.”
You can also select the “ ” button and press the
[ENTER] key to display “Select Backup/Restore Type”
and make your selection.
3 Select the restore-source drive.
Select the “Drive” button and press the [ENTER] key to
open the dialog box.
Select either C:CD[B] or U:USB DOS, and press the
[YES/OK] key.
4 Select the restore-source song.
Select the “ ” button and press the [ENTER] key. In the
“Select RestoreSong” dialog box, select the desired song.
When restoring from a CD-R/RW
Select the song to be restored from the file list.
If you want to restore all songs, turn on the
“SelectAll” button.
3 5
6
2
4
7
4
23
6
5
Data
