VA-76 Owner’s Manual—Song Composer (16-track, etc.)
142
Example 1: Recording a track
Here’s how to add a track to a song in the VA-76’s
Song RAM memory. This is only meaningful after
recording a song using the Song Composer or after
playing back a song on disk. See page 145 for how to
start a new song.
Note: Though the following may seem confusing at first, you
will find very quickly that the 16-track Sequencer uses a
very logical structure. Please bear with us and perform all
indicated steps to get a feel for how the 16-track Sequencer
“ticks”. Besides, what you learn here will also come in handy
for recording your own Music Styles.
Note: See also “Easy editing and useful functions” on
page 147 for some additional functions that are not covered
here.
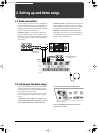
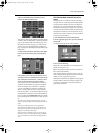
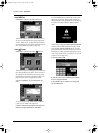
1.
Press the [SONG COMPOSER] button and the [16
Tracks Sequencer] field.
2.
If the following page is not displayed, press the
[Rec] field in the bottom row of the display.
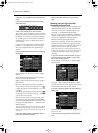
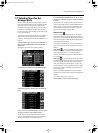
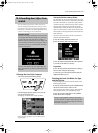
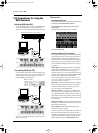
3.
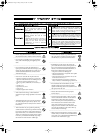
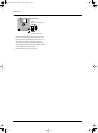
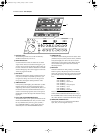
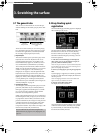
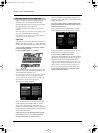
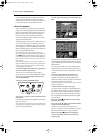
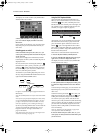
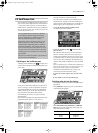
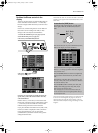
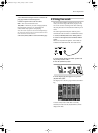
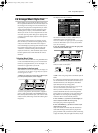
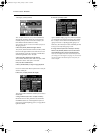
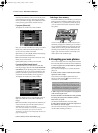
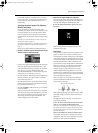
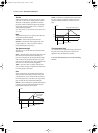
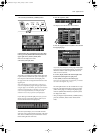
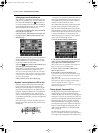
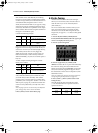
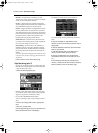
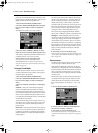
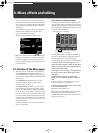
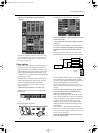
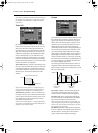
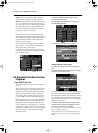
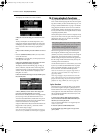
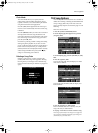
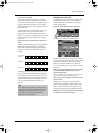
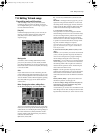
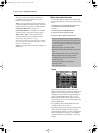
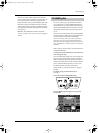
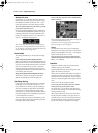
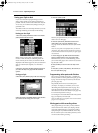
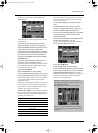
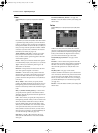
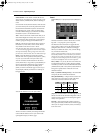
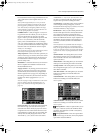
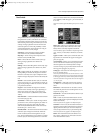
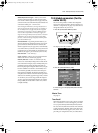
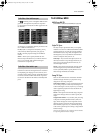
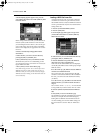
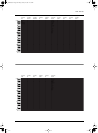
Press the [Master] field in the upper left corner.
Field A in the upper right corner informs you about
the current measure and the time signature. You can
use [√√ BWD] and [FFW ®®] to jump to another
measure, or [STOP ■|√] to return to the beginning
of the song. Field B shows which tracks contain data
and are active. No switch (neither [ON] nor [OFF])
means that the track in question doesn’t yet contain
data.
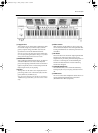
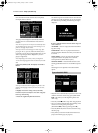
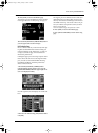
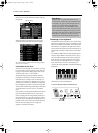
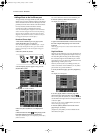
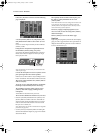
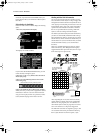
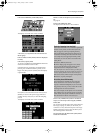
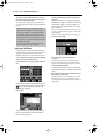
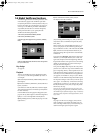
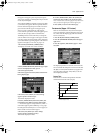
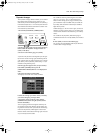
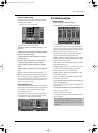
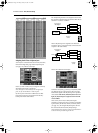
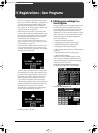
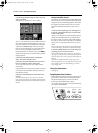
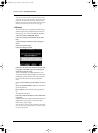
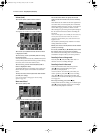
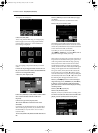
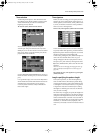
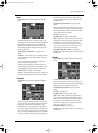
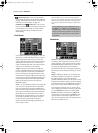
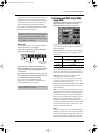
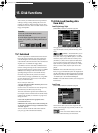
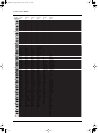
4.
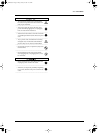
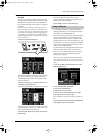
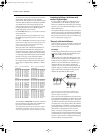
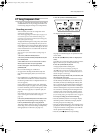
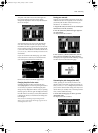
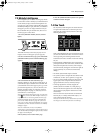
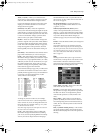
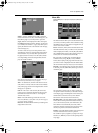
Press the big [Track] field more or less in the mid-
dle and use the [TEMPO/DATA] dial to select the
track you wish to record.
The name of the selected track appears in the [Track]
field and is indicated by a white box (in the above
example, track 1 has been selected).
Note: Select track 13 to record using the VariPhrase part.
But be careful: You cannot work with the VariPhrase part if
it has not been assigned to the song. You need to initialize
the Song RAM memory and activate the VariPhrase part
for Composer use, or initialize track 13. See page 146.
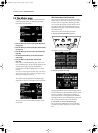
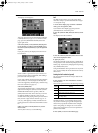
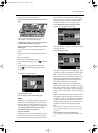
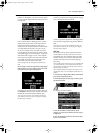
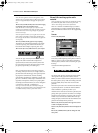
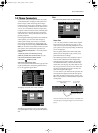
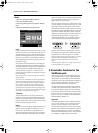
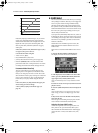
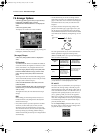
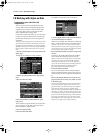
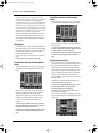
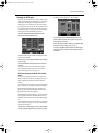
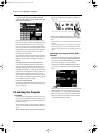
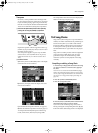
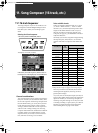
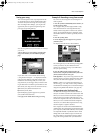
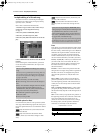
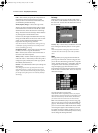
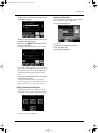
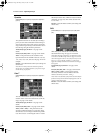
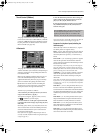
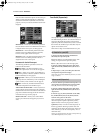
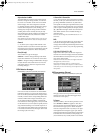
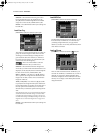
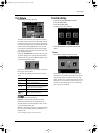
Selecting the (Recording) Mode and the first mea-
sure
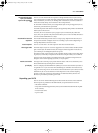
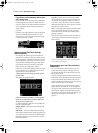
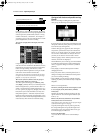
5.
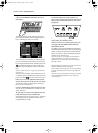
Press the [Mode] field and use the [TEMPO/DATA]
dial to specify how the new data should be recorded.
Select Erase if a track contains data you wish to
replace with new data. This erases all data of the
selected track from the place where you start recording
until the end. (Erase is selected by default for empty
tracks.)
Select Merge to add new notes to the ones already
recorded on the selected track. This recording mode is
particularly useful for recording the rhythm track (10)
because you can first record the bass and snare drums,
then add a few tom hits here and there, and record the
HiHat, for example.
Punch In/Out allows you to re-record part of a track.
Select this mode to replace a phrase you do not like
with a new version. Doing so has the advantage that
only the area where you punch in and out will be over-
written. See also page 144.
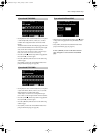
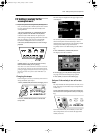
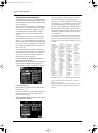
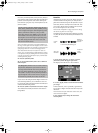
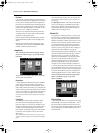
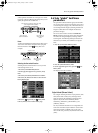
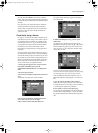
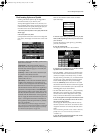
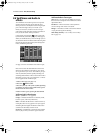
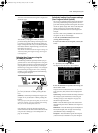
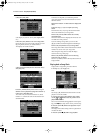
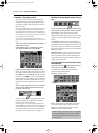
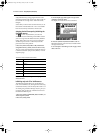
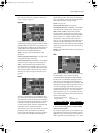
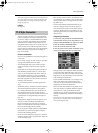
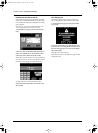
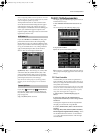
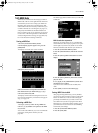
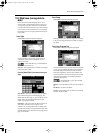
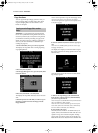
Setting the Metronome and the Quantize, Octave
values (Options)
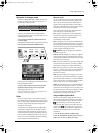
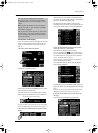
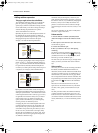
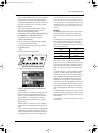
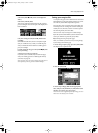
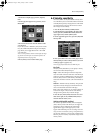
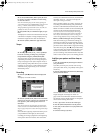
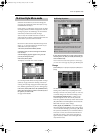
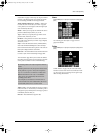
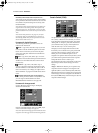
6.
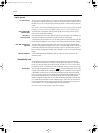
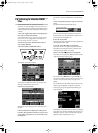
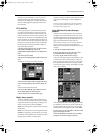
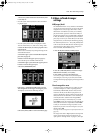
Press the [ON/OFF ] field to switch the metro-
nome “ON” (or “OFF” if you don’t need it).
If you also wish to specify when the metronome
should sound, proceed as follows:
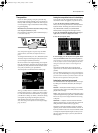
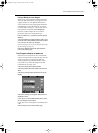
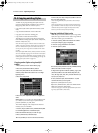
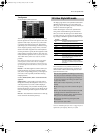
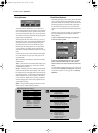
a)
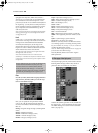
Press the [Options] field:
The display now looks more or less as follows:
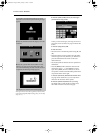
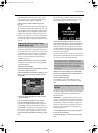
b)
Press the Metronome [Mode] field. This takes you
to a familiar display page. See page 66 for details.
c)
Select the desired Metronome Mode and press
[oBack] to return to the above page.
A
B
The following two parameters can be set by pressing
the corresponding field and by using the [TEMPO/
TAP] dial and the [DATA] button/Numeric Entry
pad (see page 49).
VA-76.book Page 142 Friday, January 12, 2001 12:35 PM