VA-76 Owner’s Manual—Song Composer (16-track, etc.)
144
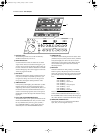
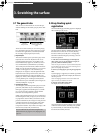
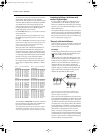
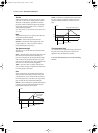
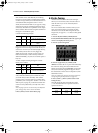
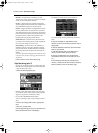
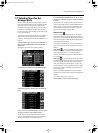
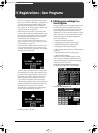
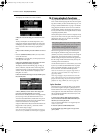
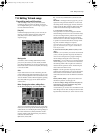
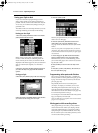
Volume (Level)
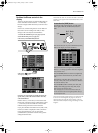
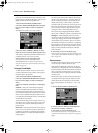
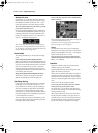
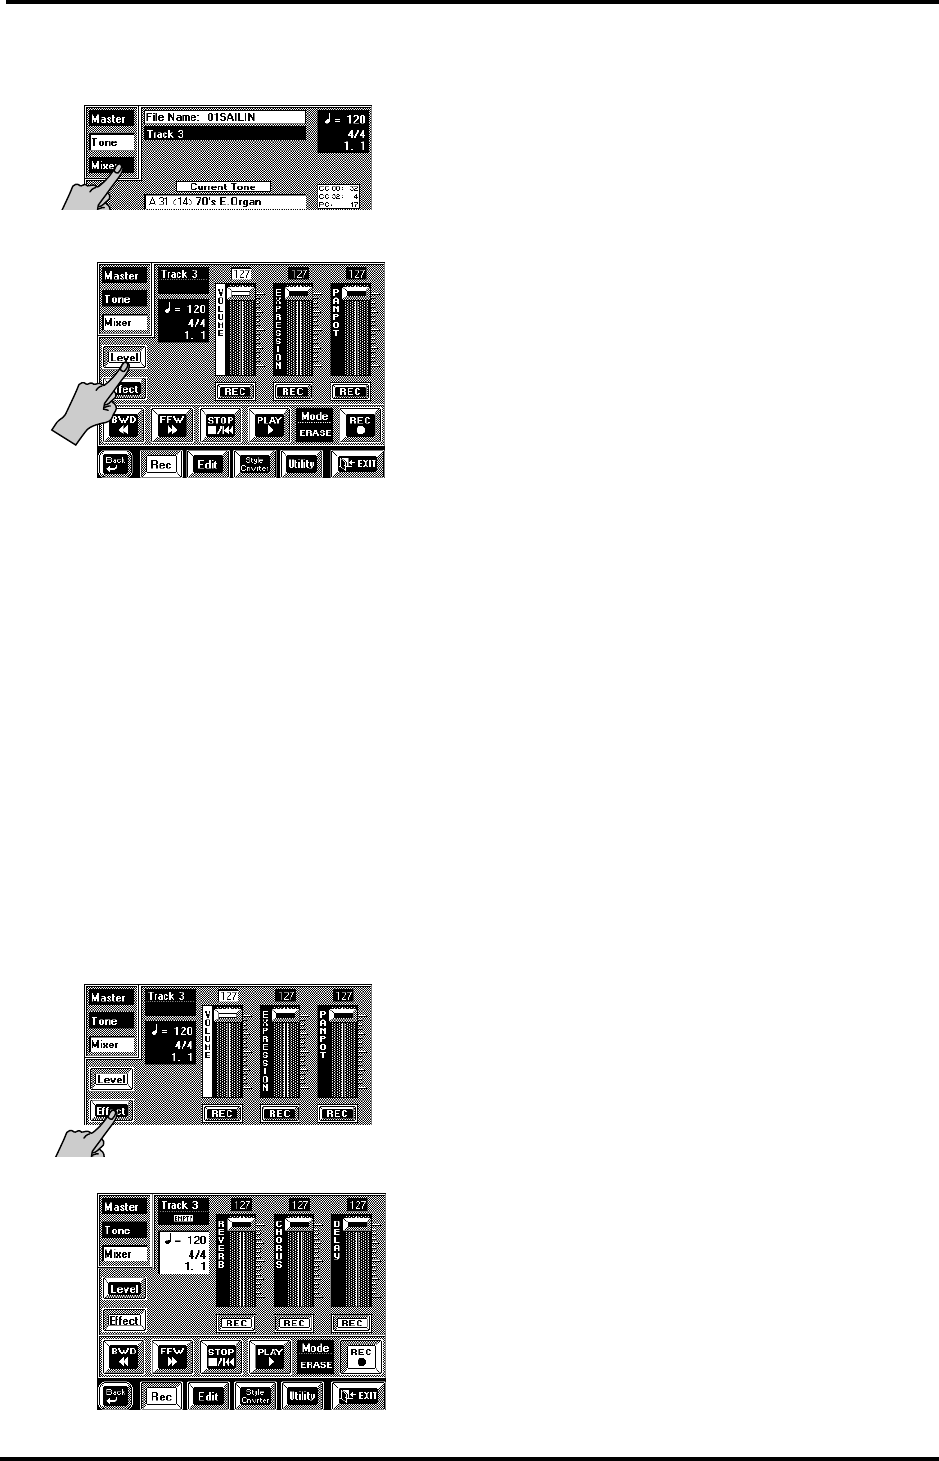
13.
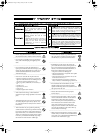
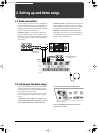
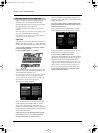
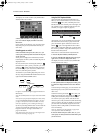
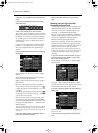
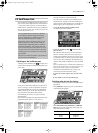
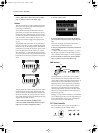
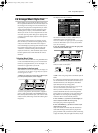
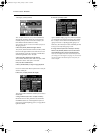
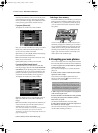
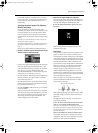
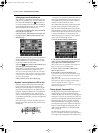
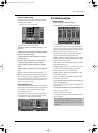
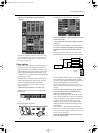
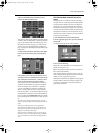
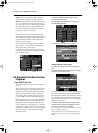
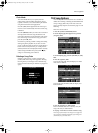
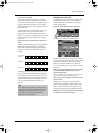
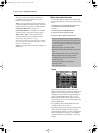
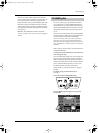
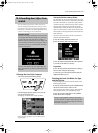
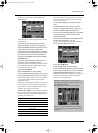
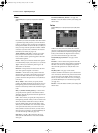
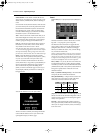
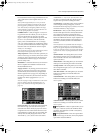
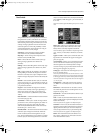
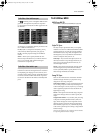
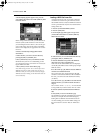
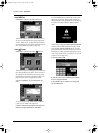
Press the [Mixer] field in the left column.
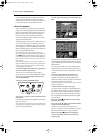
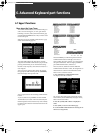
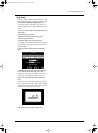
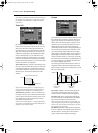
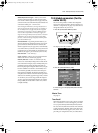
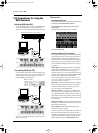
The display now looks more or less as follows:
14.
Press the [Level] field in the left column so that it
is displayed in white.
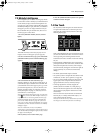
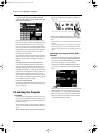
15.
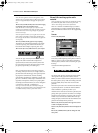
If necessary, use the [VOLUME] slider for setting
the desired volume.
You can also touch it and use the [TEMPO/DATA] dial
or the [DATA] button/Numeric Entry pad for entering
the value. (You can also leave this for later.)
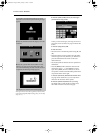
16.
If necessary, press the VOLUME [REC] field so
that it is displayed in white.
These fields (like the two remaining ones on this page)
follow the same system as Tone/Drum Set selection
above.
17.
Play a few notes on the keyboard to check whether
you like your settings.
Note: See also “Mixer: Changing the volume, adding
effects” on page 147.
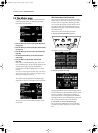
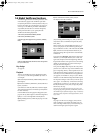
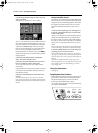
Want some effects?
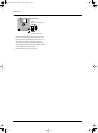
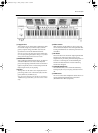
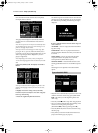
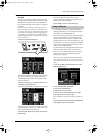
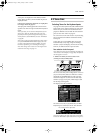
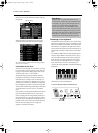
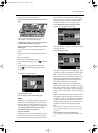
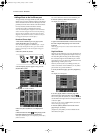
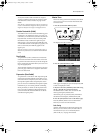
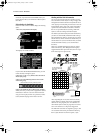
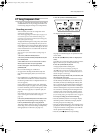
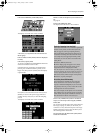
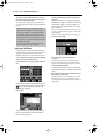
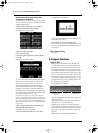
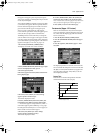
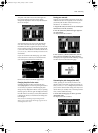
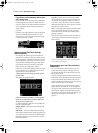
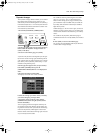
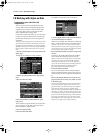
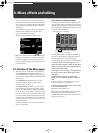
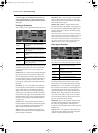
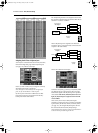
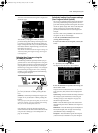
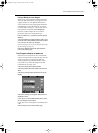
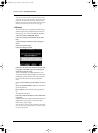
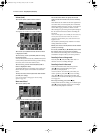
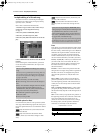
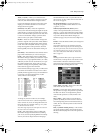
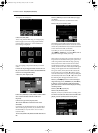
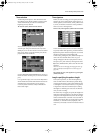
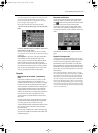
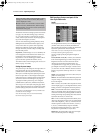
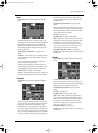
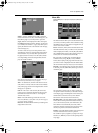
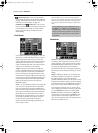
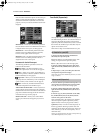
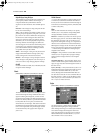
18.
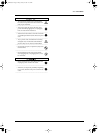
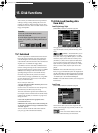
Press the [Effect] field.
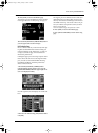
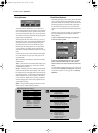
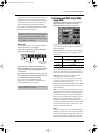
The display now looks more or less as follows:
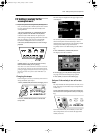
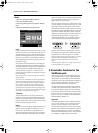
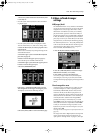
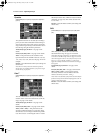
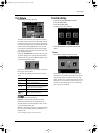
19.
Use these three sliders to specify the selected
track’s Send level for the Reverb, Chorus and Delay
effects.
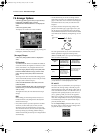
These sliders set the volume of the track signal that is
sent to the effect, and consequently how much effect
should be added to the track. See page 116 for how to
set the effects (type, parameters). Those “overall”
effect settings are part of the general SysEx settings of
the “M” track and must be set before recording the
first track.
Note: The Delay effect is not available for drum tracks (10,
and any other track that uses a Drum Set) or track 13
(assigned to the VariPhrase part), while the M-FX is not
supported at all.
Use the [REC] fields to specify whether or not these
settings should be recorded.
20.
Play a few notes on the keyboard to check whether
you like your settings.
21.
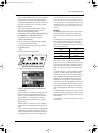
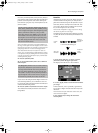
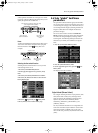
Use the [FFW ®®] or [√√ BWD] field to select
the measure where you want to start recording.
For Punch In/Out recording, select a measure that lies
a little before the place where you wish to punch in.
Recording in Erase or Merge mode
Press the [REC ●] and [PLAY ®] fields. After a 1-
measure count-in, recording will begin.
Recording in Punch In/Out mode
• To record in Punch In/Out mode, first press the
[REC ●] field (it starts flashing). Next, press
[PLAY ®] to start playback.
As soon as the VA-76 reaches the point where you
want to punch in, press [REC ●] to start recording.
(The [REC ●] field is now displayed steadily.) You
could also use a footswitch for doing so. See “Punch I/
O” on page 191.
22.
To stop recording, press [STOP ■|√].
During Punch In/Out recording, you could also press
[REC ●] or the footswitch. In that case, recording is
deactivated, while playback continues.
VA-76.book Page 144 Friday, January 12, 2001 12:35 PM