


189
VA-76 – Choosing the performance functions (Controllers)
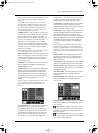
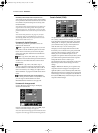
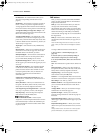
Touch Control (Ribbon)
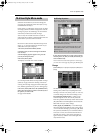
This page contains the functions that can be assigned
to the Touch Control (also called “Ribbon”). With the
exception of Off (that deactivates the Ribbon control-
ler), the parameters are identical to the ones of the D
Beam controller (see page 186).
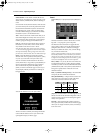
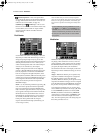
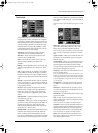
Aftertouch
This page does not follow the pattern of the other
“Hand” controllers: you cannot select a Keyboard part
simply by pressing the corresponding field. There are
two reasons for this:
a)
You can set multiple parameter values for one, sev-
eral or all available Keyboard parts. These will be
applied simultaneously whenever you press the keys
down even further after playing the desired notes.
b)
Aftertouch can also be used for controlling the
Arranger. You can even control one or several Key-
board parts and the Arranger simultaneously.
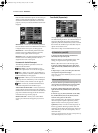
The best way to proceed is as follows:
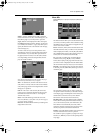
1.
First select the part whose parameters you wish to
assign to the Aftertouch ([i][m]).
The options are: Upper1, Upper2, Lower1, Lower2,
and (VariPhrase) (and Arranger).
2.
Decide whether or not the part in question should
respond to Aftertouch messages by pressing the [ON/
OFF] field.
Obviously, [ON] means “yes”, and [OFF] means “no”.
You can set the Value of several available parameters,
so that the Aftertouch allows you to control several
parameters simultaneously.
Note: Aftertouch only applies to Keyboard parts that are
currently accessible (Keyboard Mode setting, Keyboard part
on/off (see page 36)).
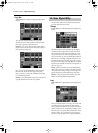
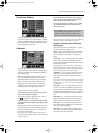
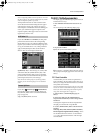
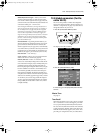
3.
Press the field of the parameter whose setting you
wish to change. If the desired parameter is not dis-
played, use the [o][k] fields to select it.
4.
Enter the desired value using the on-screen slider,
the [TEMPO/DATA] dial, or the [DATA] button/
Numeric Entry pad.
Note: Select Arranger with the [m] field to set the effect the
Aftertouch can have on the Arranger (see page 97).
Parameters for Keyboard parts (excluding the
VariPhrase part)
Aftertouch only works in one direction (i.e., it gener-
ates either positive or negative values).
Pitch (–24~24): This parameter has the same effect as
the Pitch Bend feature (see page 188). Bear in mind
that it only allows for upward (+) or downward (–)
bends.
TVF Cutoff— (–64~63) Setting a positive or negative
value for this parameter means that the cutoff fre-
quency of the Tone assigned to the selected part can be
increased or decreased.
Note: Depending on the value you set for TVF Cutoff (see
page 126), high positive or negative settings may have no
audible effect. That is also the case of Tones whose cutoff fre-
quency is already preset to the maximum value.
Amplitude— (–64~63) Setting a positive or negative
value for this parameter allows you to increase or
decrease the volume of the selected part using the
Aftertouch.
Note: Again, the volume cannot be increased (or decreased)
beyond “127” (or “0”). If the volume of the part is question
is already set to “127” (or “0”), the Aftertouch will produce
no audible effect.
LFO1 Rate— (–64~63) This parameter allows you to
increase or decrease the modulation speed of LFO1.
Use this function in combination with the Modulation
axis of the Bender/Modulation lever, or to change the
modulation speed of the preset automatic modula-
tion.
LFO1 Pitch— (0~127) This parameter allows you to
add pitch modulation using the Aftertouch feature.
Pitch modulation is usually referred to as vibrato.
LFO1 TVF— (0~127) This parameter allows you to
add cutoff frequency modulation via the Aftertouch.
This is also known as WahWah.
LFO1 TVA— (0~127) This parameter allows you to
add amplitude modulation using the Aftertouch func-
tion. This is also known as tremolo.
Press the [Reset] field to set all parameter values for
the currently selected part back to “0”. This even
applies to parameters that are not visible at the
moment – but only for the currently selected part.
VA-76.book Page 189 Friday, January 12, 2001 12:35 PM