


VA-76 Owner’s Manual—VA-76 clinics
64
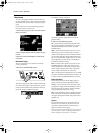
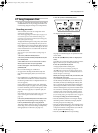
1.
See steps (1) and (2) above.
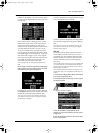
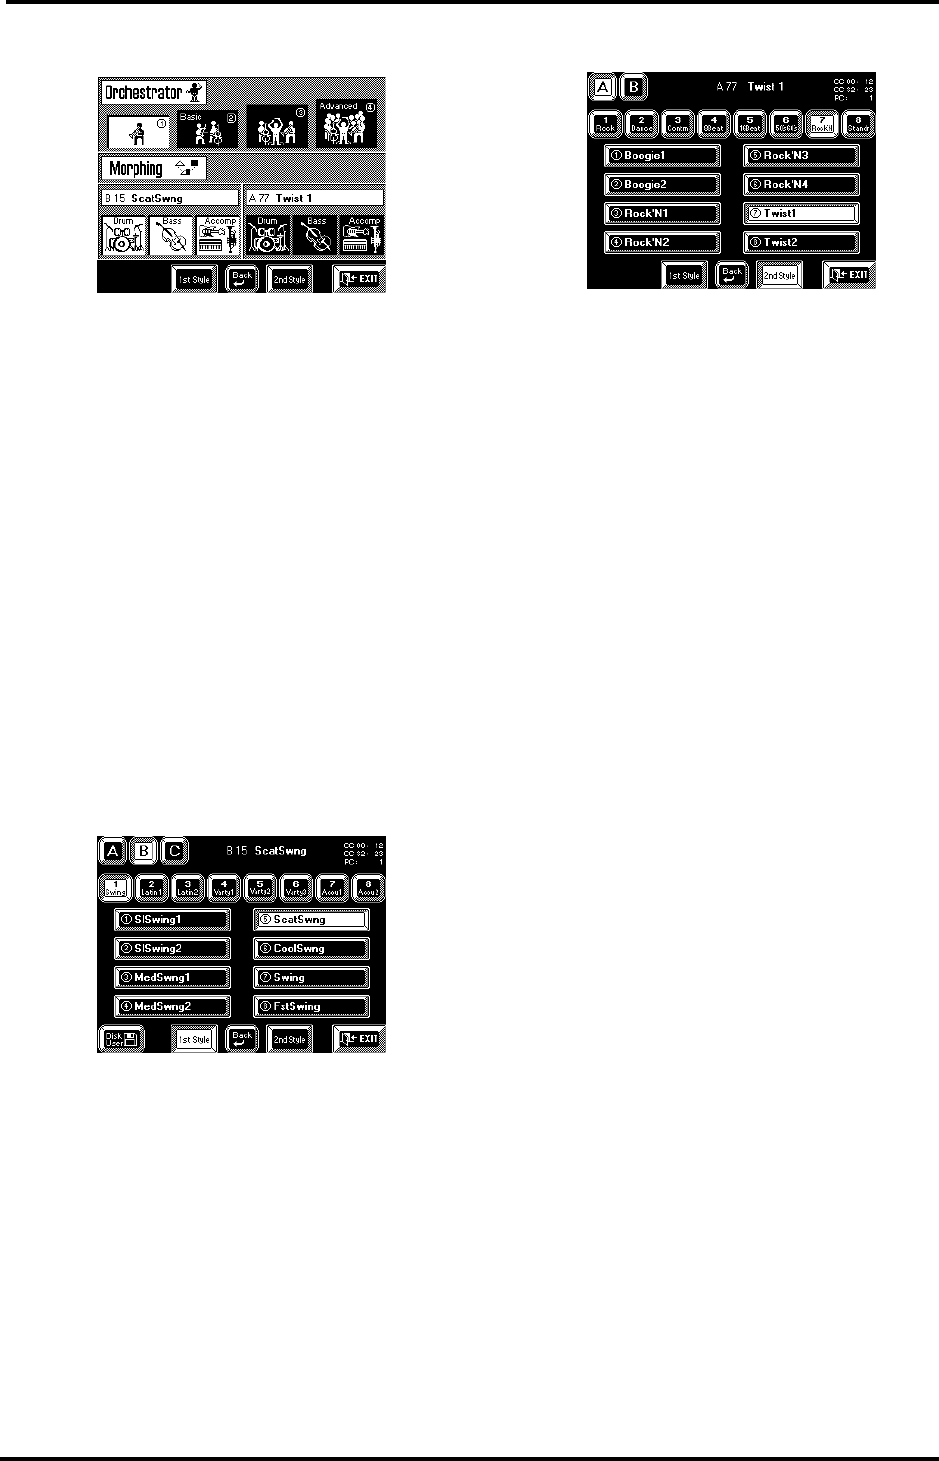
The “1st Style” is the one you (or the Virtual Band)
selected last, while the “2nd Style” is prepared auto-
matically. What you hear now is the “1st Style” (all
three fields in the left column are white).
Note: See below for how to select other Music Styles for the
Morphing function.
2.
Press the [Drum] field in the right column.
The [Drum] field in the left column turns blue, while
the one in the right column turns white. You are now
using the drum part of the “2nd Style” with the Bass
and Accompaniment of the “1st Style”.
3.
Press the [Bass] field in the right column.
This switches off the Bass line of the “1st Style”, while
the Bass line of the “2nd Style” is activated.
4.
Try out other combinations.
5.
Press [START/STOP] to stop Arranger playback.
Let us now select other Music Styles for the “1st Style”
and the “2nd Style”.
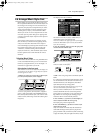
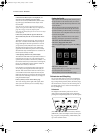
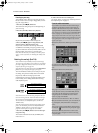
6.
Press the [1st Style] field in the display.
This page should look familiar. It allows you to select a
Music Style.
7.
Assign a Music Style to the “1st Style” memory.
Remember that it is also possible to use the BANK/
NUMBER buttons. See “Selecting Music Styles” on
page 59 and “Style Morphing (part 2)” on page 98 for
operation details.
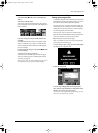
8.
Press the [2nd Style] field.
Again a familiar display page. Note, however, that the
[C] and [Disk User] fields are no longer there. While
the “1st Style” can be taken from the ROM memory
(groups A and B) or a Zip/floppy disk (group C or
Disk User), the “2nd Style” must be a ROM Style. That
is why you can only select group A or B.
9.
Assign a Music Style to the “2nd Style” memory.
10.
Press the [oBack] field to return to the Orches-
trator/Morphing page, and start morphing again.
Note: Your “2nd Style” will also be stored when you write
your settings to a User Program (see page 127). You thus do
not have to perform the selection process every time you
want to morph.
VA-76.book Page 64 Friday, January 12, 2001 12:35 PM