


VA-76 Owner’s Manual—More about the Arranger
96
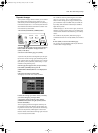
Sync (Options)
If you’ve never used an arranger keyboard before, the
status of the [SYNC] button is the single most impor-
tant function to look out for after switching on your
instrument. After all, if it is on without you knowing
it, playing just one note on the keyboard may cause
the Arranger to start even though you don’t want it to.
Once you get to know the VA-76 a little better, you will
appreciate this function, and you may want to take
advantage of its Sync functions. Sync Start means that
the Arranger starts as soon as you play a note or chord
in the chord recognition area of the keyboard. (If the
Keyboard Mode [ARRANGER] button lights, this area
is the left half of the keyboard. See page 101 for
details.)
The VA-76 also provides a Sync Stop option. This will
cause the Arranger to stop playback as soon as you
release all keys in the chord recognition area. This is
great for songs where you need breaks (i.e. one or sev-
eral beats of silence).
And finally, you can choose to activate both Sync Start
and Sync Stop.
Whenever you configure the VA-76 via the Virtual
Band function or by pressing the Keyboard Mode
[ARRANGER] button, the [SYNC] button lights.
This means that the currently selected Sync Option
has been switched on. As long as you do not select
another Sync Option, this will be Sync Start.
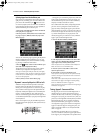
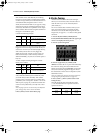
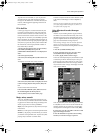
Here’s how to set another Sync option. This setting
can be written to a User Program (see page 127).
1.
Press and hold the [SYNC] button until the follow-
ing page appears:
2.
Press the Sync field that corresponds to the desired
Sync function(s).
3.
Press [EXIT] to return to the Master page.
You can now use the [SYNC] button to switch the
selected Sync function off (button dark) and on (but-
ton lights).
Note: Whenever you use One Touch or Virtual Band to con-
figure the VA-76, Sync Start will be selected.
Note: See also page 100 for how to prevent the VA-76 from
reverting to Sync Start and switching on the [SYNC] button
when you take advantage of the One Touch memories.
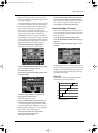
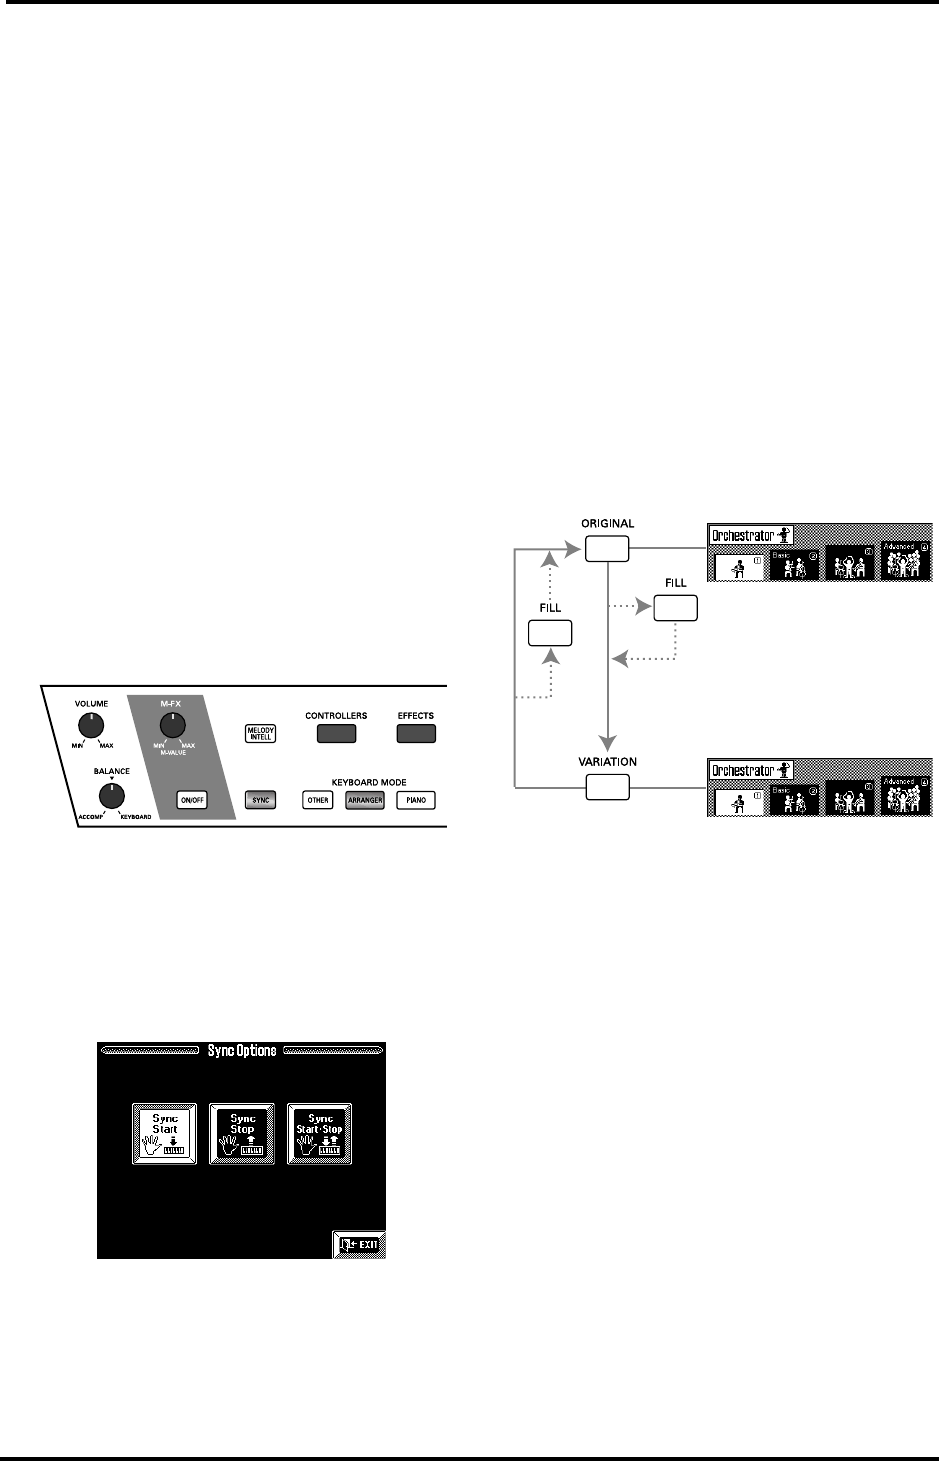
7.2 Selecting other Style
divisions
As stated above, you can “professionalize” your perfor-
mance with the Arranger by selecting different accom-
paniment patterns. Let us agree to use the word
Division for any Music Style pattern the VA-76 can
play. We’ll need that term for programming User
Styles.
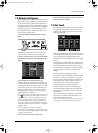
Here’s a quick overview of how the VA-76’s Music
Styles (and the ones on Zip/floppy disk) are struc-
tured:
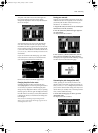
Press the [ORIGINAL] button to select the “normal”
accompaniment. ORIGINAL A is the simplest of the
four possible accompaniment patterns, while VARIA-
TION D is the most complex. B (“Basic”) and D
(“Advanced”) can also be selected by pressing [ORIGI-
NAL] or [VARIATION] twice in rapid succession. The
combination of ORIGINAL and VARIATION with the
four ORCHESTRATOR options already provides a
total of eight accompaniments per Music Style (multi-
plied by three, see the next paragraph).
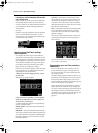
As you see, you can use the [FILL] button to go from
ORIGINAL to VARIATION, and back. In the first case,
you will hear the Fill-In To Variation pattern. When
going back from VARIATION to ORIGINAL, the
Arranger will play the Fill-In To Original pattern.
Note that you don’t have to use the [FILL] button: you
can also switch divisions by pressing [VARIATION] or
[ORIGINAL].
Note: See also “Using the VA-76’s Arranger” on page 25.
Note: You can also press [INTRO] in the middle of a perfor-
mance. In that case, the indicator will flash until the end of
the current bar and then light on the next downbeat to indi-
cate that the Arranger is playing the introductory pattern.
Fill In
To Variation
Fill In
To Original
VA-76.book Page 96 Friday, January 12, 2001 12:35 PM