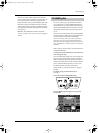
VA-76 Owner’s Manual—Scratching the surface
32
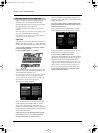
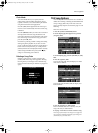
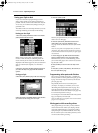
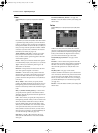
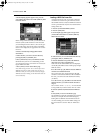
• If Song Composer playback is stopped, selecting the
Master page would switch off the Song Composer
mode and take you back to Arranger mode where you
can use the automatic accompaniment function.
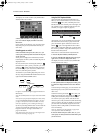
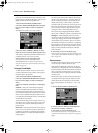
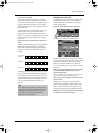
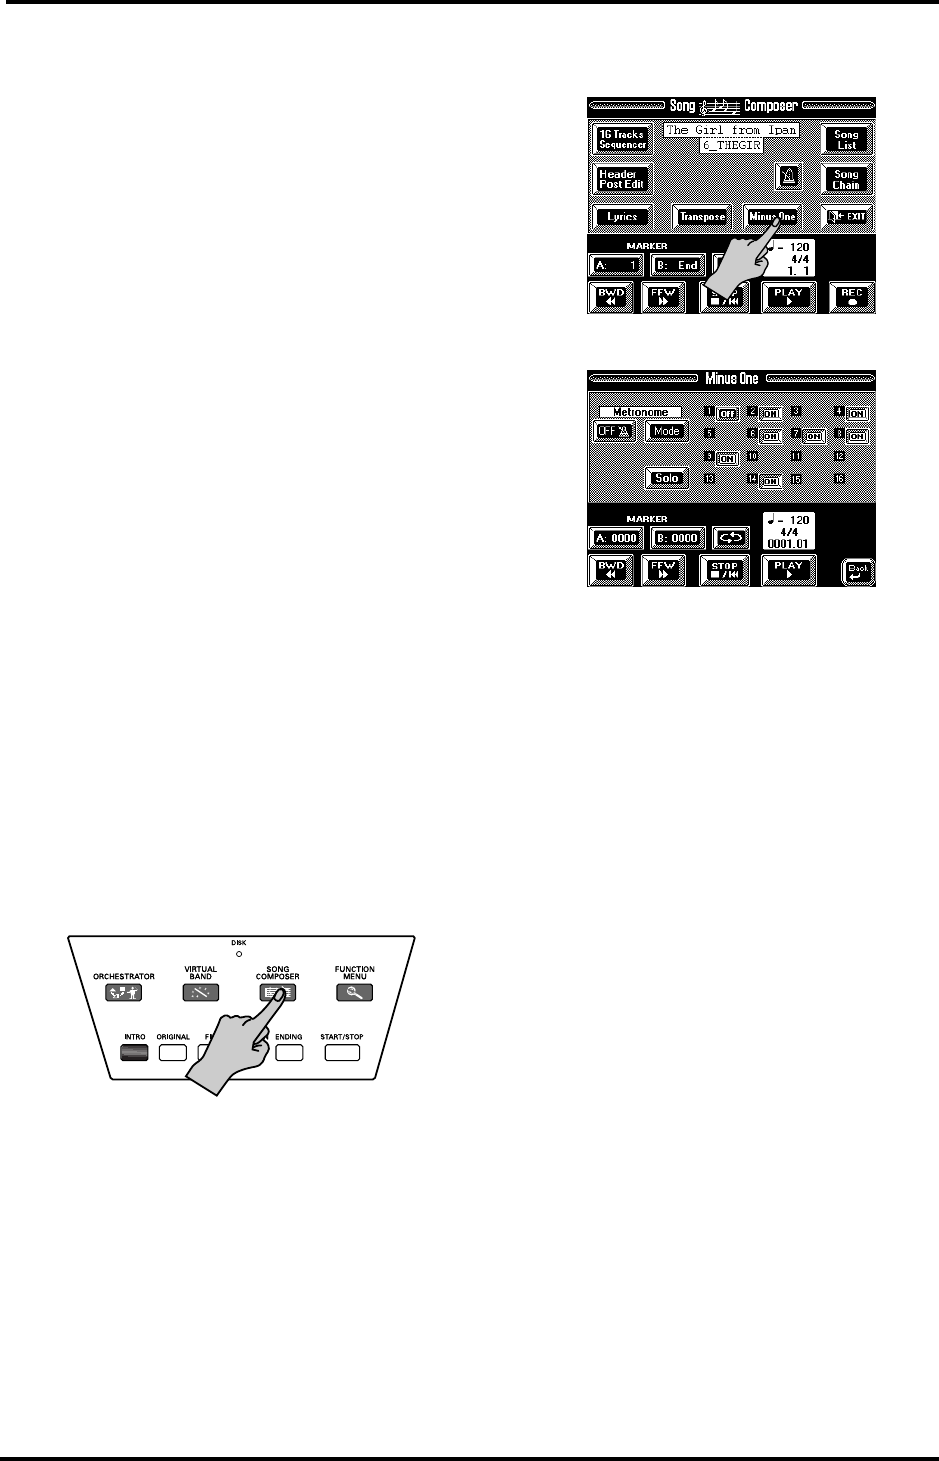
Minus One playback
Your VA-76 allows you to mute any given part of the
song you are currently playing back. You could use this
feature to mute the solo part on disk so that you can
play it yourself. This is called Minus One playback
(because one part of the original song is muted).
You can solo whichever part you like, and even mute
several parts simultaneously.
All Keyboard parts remain active. In other words, you
are free to use the Upper1/2, VariPhrase, Lower1/2,
and M.Bass parts in whichever split or layer combina-
tion (see page 35) you like. The MDR part is also avail-
able but selecting this part means that other Keyboard
parts are temporarily deactivated.
Note: Whenever you start playing back a new song or
return to the beginning of the current song (by pressing the
[STOP ■|√] field), all Keyboard parts, except Upper1, are
be switched off and the VA-76 selects the Whole Keyboard
mode. This is not the case however, if you select a User Pro-
gram memory.
Note: When playing back one of your songs in which you
used the VariPhrase part and one of your own phrases (User
memory), you must load the phrase(s) in question before
you start playback. See page 69.
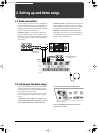
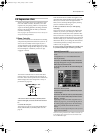
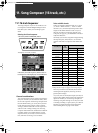
1.
Insert the supplied Zip™ disk into the appropriate
drive (the one below the keyboard).
You can also use any other Zip or floppy disk, of
course. It must contain a Standard MIDI File, though.
2.
If necessary, press the [START/STOP] button to
stop Arranger playback.
3.
Press the [SONG COMPOSER] button.
4.
See steps (4)~(8) above for how to select the desired
song on disk.
It would be a good idea to start playback and to stop it
after a few measures.
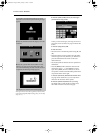
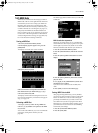
Note: If the field in the upper left corner on the Master page
reads [Song], you can press it to jump to the page where you
can select a Standard MIDI File.
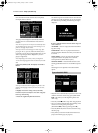
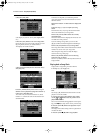
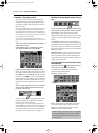
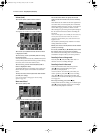
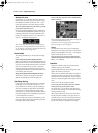
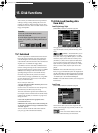
5.
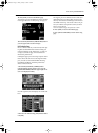
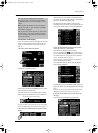
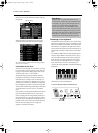
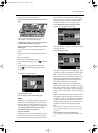
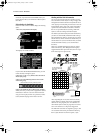
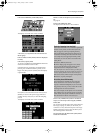
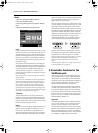
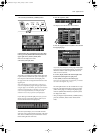
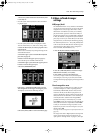
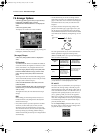
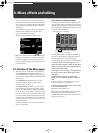
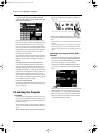
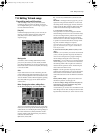
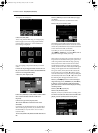
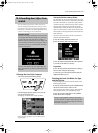
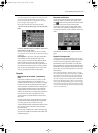
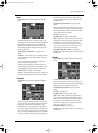
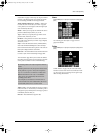
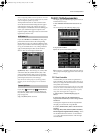
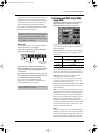
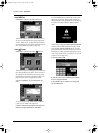
On the Song Composer page, press the [Minus One]
field.
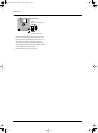
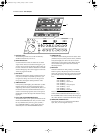
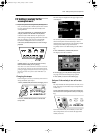
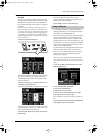
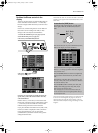
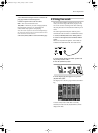
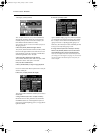
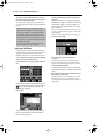
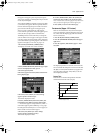
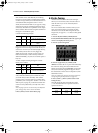
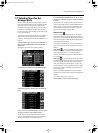
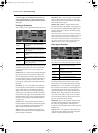
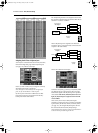
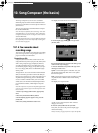
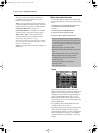
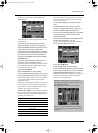
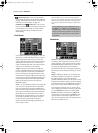
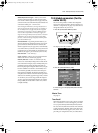
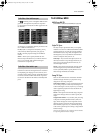
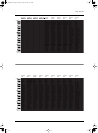
The display now looks as follows:
The numbers 1~16 represent the tracks of the selected
Standard MIDI File. Standard MIDI Files can contain
up to 16 different parts that each receive on a different
MIDI channel.
The [ON]/[OFF] fields next to the numbers indicate
whether the tracks in question will be played back or
not. No field means that the track in question contains
no data.
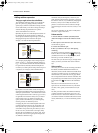
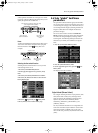
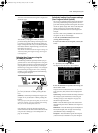
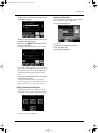
6.
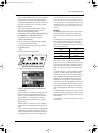
Press the [ON] field next to track/channel [4].
In most Standard MIDI Files, the melody part is
assigned to track/channel 4. Pressing this field (to
make it read [OFF]) is thus a good guess. This channel
corresponds to the VA-76’s UP1 part.
Note: The on/off status of the tracks can be written to a User
Program (see page 127).
7.
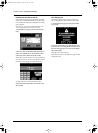
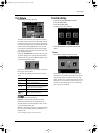
Select a Tone for the Upper1 (UP1) part.
See “Super Tones” on page 28 or “Selecting Tones for
the Keyboard parts” on page 37. There is a function
that allows you to link Tone selection for the Upper1
part to the parameter settings of the selected song so
that your melody will sound exactly like the original
part. See below.
8.
Press the [STOP ■|√] field twice to return to the
beginning of the song.
9.
Press the [PLAY ®] field to start playback, and play
along to the Standard MIDI File.
Feel free to use the performance functions (see
page 51). If necessary, use the [TEMPO/DATA] dial or
the [TEMPO/TAP] button to change the tempo.
10.
Press the [STOP ■|√] field to stop playback.
11.
Press the [oBack] field to return to the Song
Composer page.
VA-76.book Page 32 Friday, January 12, 2001 12:35 PM