


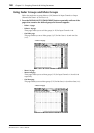

Using Fader Groups and Mute Groups 149
DM1000 Version 2—Owner’s Manual
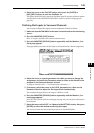
Grouping Channels & Linking Parameters
12
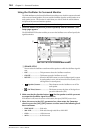
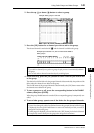
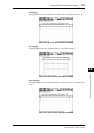
2 Press the up ( ) or down ( ) button to select a group.
3 Press the [SEL] button for a channel you wish to add to the group.
The selected channel is marked with “ ” and the channel is added to the group.
4 In the same way, press the [SEL] button for other channels you wish to add
to the group.
The relative level of the faders for the grouped channels is determined by the position of the
faders when the channels were added to the group.
The On/Off status of the grouped channels is determined by the [ON] button status when
the channels were added to the group.
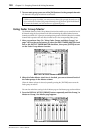
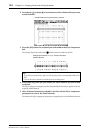
5To turn a group on or off, move the corresponding button in the ENABLE
column, then press [ENTER].
When the group Enable button is turned off, the corresponding group is temporarily can-
celled.
6To use a fader group, operate one of the faders for the grouped channels.
Tip:
•If you add one channel from a pair to a group, the pair partner is automatically added to
the group.
•You can also select a channel on another layer by switching layers.
Note:
•If you wish to change the relative level balance between the grouped channels while this page
is displayed, first turn off the Enable button or remove the channels for which you want to
change the level from the group.
•If other pages are displayed, press and hold down the [SEL] button for the desired channels
to temporarily remove them from the group, then change the level balance.
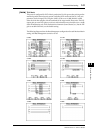
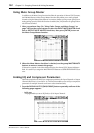
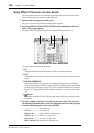
Example: Fader group C is selected.
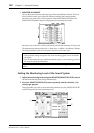
Example: Input Channels 1–6, and 13–14 have been added to
Fader group C.