


Using the User Defined Keys 275
DM1000 Version 2—Owner’s Manual
Other Functions
20
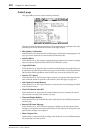
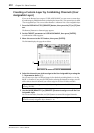
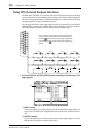
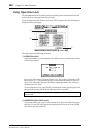
2 Move the cursor to the desired BANK parameter button, then press [ENTER].
The corresponding bank is selected, and the functions assigned to the User Defined buttons
in that bank are displayed in the 1–12 parameter boxes.
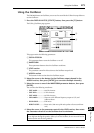
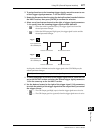
3 Move the cursor to one of the 1–12 parameter boxes, then press [ENTER].
The DM1000 displays the User Define Select window, which enables you to assign functions
to the selected buttons.
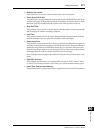
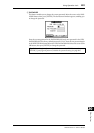
4 Move the cursor to the left column, then rotate the Parameter wheel or press
the [INC]/[DEC] buttons to select a function you wish to assign.
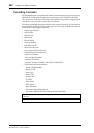
A function is selected when it appears inside the dotted box. See page 293 for a complete list
of assignable functions.
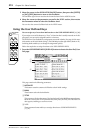
5 In the same way, set the center and right column.
The items that appear in the center and right columns vary depending on the function
selected in Step 4.
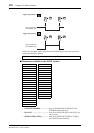
6To close the window, move the cursor to the YES button, then press [ENTER].
When the window closes, the specified function is assigned to the selected User Defined
button.
To cancel the assignment, move the cursor to the CANCEL button, then press [ENTER].
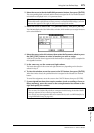
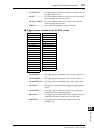
7 If you assigned functions that require numbers (such as recalling a Scene or
library memory), move the cursor to the extra parameter box shown on the
right and specify the number.
Tip: When you select a function that is executed based on specified numbers (for example, a
function that recalls a specific Scene or library memory or transmits MIDI messages), an extra
parameter box appears on the right, in which you must specify the number.
Tip:
•You can store User Defined Keys banks to a computer hard disk using the included Studio
Manager software. Be sure to back up important data.
•You can also store the assignment data to an external device, such as a MIDI data filer, by
using MIDI Bulk Dump (see page 256).