


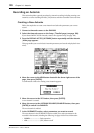

Recording an Automix 191
DM1000 Version 2—Owner’s Manual
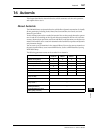
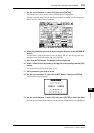
Automix
16
• PA N ................................Pan operation
• SURR .............................Surround pan operation
• AUX ................................Aux Send level operation
• AUX ON ........................Aux Send on/off operation
• EQ...................................EQ operation
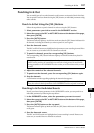
Recording the First Event
Follow the steps below to select channels and start Automix recording.
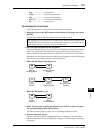
1 Move the cursor to the REC button at the bottom of the page, then press
[ENTER].
The REC button flashes, indicating that the Automix is ready to record.
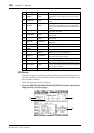
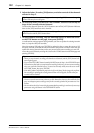
2 Press the [AUTO] button on the top panel.
The button indicator lights up. If you turn on the [AUTO] button indicator while the REC
button is lit or flashing on the Automix Main page, the [SEL] buttons will allow you to
enable or disable the Automix function for each channel, or arm or disarm each channel.
Depending on the REC button status on the Main page, pressing the channel [SEL] buttons
will place the corresponding channels in the following state:
• When the REC button is flashing or lit:
• When the REC button is off:
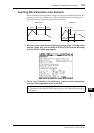
3 Select the layer that contains the channels you wish to record, then press
the corresponding channel [SEL] buttons.
The button indicators light up orange. The corresponding channels are armed.
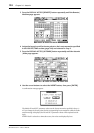
4 Start the timecode source.
The REC and PLAY buttons are highlighted and the recording starts. The [SEL] button
indicators (illuminated in Step 3) change from orange to red (indicating that recording is
in progress).
Tip: Alternatively, you could press the AUTO REC button (instead of the REC button), then
press [ENTER] to place the Automix in record ready mode. Whether you press REC or AUTO
REC will affect the way in which you cancel record ready mode.
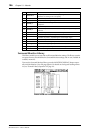
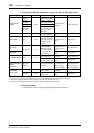
Green
Ready for
Automix playback
Orange
Ready for Automix
recording
Off
Automix
disabled
Green
Ready for
Automix playback
Orange
Ready for Automix
recording
Off
Automix
disabled
Green
Ready for
Automix playback