


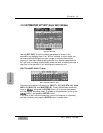

Cursor to the [TIME BASE] area, and select the timecode master device
by rotating the JogDial, and pressing the ENTER button.
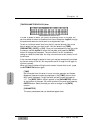
Play back the master timecode device. Confirm that the [TC] area on the
top right of the LCD window indicates identical numbers to that of the
master device.
When SMPTE or MTC format is used, confirm the [TIME BASE] area
displaying ND, DF, 25 or 24.
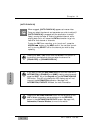
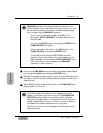
[NEW MIX] operation will erase the data that is stored in the
current memory, if any. This data is from your previous mix. If you
do not want to erase this information, take the following steps
prior to beginning the [NEW MIX] operation:
Cursor to one of the memories [No. 01 to 04] in the
Automation SETUP [MEMORY], and select where you will
store the data.
Cursor to the [STORE] button, and press the ENTER button.
[NAME EDITOR] will appear.
Enter a new name, then cursor to the [OK] button in the
[NAME EDITOR], and press the ENTER button.
The contents of the previous START SCENE and a mix
located in the current memory will now be saved into the
[No. 01 to 04] in the Automation SETUP [MEMORY] with a
new name. Now you can proceed to the [NEW MIX]
operation to store a new mix.
Chapter 14
DA7 Users’ Guide
14
-
20
14
Automation
If for some reason you receive an error message on the LCD
screen (in the lower right hand corner) of the [AUTOMATION
EXECUTE] window, check the connection and/or timecode
settings of the master device. You should also confirm that your
master timecode source is not in a “Free-run” mode, or that the
time base of the master code source is not corrupted.
You can not go further with the operation of Automation while
these errors exist.
4
5
6