117
Sampling
P0
P1 P2 P3 P4 P5 P8
3 In “Crossfade Length,” specify the length of the sample
that you wish to crossfade.
If you set this as %, “Crossfade Length” will be calcu-
lated automatically. Specify the proportion of the “Cross-
fade Length” relative to the length between the loop start
and loop end. If you set this to 50%, crossfade will be per-
formed on the second half of the region between loop
start and loop end.
If the length from the beginning of the sample to the
loop start is shorter than the length from the loop start
to the loop end, “Crossfade Length” can be set only up
to the length from the beginning of the sample to the
loop start. In this case, a setting of 100% will not be pos-
sible.
4 Set “Curve” to specify how the volume will change in the
crossfaded region.
Linear: The volume will change linearly.
Power: The volume will change non-linearly. Sometimes
a setting of Linear will produce the impression that the
volume has dropped in the middle of the curve. In such
cases, use Power.
5 In “Save to No.,” specify the save destination sample
number. By default, an unused sample number will be
selected.
The sample number cannot be specified if “Overwrite” is
checked (☞p.101).
For stereo samples, use “Save to No.(L)” and
“(R)” to specify the save-destination of the L and R chan-
nels.
6 To execute Crossfade Loop, press the OK button. To can-
cel without executing, press the Cancel button.
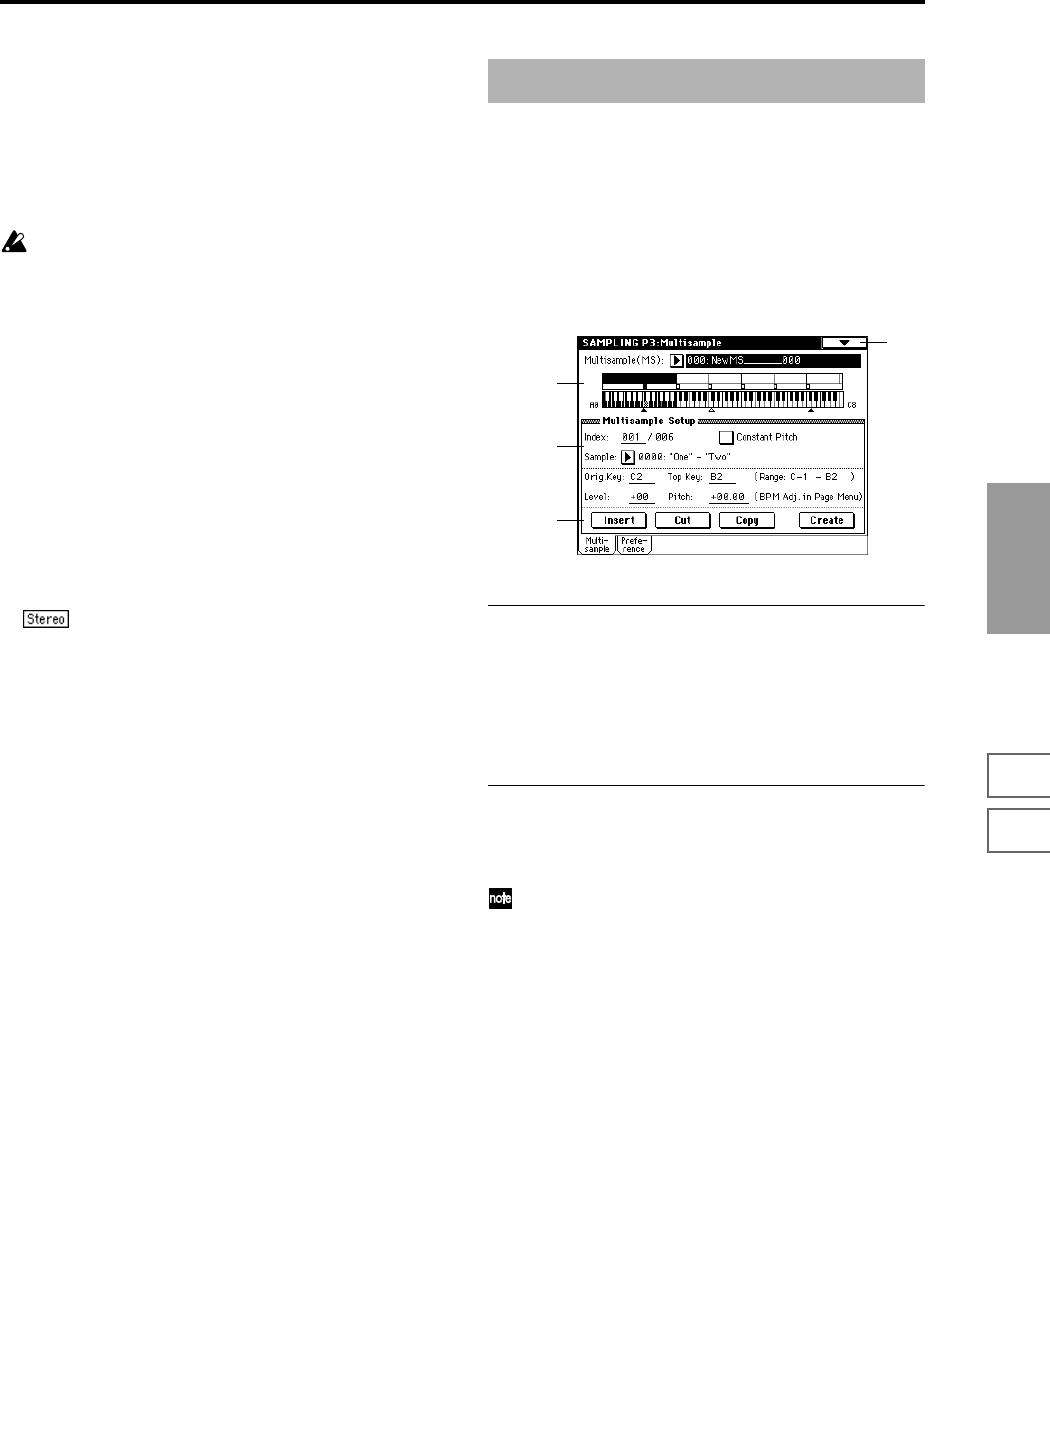
Here you can make settings for multisamples. You can create
indexes for a multisample, and then assign a sample to each
index. (These basic settings can also be performed in P0:
Recording page) In addition, you can delete, copy, or insert
an index, and perform detailed editing such as adjusting the
level and pitch of the sample for each index.
3–1: Multisample
3–1a: Multisample (MS), Keyboard & Index
Multisample (MS) [000...999]
Select the multisample that you wish to edit (☞0–1a).
Keyboard & Index
(☞0–1a)
3–1b: Multisample Setup
Index [xxx (001...127)/yyy (001...127)]
Selects the index that you wish to edit (☞0–1a).
You can also select an index by holding down the
[ENTER] key and playing a note on the keyboard. The
index that includes this note will be selected. The
selected key will be the base key, and will be displayed
in gray in “Keyboard & Index.”
Constant Pitch
On (checked): All notes in the zone of the index will sound
at the pitch of the original key. Use this setting when you
have sampled a drum sound or a rhythm loop, and want it
to always playback at the original pitch.
Off (unchecked): The pitch will change in semitone steps,
based on the original key. Use this setting when you have
sampled a musical instrument sound etc. and would like to
play it conventionally from the keyboard.
Stereo
This area will indicate “Stereo” if a stereo multisample or
sample is selected, or if you sampled with a setting of Stereo
in “Sample Mode” (0–1c) (☞0–1c).
Sample [----: ---No Assign----, 0000...3999]
This shows the number and name of the sample that is
assigned to the selected index. You can also select a sample
here (☞0–1b).
Orig.Key (Original Key) [C–1...G9]
Specifies the original key of the sample (☞0–1b).
Sampling P3: Multisample
3–1
3–1a
3–1b
3–1c
