


Appendices
289
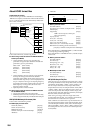
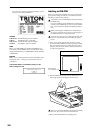
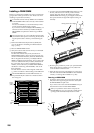
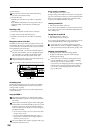
4 Verify the location of the slot into which you want to
install the EXB-PCM.
The seven slots closest to yourself are for EXB-PCM mod-
ules. (The three slots furthest from yourself are for
DRAM SIMM modules.)
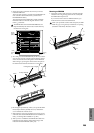
The notched side of the EXB-PCM is 1 PIN. Install the
EXB-PCM with its 1 PIN side aligned with the 1 PIN
mark ( ) of the slot.
The EXB-PCM slots and the DRAM SIMM slots are
shaped identically. Be careful not to install a memory
module in the wrong slot.
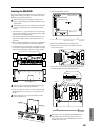
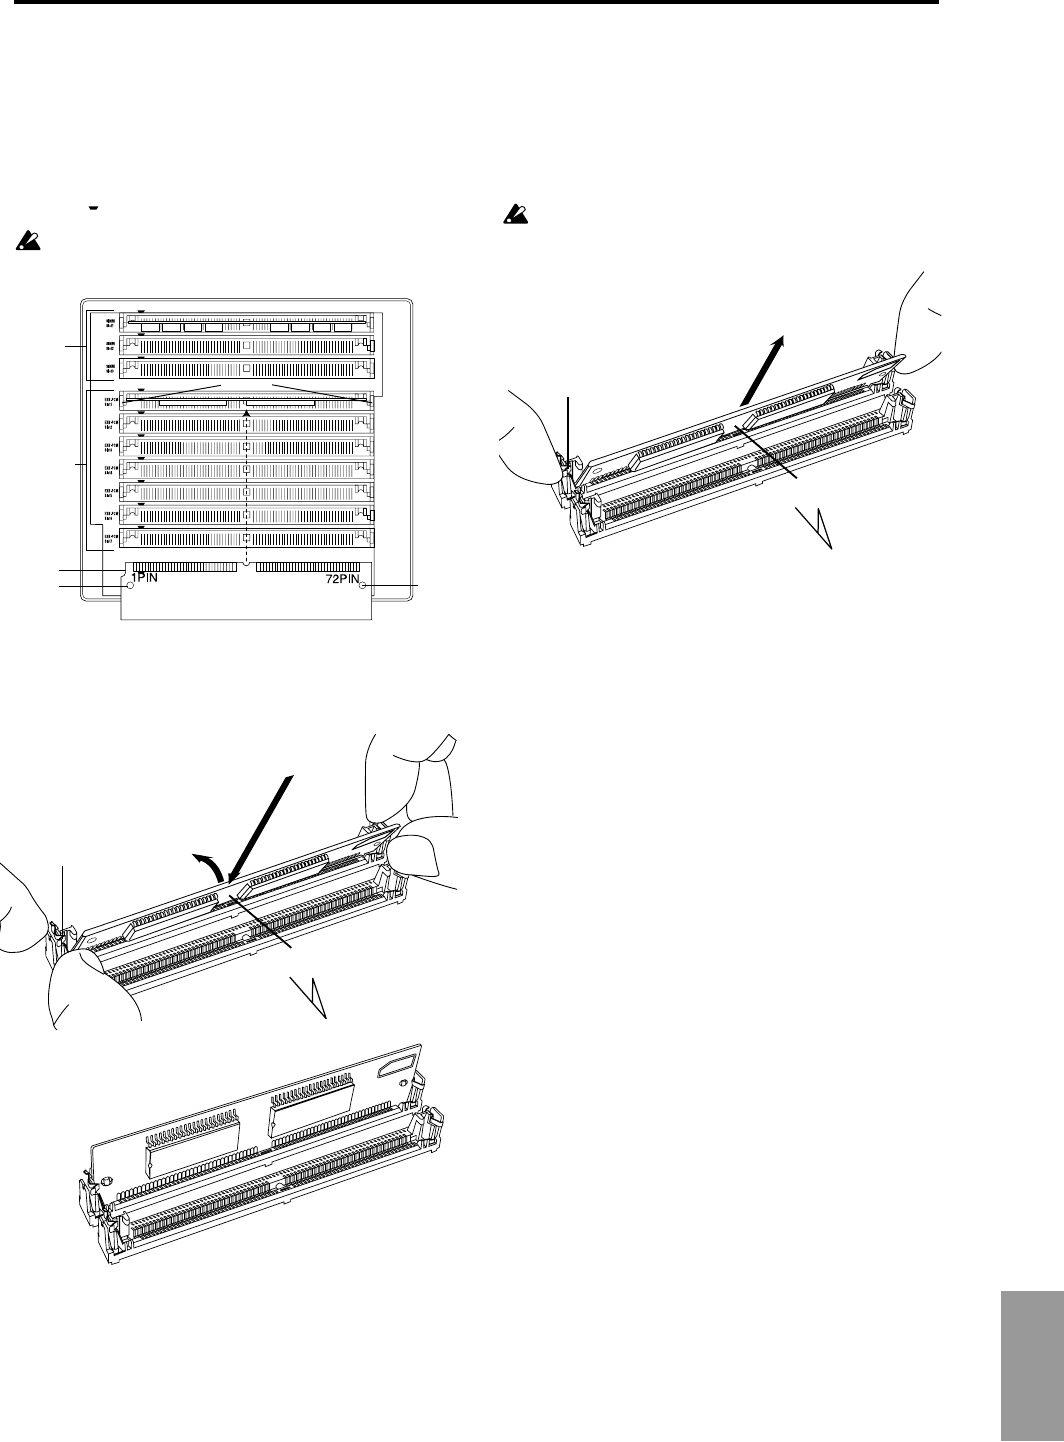
5 At a slant, press the EXB-PCM firmly all the way into the
slot, and raise it to the vertical position until the catches
of the slot click into the locking holes of the EXB-PCM.
When doing so, pressing the catches of the slot apart to
the left and right will help the board go in smoothly.
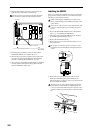
6 Reversing the procedure by which you opened the EXB-
PCM/sample memory (RAM) slot cover, reattach the
cover and fasten it with the screw.
7 When all steps have been completed, turn on the power
and make sure that the EXB-PCM has been installed cor-
rectly. (“Checking after installation” ☞p.287)
8 After you have verified that the EXB-PCM module was
installed correctly, load the data from the floppy disk
included with the EXB-PCM. (☞BG p.65)
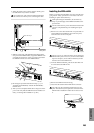
Removing an EXB-PCM
• Spread the catches of the slot apart to the left and right,
and (after removing the stoppers from the catches) tilt
the EXB-PCM and pull it out.
If you wish to remove the rear EXB-PCM board, you
must first remove the forward EXB-PCM.
When you spread the catches of the slot apart, the EXB-
PCM may pop out vigorously and fall into an opening
(inside the instrument). Please be careful.
Catches
Locking
hole
Locking
hole
Notch
Rear side of EXB-PCM
Sample
memory
(RAM) slots
EXB-PCM
slots
Front
Catch
1. Firmly press in at an angle.
2. Tilt up vertically.
Front
Catch
EXB-PCM