Appendices
297
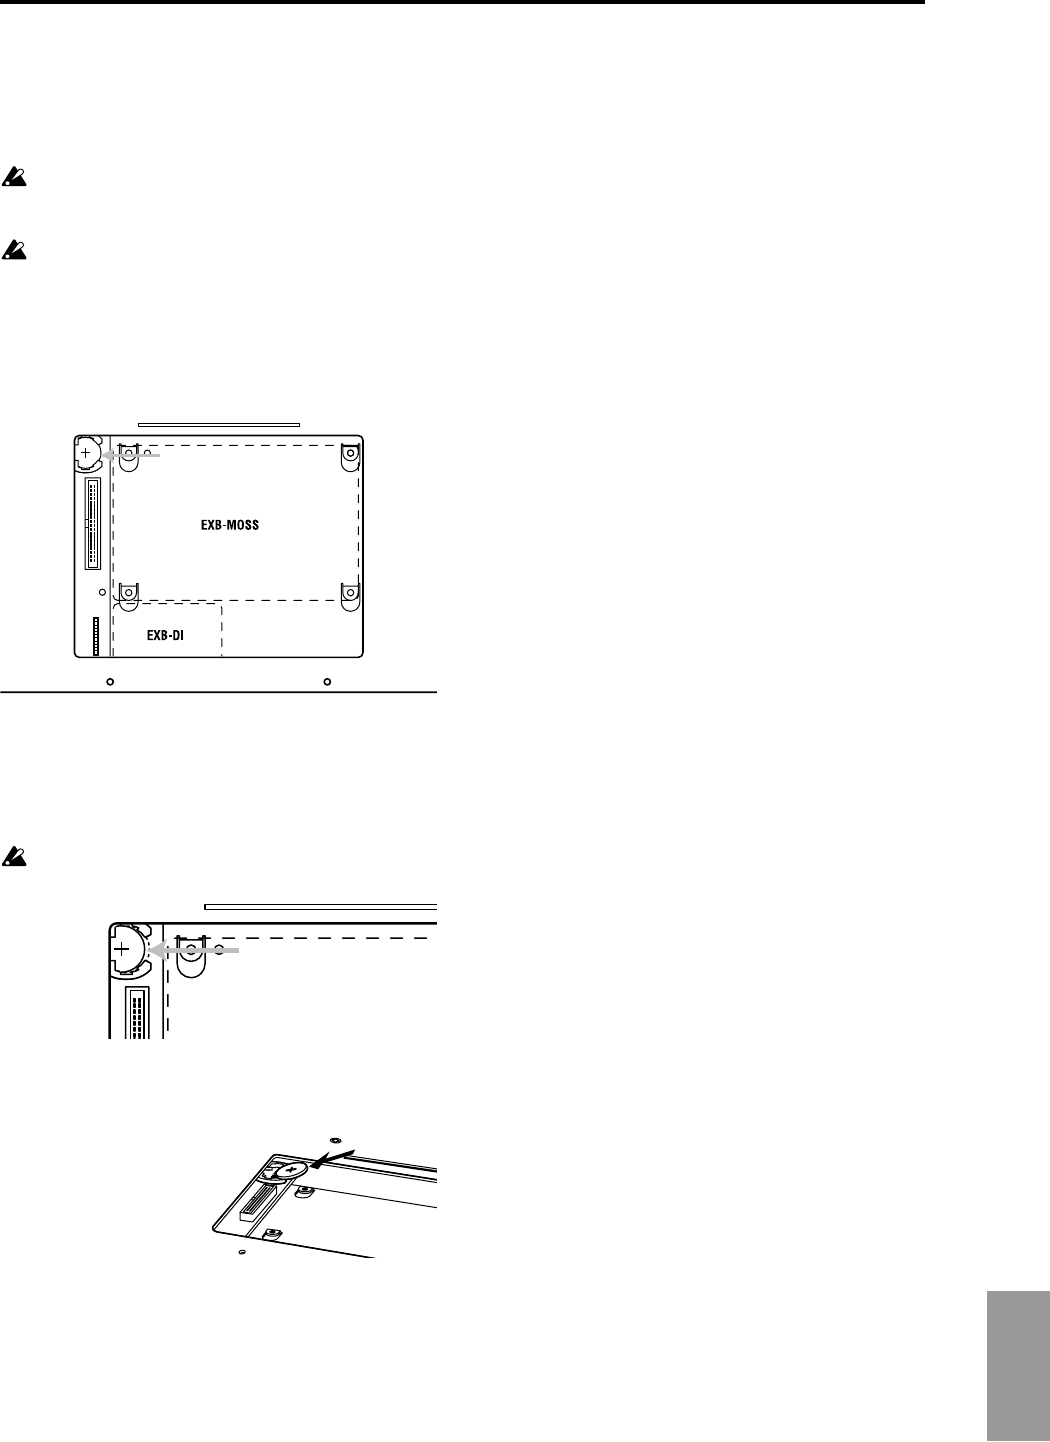
Replacing the calendar battery
Before you replace the battery, you must read “Safety pre-
cautions” and “Cautions when installing the calendar bat-
tery.”
While performing this procedure, be careful of any
sharp edge or corner of the TRITON STUDIO or an
option board.
You must leave the AC power cable disconnected until
you have finished all steps of replacing the calendar
battery.
1 Remove the EXB-MOSS/EXB-DI cover as described in
steps
1–5 of “Installing the EXB-MOSS.”
2 Verify the location in which the calendar battery is
installed. (☞Step
6 of “Installing the EXB-MOSS”)
3 Remove the calendar battery that has run down.
Press the part of the battery indicated in the diagram
below to release the catch of the battery holder, and then
lift up and remove the battery.
Be careful not to drop the battery into the interior of the
TRITON STUDIO.
4 Install the new battery.
With the “+” side of the calendar battery facing upward,
insert it into the battery holder at an angle, and press it
into place.
5 Reversing the procedure described in steps 1–5 of
“Installing the EXB-MOSS,” reattach the EXB-MOSS/
EXB-DI cover.
6 When all of the above steps have been completed, turn
on the power, and verify that the “Battery voltage for cal-
endar IC is low” is no longer displayed.
7 After you have verified that the above message did not
appear, use the page menu command “Set Date/Time”
(Disk, Utility) to reset the calendar.
Rear panel
With the cover removed
Calendar battery
Press this part of the battery.
