


118
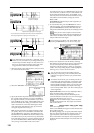
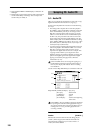
Top Key [C–1...G9]
Specifies the highest key in the zone of the index. The zone
is defined by this “Top Key” (☞0–1b).
Range
This shows the range of the zone that is determined by the
“Top Key” setting. The selected sample data will playback
within this area. Zone settings for an index can also be
viewed in “Keyboard & Index” (☞0–1a).
Level [–99...+99]
Adjusts the playback level of the sample. Use this when you
need to adjust the level balance between samples within a
multisample.
0: Unity level
–: The level will be lowered.
+: The level will be raised.
Since in Sampling mode the playback unity level will
normally be the maximum level, adjustments in the +
direction will have no effect. If Volume (CC#07) or
Expression (CC#11) has been assigned to the ASSIGN-
ABLE PEDAL or as the B-mode function of a REAL-
TIME CONTROLS knob [1]–[4] and these controllers
have been operated, or if these MIDI messages have
been received to lower the playback unity level, then
adjustments in the + direction will be valid. (☞Program
P1: 1–2A, Sample Parameters: Level)
The playback level will also be affected by the “+12 dB”
(2–1c) setting. If “+12 dB” is on, the sample will play
back approximately +12 dB louder.
Pitch [–64.00...+63.00]
Adjusts the playback pitch of the sample in one-cent steps
(☞p.11, Pitch).
0: The sample will sound at the original pitch when the orig-
inal key is played.
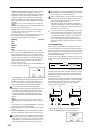
–: The pitch will be lowered. At a setting of –12.00 the pitch
will be one octave lower.
+: The pitch will be raised. At a setting of +12.00 the pitch
will be one octave higher.
You can also use “Pitch” to make fine adjustments in the
length of a rhythm loop. For example with a setting of
+12.00, the playback speed will be doubled, and the loop
playback time will be 1/2. (☞Program P1: 1–2A, Sample
Parameters: Pitch)
The “Pitch BPM Adjust” page menu command lets you
set the playback time in terms of a BPM value (☞3–1A).
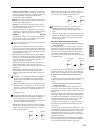
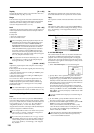
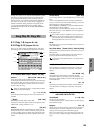
3–1c: Insert, Cut, Copy, Create
Insert
This creates an index. When you press the Insert button, a
new index will be created according to the “Position” setting
(0–3a, 3–2a). At this time, the contents of the index that was
cut or copied by “Cut” or “Copy” (i.e., the “Zone Range,”
“Original Key Position,” “Level” and “Pitch”) will be
assigned at the same time. (The sample will automatically be
copied or assigned to a different number.)
If it is not possible to create a new index when you exe-
cute “Create” or “Insert,” a dialog box will appear. If
this occurs, refer to “Create” (0–1b).
If you have not yet executed “Cut” or “Copy,” such as
immediately after power-on, the new index will be cre-
ated according to the Create Zone Preference settings
(0–3a, 3–2a) “Position,” “Zone Range,” and “Original
Key Position.”
Cut
This deletes the selected index. At the same time, the con-
tents of the deleted index are copied to the “Insert” buffer.
Copy
This copies the content of the selected index to the “Insert”
buffer.
Create
This creates an index. When you press the Create button, a
new index will be created according to the settings of “Posi-
tion,” “Zone Range,” and “Original Key Position” (3–2a, 0–
3a) (☞0–1b).
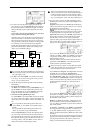
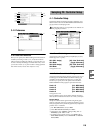
▼ 3–1: Page Menu Command
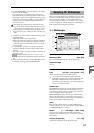
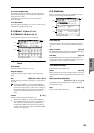
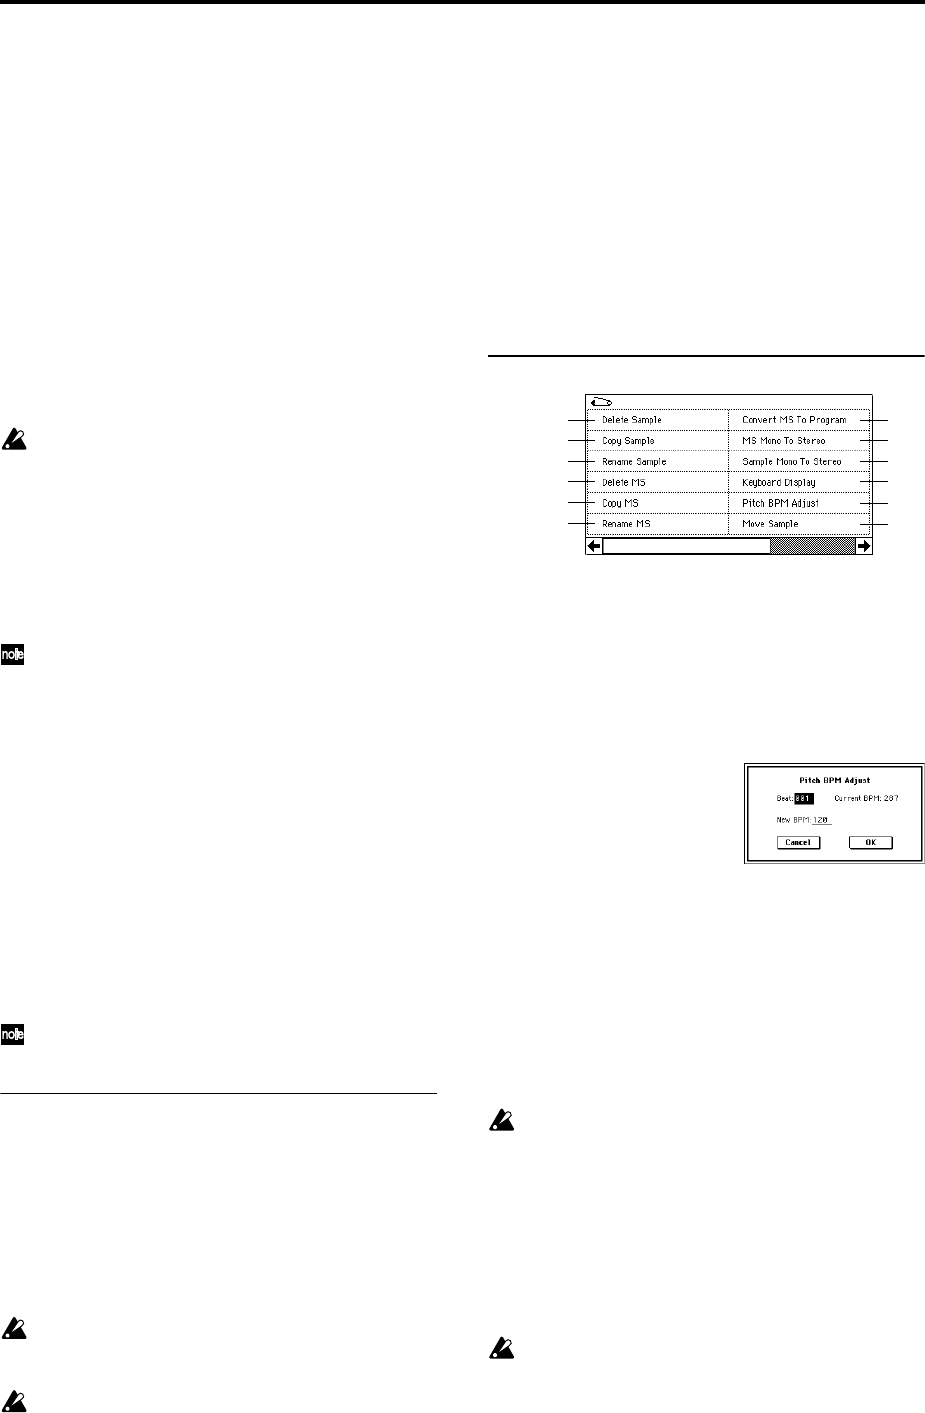
3–1A: Pitch BPM Adjust
This command sets the “Pitch” (3–1b) of the selected index
on the basis of a BPM value. Raising the pitch of sample
playback will increase the playback speed. Lowering the
pitch will slow down the playback speed. This can be used
to match the loop length etc. of the sample to a tempo of the
desired BPM value.
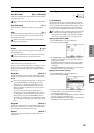
1 Select “Pitch BPM Adjust” to access the dialog box.
2 Specify “Beat.” This is specified in quarter-note beats.
3 “Current BPM” will show the BPM value at the base key
(displayed in gray). This BPM value is calculated auto-
matically from the start address to the end address of the
sample (if looping is off) or from the loop start address to
the end address (if looping is on).
For example if the start and end address of the sample
are two seconds apart, the original key is specified as the
base key, and “Beat” is set to 4, “Current BPM” would be
120. If “Beat” is set to 2, the display would indicate “Cur-
rent BPM” as 60.
It is not possible for this display to exceed the range of
40–480.
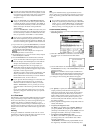
4 In “New BPM,” specify the BPM value that will result
from the conversion of the “Current BPM” value.
5 To execute the Pitch BPM Adjust command, press the OK
button. To cancel, press the Cancel button.
When you execute this command, the “Pitch” (3–1b)
value will be set automatically. For example if you mod-
ify a quarter-note 120 BPM sample to 240 BPM, the
“Pitch” will be set to +12.00.
This calculation is performed within the TRITON STU-
DIO’s limits of precision. Minor discrepancies may
occur in the final BPM caculation.
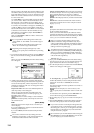
0–1A
0–1B
0–1C
0–1D
0–1E
0–1G
0–1H
0–1I
0–1J
0–1F
3–1A
0–1K