


69
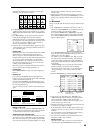
Sequencer
P0
P1 P2 P3 P4 P5 P6 P7 P8 P9
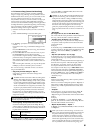
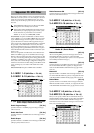
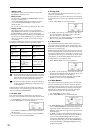
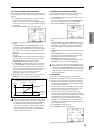
The following table shows the number of clocks repre-
sented by each “Step Time” selection.
5 In “Note Duration,” specify the length that the note will
actually be held, relative to the “Step Time.” In general,
100% will be tenuto, 85% will be normal, and 50% will be
staccato.
6 Use “Note Velocity” to specify the velocity value (key-
board playing strength) of the note data. With the
[PAUSE] key pressed, you can hold down the [ENTER]
key and play a note on the keyboard to specify the veloc-
ity value. If you set this to Key, the actual velocity at
which you played the key will be input.
7 Input the note events described below by playing notes
on the keyboard or by pressing the buttons in the lower
part of the dialog box.
• Inputting notes
When you press a key on the keyboard, that note number
will be input as a note of the length specified in
4.
When you press a chord on the keyboard, those note
numbers will be input as chords of the length specified in
4. Since each of the note numbers you press before
releasing all of the keys will be input at the same loca-
tion, the notes will be input as a chord even if they are
actually played at different times.
Each time you press and release the keyboard, the loca-
tion will advance by the length specified in
4.
• Inputting rests
Press the Rest button to input a rest of the length speci-
fied in
4.
• Inputting a tie
If you press the Tie button without pressing the key-
board, the previously-input note will be tied, and length-
ened by the amount specified in
4.
If you press the Tie button while holding down a note,
the note you are playing will be tied, and lengthened by
the amount specified in
4.
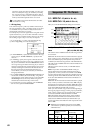
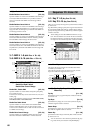
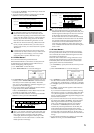
You can even input notes as shown in the following dia-
gram.
• Deleting a note or rest
To delete a note or rest, press the StepBack button. The
location will move backward by the amount specified in
4, and the data in that interval will be deleted.
• Auditioning the next note before input
If you wish to make sure of the next note before you actu-
ally input it, press the [PAUSE] key (the LED will light).
Now when you press a key, you will hear sound but the
note will not be input. Press the [PAUSE] key once again
(the LED will go dark) to cancel the pause mode and
resume input.
8 When you are finished with step recording, press the
Done button. If you press the [COMPARE] key, you will
return to the condition of before you began step record-
ing.
5–1B: Event Edit
Here you can edit individual events of music data that were
input.
1 Use “Track Select” to select the track that you wish to
edit, and use “From Measure” (5–1b) field to specify the
measure at which you wish to begin editing.
If you selected Track01–16 in “Track Select,” selecting
this command will open the Set Event Filters dialog box.
If you selected Master Track in “Track Select,” this dia-
log box will not appear.
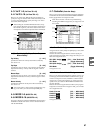
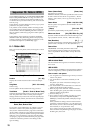
In the Set Event Filters dialog box you can select the
types of events (musical data) that will appear and can be
edited in the event edit window.
For “Note” you can set “Bottom” and “To p” to specify
the range of notes available for editing. These settings
can also be entered by holding down the [ENTER] key
and pressing a key. Normally you will leave these set at
C–1 and G9.
“Control Change” lets you specify the control change
number. Normally you will leave this set at ALL.
You can also check various other events (“Pitch Bend,”
“Program Change,” “After Touch,” and “Poly After
Touch”).
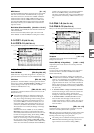
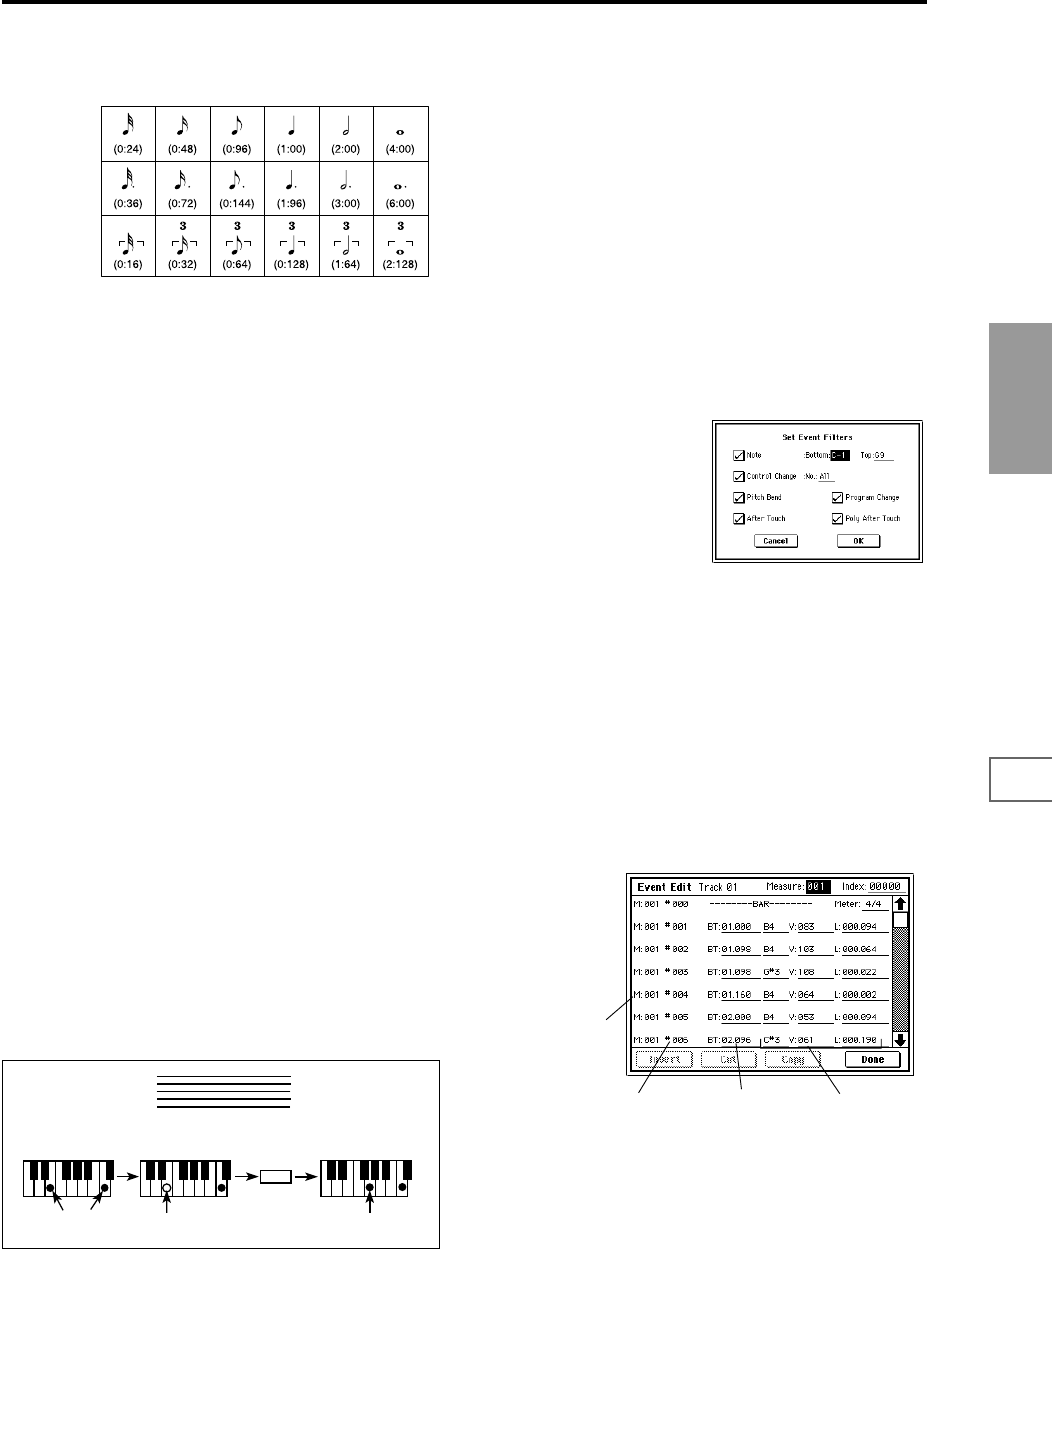
2 Press the OK button to open the Event Edit dialog box.
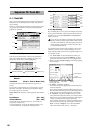
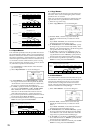
3 In the upper part of the dialog box, “Measure” and
“Index” show the measure that you are editing and the
events of the index numbers within the measure.
You can touch the scroll bar located at the right to move
to the event that you wish to edit.
4 Select the event that you wish to edit, and use the VALUE
controller etc. to modify its value(s).
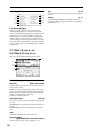
• By modifying the value of the “BT” (Beat. Tick) location
within the measure, you can move the event within the
measure.
• You can edit each event by modifying its data value(s).
When you select a note event, it will sound.
5 You can press the buttons located at the bottom of the
dialog box to edit events as follows.
• Inserting an event
Select the location “BT” at which you wish to insert an
event, and press the Insert button to insert an event.
3
Step Time =
Step Time =
Step Time =
Tie
On
Press E and C
ON
Press G
Off
Release E (continue holding C)
Measure
Index no. Location within the
measure (beat, clock)
Event data