Audio recording Recording procedure
103
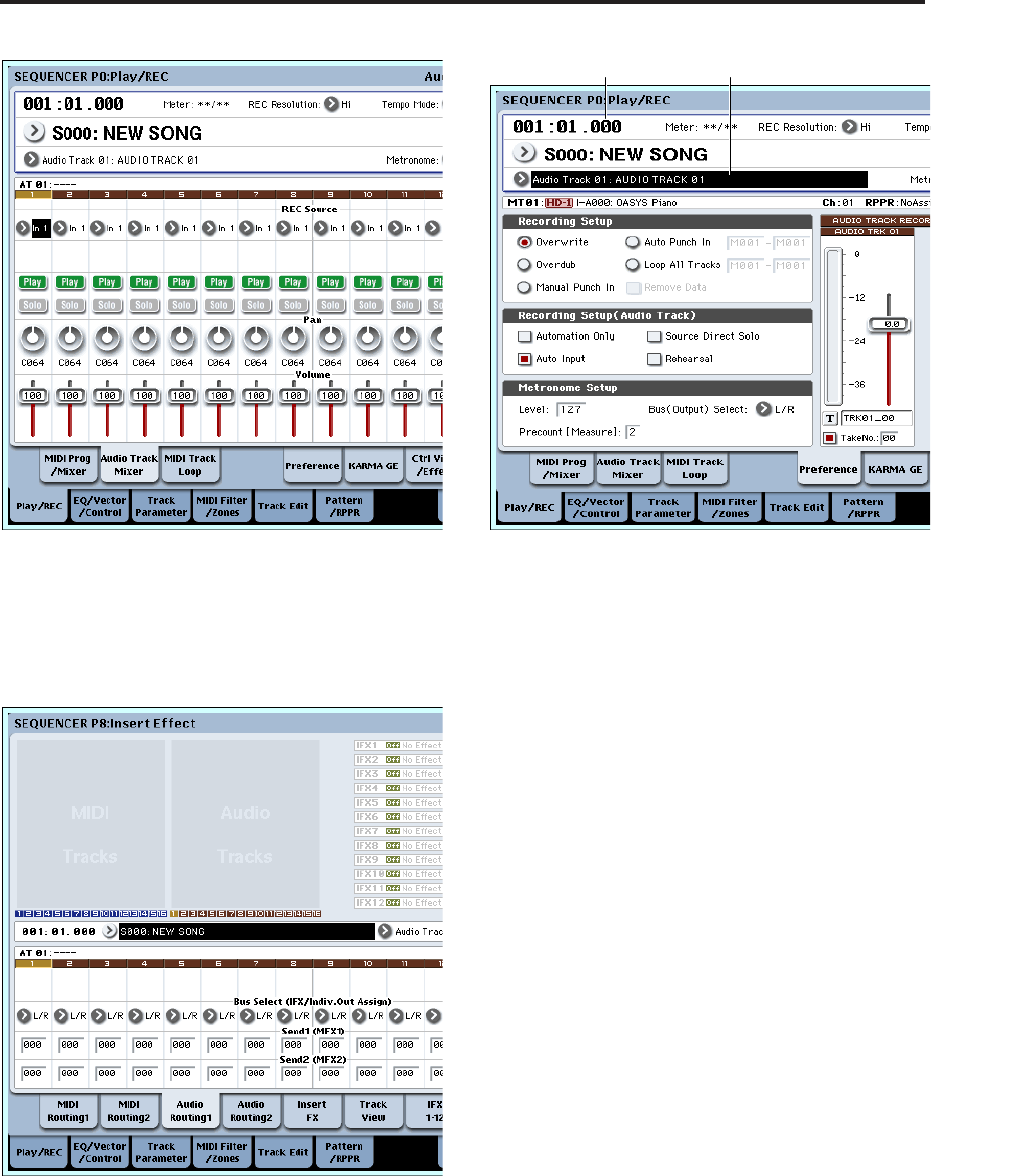
Access the P8: Insert Effect– Audio Routing1 page.
In “Audio Track 1,” specify the output for audio
track 1.
Bus Select (IFX/Indiv. Out Assign) Bus Select
(IFX/Indiv. Out Assign): L/R
“Send1 (MFX1),” “Send2 (MFX2)”: 000
3. In the P0: Play/REC– Preference page, set “Track
Select” to Audio Track 01.
AUDIO TRK 01 (“Level Meter 1,” “Recording Level
1,” “Name 1,” Take, Take No.) will appear.
Use the “Name 1” field to specify a name for the
region and WAVE file that will be created.
If you intend to record several takes on the same
track, check the Take option box.
4. Specify the recording method in Recording Setup
and “Recording Setup (Audio Track).”
“Overwrite”: selected
“Automation Only”: unchecked
“Source Direct Solo”: unchecked
“Auto Input”: checked
“Rehearsal”: unchecked
Note: If you want to record from the beginning of
the song or from the measure specified by
“Location,” you should select “Overwrite.”
Note: If Take is unchecked, you will be able to input
up to eight characters as the file name. If it is
checked, you will be able to input up to six
characters.
Note: If you want the metronome to sound during
recording, use Metronome Setup to make
metronome settings. For more information, see “0–
5d: Metronome Setup” on page 431 of the Parameter
Guide.
Set the recording level
5. Play your guitar at the volume you intend to
record.
If the “ADC OVERLOAD !” (AD converter input
overload) indication appears, turn the rear panel
LEVEL knob toward MIN to adjust the level
appropriately.
For the best sound, adjust the level as high as
possible without allowing the “ADC
OVERLOAD !” indication to appear.
6. The level meter will show the volume of the guitar
signal that will be recorded.
If the “CLIP !” indication appears, use the VALUE
controller etc. to lower the Recording Level slider
Track SelectLocation


