Sampling (Open Sampling System)
134
To play the sample, press the key to which the
sample is assigned (the key range that is highlighted
in “Keyboard & Pad”).
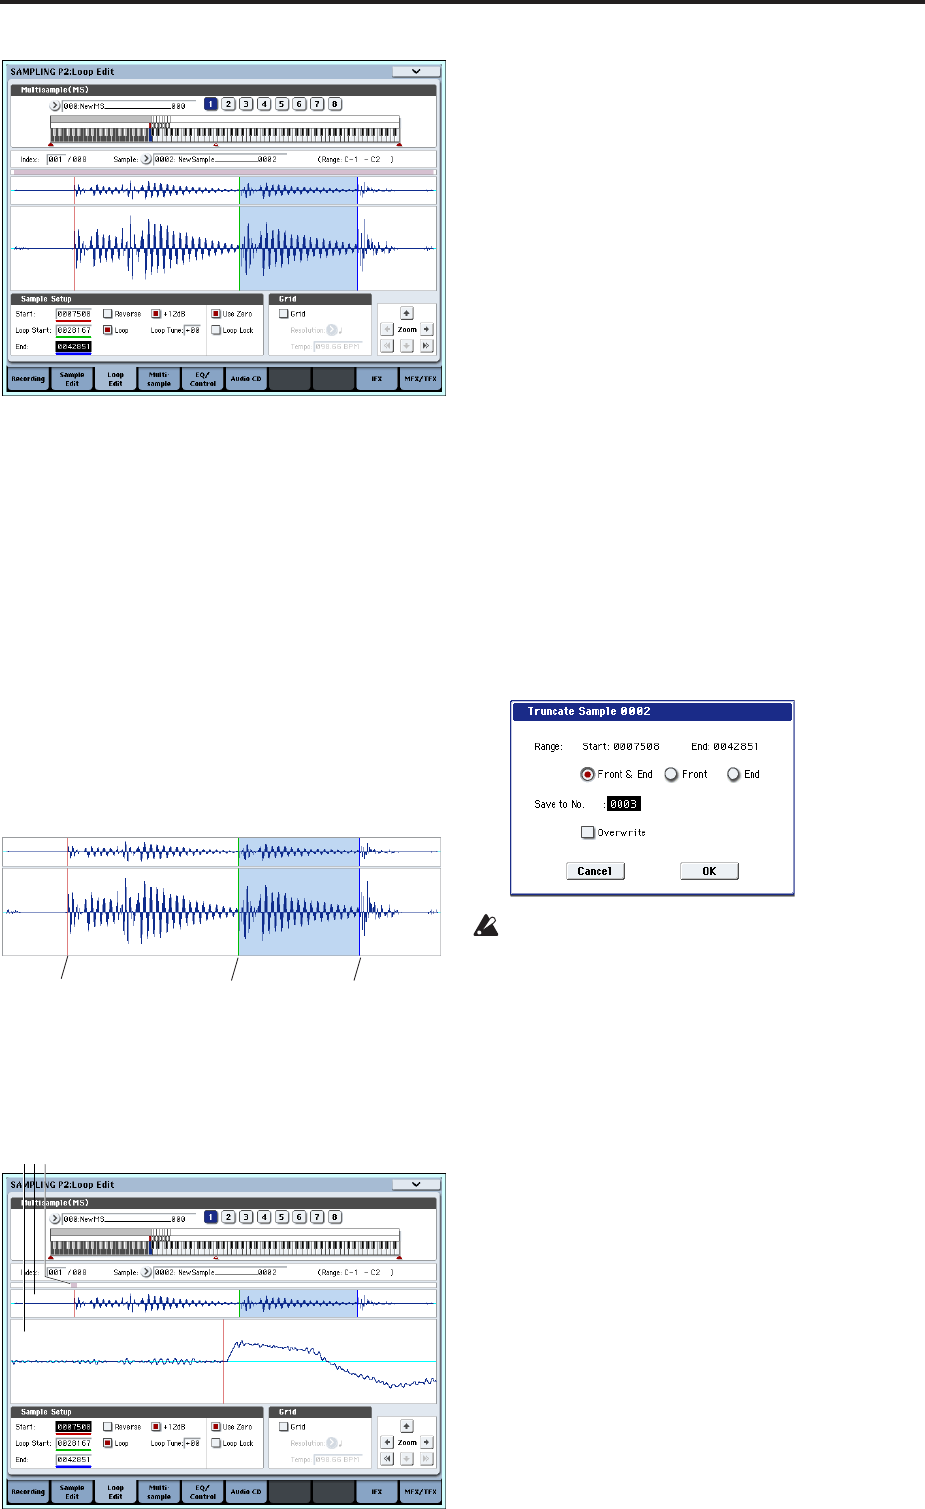
A sample waveform that was sampled with
“Sample Mode” set to Stereo will be displayed in
two levels. The upper level is the L channel, and the
lower level is the R channel.
3. Specify the start address in “Start,” the loop start
address in “Loop Start,” and the end address in
“End.”
Select “Start” (highlighted), and use the [VALUE]
dial or other VALUE controllers to modify the
value. The corresponding vertical line will move.
Set “Loop Start” and “End” in the same way. In the
example shown below, “Start” is set immediately
before the first waveform, “LoopS (Loop Start)” is
set immediately before the second waveform, and
“End” is set as desired.
ZOOM
4. By using the ZOOM button you can change the
range that is displayed. When “Start” is
highlighted, zoom will be performed from the
start address.
Area “a” shown in the illustration displays the
entire sample. Area “b” indicates the region within
the entire sample that is shown in area “c.” As you
zoom-in on the time axis, this shows you where the
zoomed region is located within the entire sample.
Use the Zoom buttons to specify how area “c” will
show a magnified (zoom-in) or reduced (zoom-out)
view of the waveform.
Use Zero
If the “Use Zero” check box is checked, only those
addresses where the waveform data crosses the zero
level will be found automatically when searching,
and can be set. This lets you easily make address
settings where noise is less likely to occur when
looping.
Truncate
5. If necessary, use the page menu command
“Truncate” to delete unwanted data that falls
outside the start (or loop start) and end addresses.
Select the Front & End radio button.
In this example, we will not change the settings of
the “Save to No.” and “Overwrite” check boxes, so
press the OK button to execute.
When you execute this operation, the truncated
sample data will automatically be assigned to the
index.
In the dialog boxes of some page menu, there is a
“Save to No.” setting that lets you specify the
sample number to which the edited sample will be
saved. At this time, a vacant sample number will be
selected automatically, so you will change the
setting only if you want to specify the save
destination number. If you check “Overwrite” in the
dialog box of the command, the data prior to editing
will be deleted, and will be overwritten by the
edited data. Normally, you will execute the Write
operation without checking this, so that the
unedited data is preserved. When you are
completely finished with your editing, you can use
the page menu command “Delete Sample” to delete
unneeded samples.
Using the grid to make loop settings
“Grid” overlays a grid on the waveform display to
indicate the tempo BPM. This helps you make loop
settings that match the tempo.
You can also view the grid in the P1: Sample Edit page,
and use the grid to edit the waveform to match the
tempo.
1. Check “Grid.”
The grid will appear in the waveform display.
Start (Red) Loop Start (Green) End (Blue)
bac


