Audio recording Recording procedure
107
6. In the P0: Play/REC– Audio Track Mixer page, set
REC Source so that L will be recorded on audio
track 3.
Audio track 3 REC Source: L
Note: The settings up to this point are the same as if
you used the page menu command Auto
HDR/Sampling Setup to execute Bounce Audio
Track with the following settings. For more
information, see “If you selected Bounce Audio
Track:” on page 530 of the Parameter Guide.
Mode: Mono
From: Audio Track 01: checked
Audio Track 02: checked
To: Audio Track 03
When bounce-recording audio tracks, turn the
metronome off (Metronome Setup “Sound”: Off).
Record
7. Set “Location” to the beginning of the song (001:
01.000).
8. Press the SEQUENCER REC/WRITE switch.
You will be in record-ready mode.
Once you press the SEQUENCER REC/WRITE
switch, you will be unable to change the audio track
selection in “Track Select.”
9. Press the SEQUENCER START/STOP switch.
Playback will begin, and bounce-recording will also
begin simultaneously.
When the audio tracks have finished playing back,
recording will also end. Song playback will also end
automatically.
Listen to the recorded result
10.In the P0: Play/REC– Audio TRACK Mixer page,
mute the playback of audio tracks 1 and 2.
– Audio Track 1 –
Play/Rec/Mute: Mute
Solo On/Off: Off
– Audio Track 2 –
Play/Rec/Mute: Mute
Solo On/Off: Off
11.Press the SEQUENCER START/STOP switch to
play back the song.
Make output settings for audio track 3 as described
in “Listen to the recorded result” on page 104.
12.Press the SEQUENCER START/STOP switch to
stop playback.
If you want to create a WAVE file on the hard disk
from a song that includes audio tracks, see
“Resampling a song to create a Wave file” on
page 145.
Recording automation events for pan, EQ,
and volume etc. on an audio track
All audio track parameters (Pan, Volume, Send1/2,
and EQ) can be recorded in realtime. In this example,
we’ll record Pan and Volume changes on audio track 3.
Access the P0: Play/REC– Audio Track Mixer page,
and use “Track Select” to select Audio Track 03 as the
track to be recorded. You could use the VALUE
controller to operate a desired parameter, but using the
control surface lets you mix up to eight tracks
simultaneously.
Setup
1. Access the P0: Play/REC– Preference page.
2. In Recording Setup, Recording Setup (Audio
Track), choose the desired recording method.
In this example, we’ll choose overdub recording so
that we can record repeated passes, adding more
automation data on each pass.
– Recording Setup –
Overdub: on
– Recording Setup (Audio Track) –
Automation Only: checked
If you record without checking “Automation Only,”
audio events will also be recorded. Note that this
will erase and overwrite the audio events that
already exist.
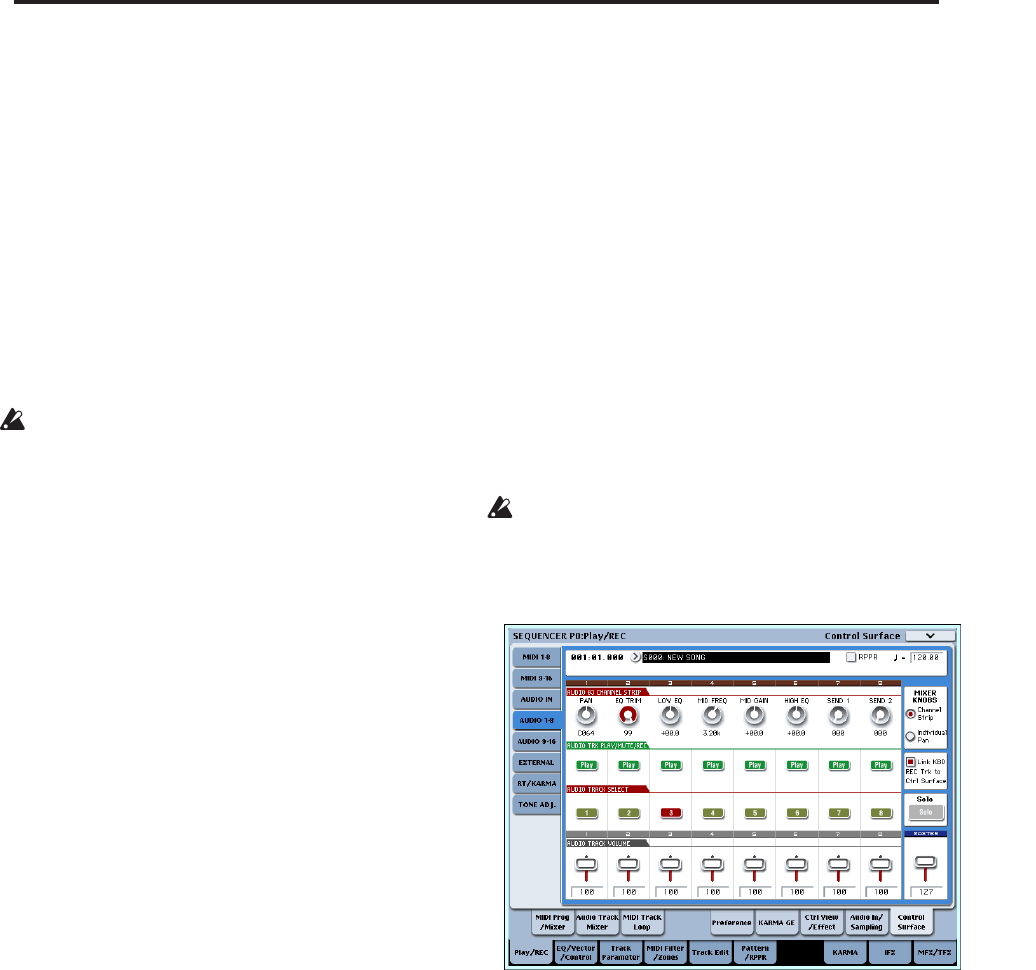
3. Access the P0: Play/REC– Control Surface page.
4. Press the CONTROL ASSIGN AUDIO switch
several times so that the HDR1–8 LED located at
the right of the switch is lit.
5. In the center of the right edge of the LCD, check
“Link KBD REC Trk to Ctrl Surface.”
If you check this and press the MIX SELECT 3
switch, each knob will control audio track 3, and at
the same time “Track Select” will switch to Audio
Track 03.
Press the SEQUENCER START/STOP switch to
play back, and operate the knobs and sliders etc. to
rehearse your mix.
If MIXER KNOB is set to CHANNEL STRIP, knob 1
will control pan, knobs 2–6 will control EQ, and
knobs 7 and 8 will control the send levels. Use slider
3 to adjust the volume of audio track 3.
When you’ve finished rehearsing, press the
SEQUENCER START/STOP switch to stop.
Press the LOCATE switch.
Record
6. Press the SEQUENCER REC/WRITE switch.


